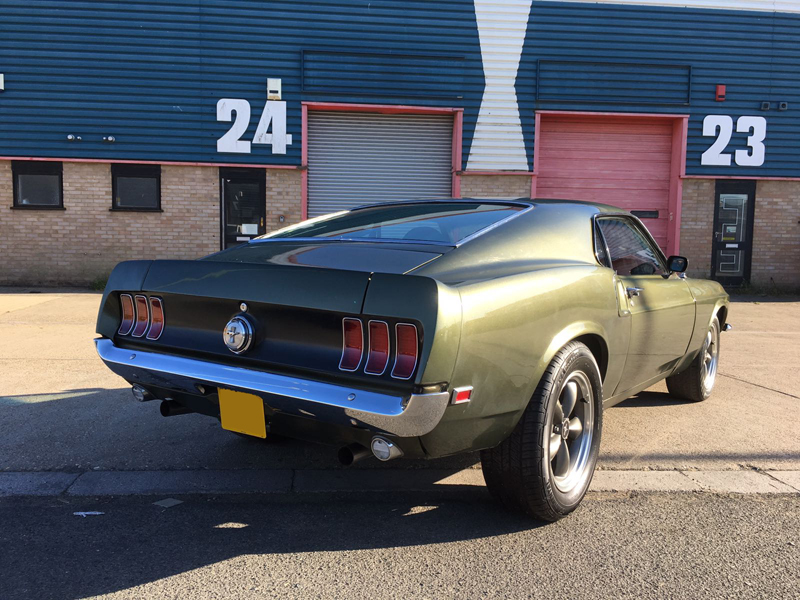


1969 Ford Mustang Fastback
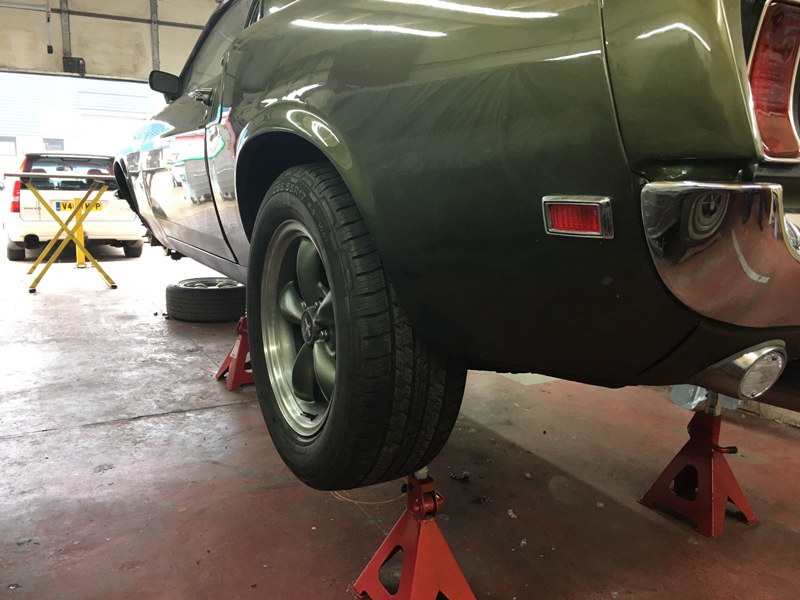
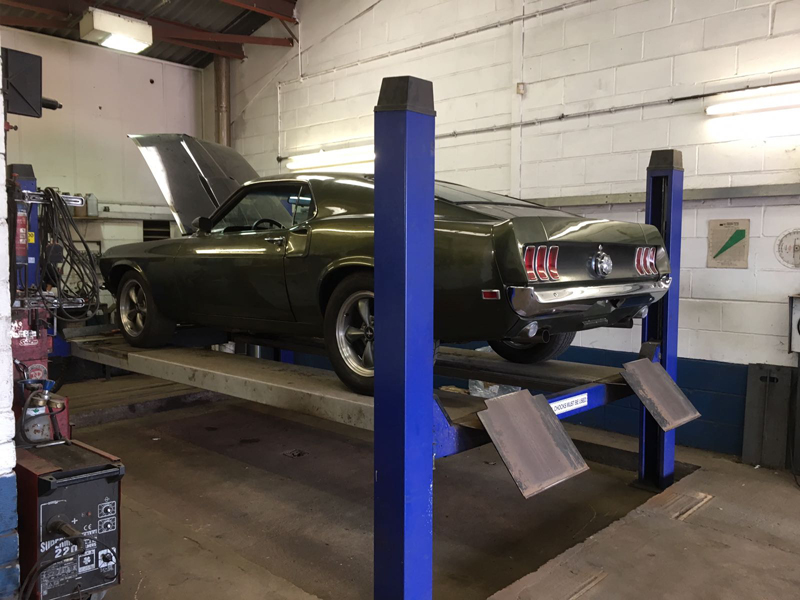
The owner of this 1969 Ford Mustang Fastback contacted us after importing this car direct from the USA. The car was not registered in the UK and needed quite a few jobs doing to it to get it through an MOT so that the registration documents could be applied for. The car was originally a running car but when it was time to come to us it wouldn't start so came in on a recovery truck:
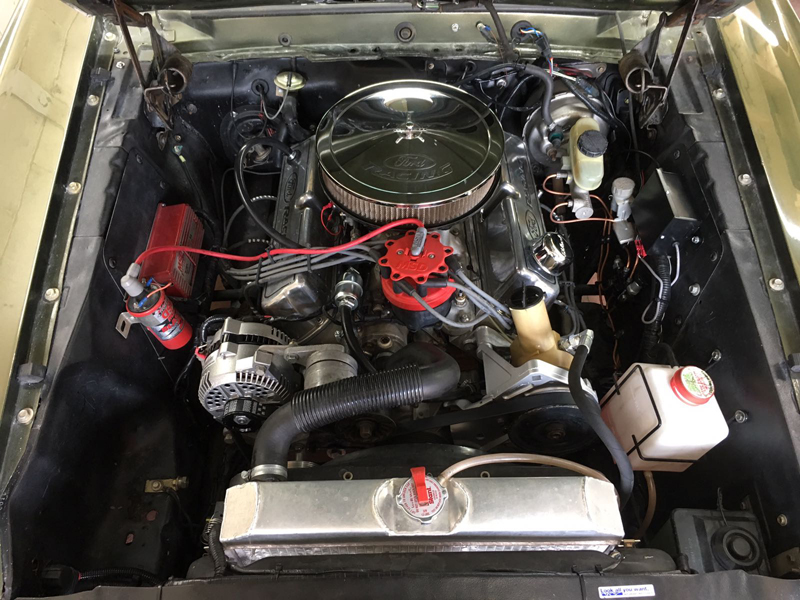
Once unloaded we could get a better look over the car:

First impressions of the car showed a pretty good starting point for a car of this age:

The first thing we had to do was find out why it wouldn't start, because when the car originally arrived at the owners house it did start but then cut out and wouldn't re-start. We traced the problem to a faulty distributor pick up module:

We sourced a replaced part for the aftermarker distributor:

Then installed it and set the correct gap between the moduel and trigger wheel. Once done and all back together the car fired straight up:

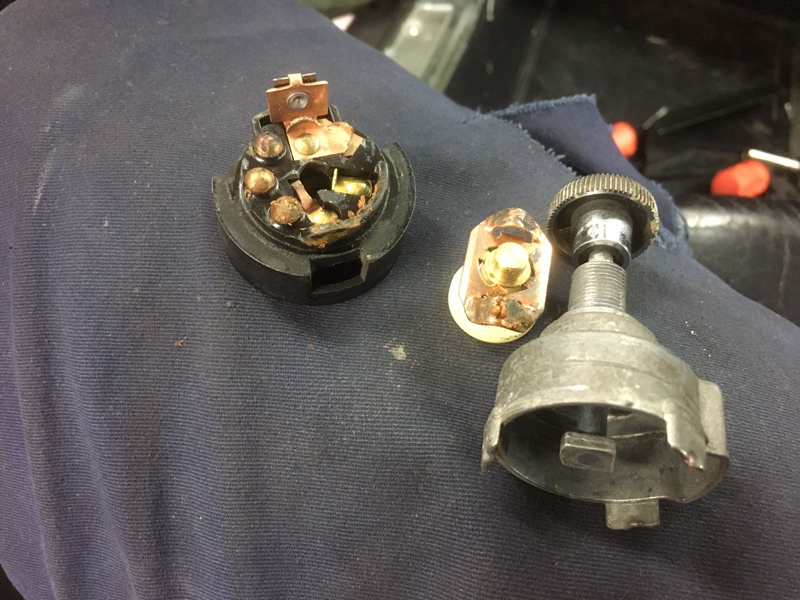
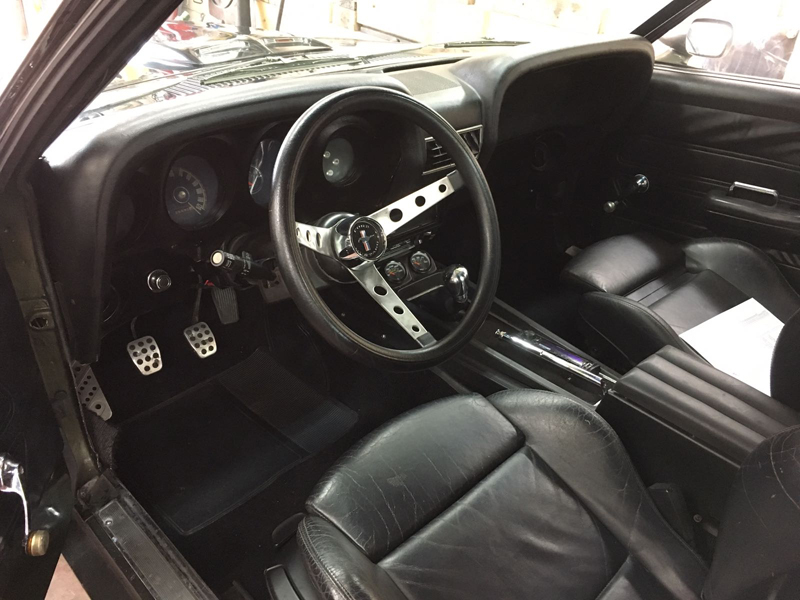
Next on the list we had to look at the steering wheel, the wheel itself was loose and the horn button wasn't attached:

Also because it had a steering column from a late model vehicle installed in it, it also had another ignition barrel and steering lock installed in it, this wasn't wired up to do anything but because there was something wrong with it the steering lock would come on by itself, so we was asked to remove the internal parts for safety reasons:

We removed the steering wheel to find the incorrect steering wheel boss installed on the column:

And then to make matters worse the threaded holes for the 3 outer bolts that hold it down had the threads completly stripped out of the boss:

We removed the boss and then removed the internal parts of the ignition switch to stop it from working anymore which could have potentially caused an accident:

Because the steering column was originaly from a GM vehicle the new steering wheel adapotor boss kit was from a Chevrolet, needless to say we won't be using the horn button from this kit!:

With the new kit installed, we re-installed the steering wheel and the correct horn button. The steering wheel is now secured properly, the horn functions and the steering won't lock up on its own while driving:

Someone had re-located the battery into the boot compartment but hadn't bothered to find any way of securing it down which meant it had been flying about all over the place previously. Also when relocating a battery into the boot you should use a gel type battery as a normal acid battery generates poisonous explosive fumes whilst chargin which cant ventilate properly in the sealed boot compatment:

We supplied a replacement gel battery and a mounting tray to hold the battery in place:

First we marked out where we wanted the mounting holes for the tray to be:

Then drilled them:

Then secured the tray to the boot floor and installed the battery into it. Fortunatly the cables where long enough so that they could be re-used:

There was an outward crease in the passenger rear quarter panel next to where the battery was sitting, we assumed that at some point in its previous life in the USA someone had gone around a corner hard and the battery had hit the panel causing the crease:

We were able to massage the crease back in without causing any damage to the vehicles paint work:

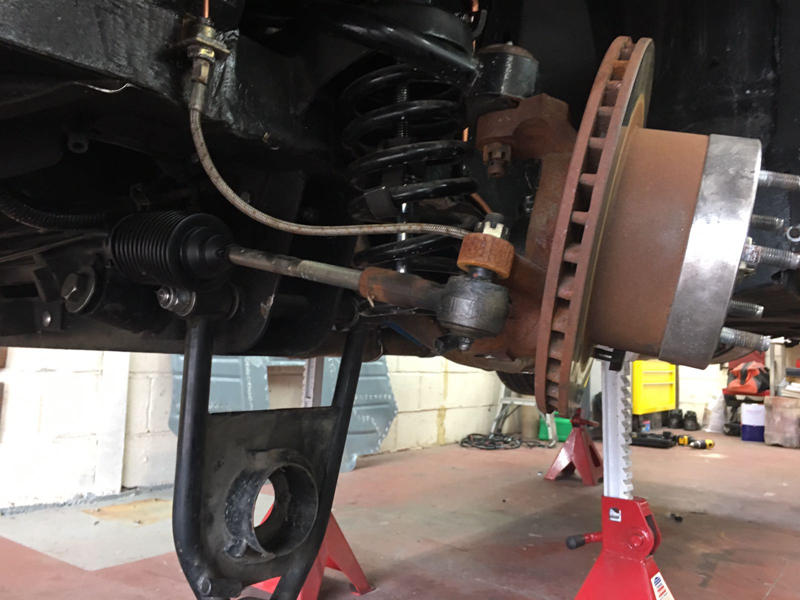
One of the things we noticed after unloading the car from the recovery truck was that is was sitting very un-even height wise all over, after some inspecting we discoverd that when the aftermarket suspension set up was installed, the person doing the job misaligned the coil spring on the passenger front:

So we had to remove the spring assembly from this side:

Clean all the dirt and stones out of the lower suspension arm, dispose of the lower rubber insulator as it shouldn't be there, only a top insulator should be fitted:

And finally re-install the spring assembly correctly:

The owner of the car also asked up to lower the rear a little as the front was lowered but the rear was stock:

So we supplied a 1 inch drop kit:

And installed it. The car was now sitting perfectly:

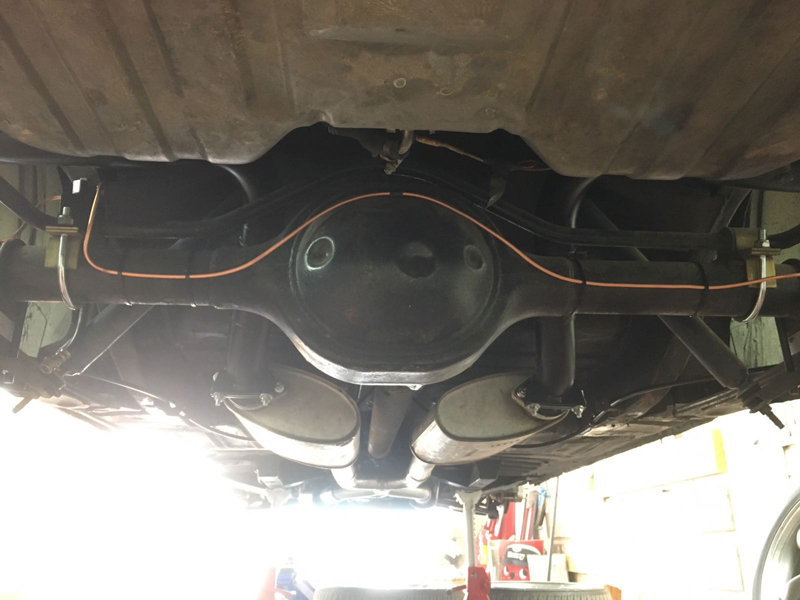
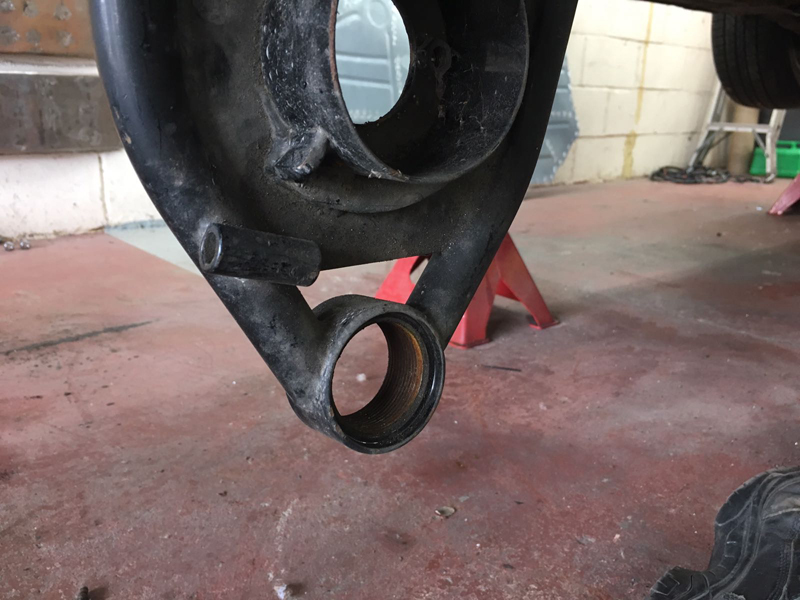
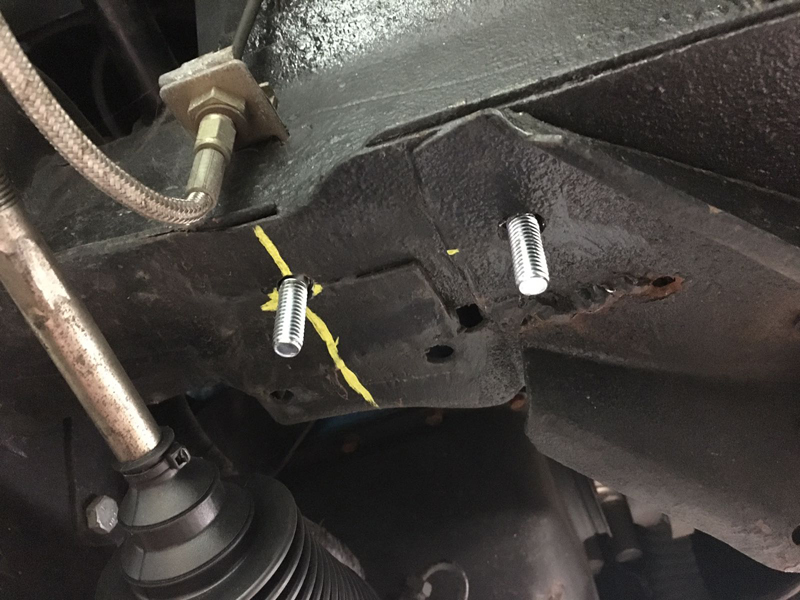
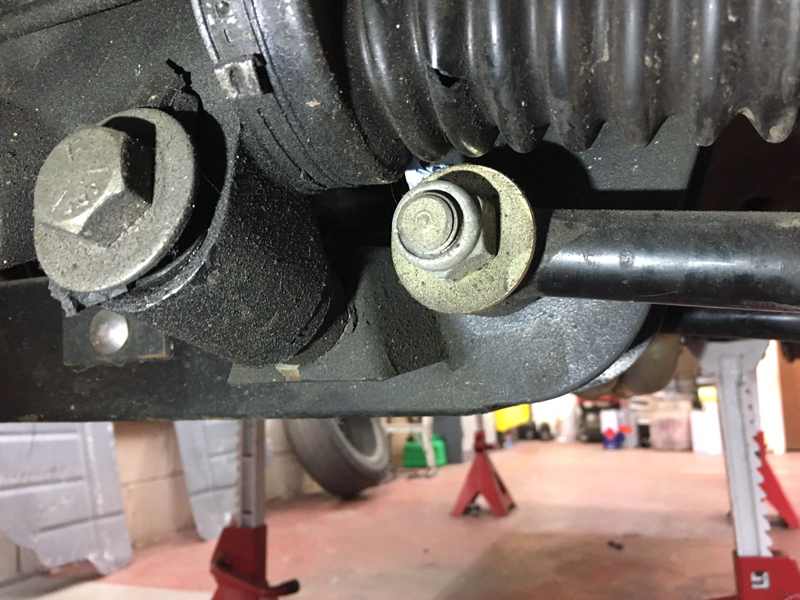
Next we could address the issues with the rear anti-roll bar set. No first generation Mustang came from the factory with a rear anti-roll bar, this is an aftermarket kit but a few issues, the first being that the U bolts that hold the bar to the axle had no thread left on the bolt:

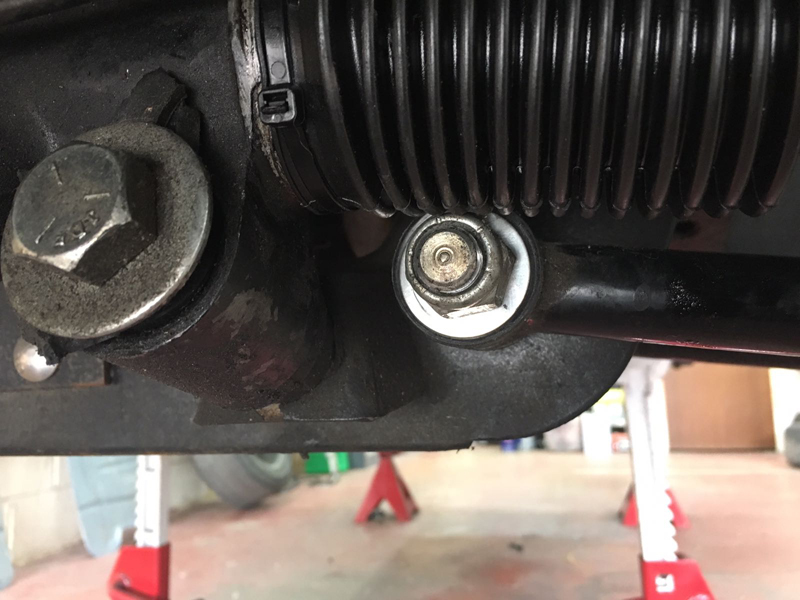
A closer shot of the threads:

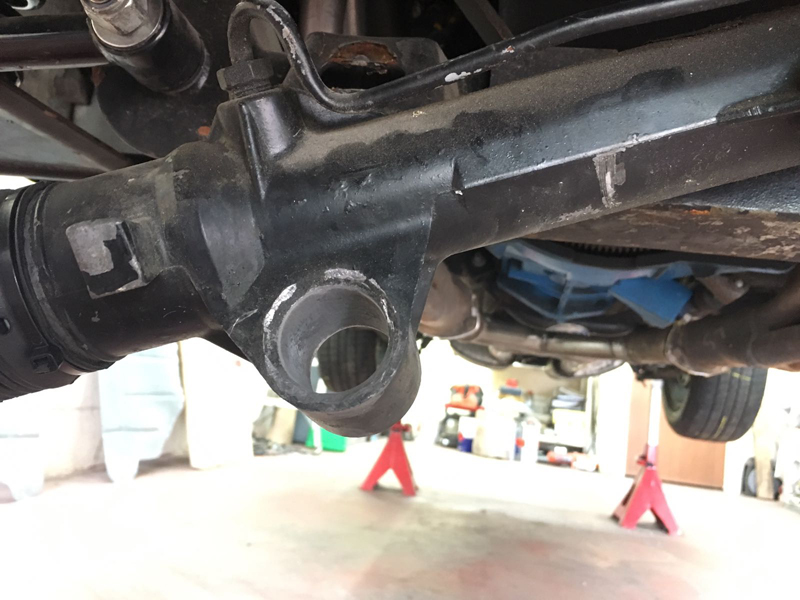
Also, the ends of the bar where it should be connected to the body where not actually connected properly:

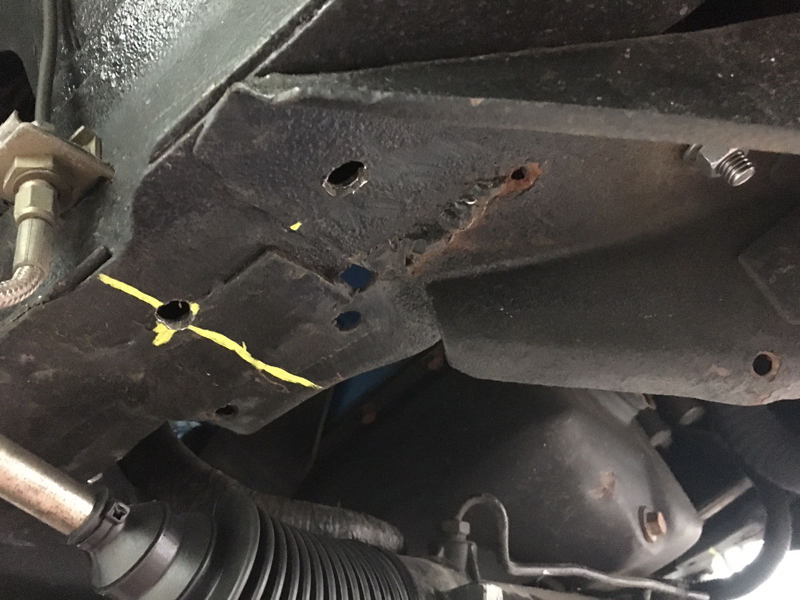
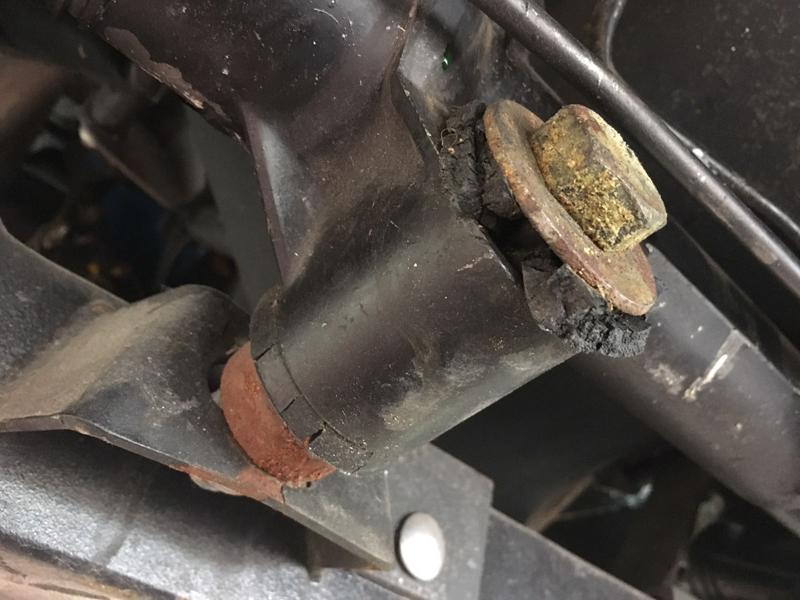
And finally where the bracked bolts to the body for the end link was installed, it was installed without the load spreader plate, which has meant the chassis legs are bent out of shape as the bolts have been trying to pull through:

First we sorted out the chassis issue:

Then installed new U bolts, new end links and added the load spreader plate in. The set up is now installed correctly:

Next a couple of trim issue, the first one, the drip rail moulding where missing:

So we sourced replacement items and installed them:

Next was the bonnet edge moulding:

It had a large dent right in the middle ruining the look of the front of the car:

We sourced a replacement and installed it:

Next we had to look at the exhaust system, due to the rear anti-roll bar install, space was very limited, so who ever install the rear anti-roll bar decided to just chop the exhaust off before the axle to save dealing with clearance issues:

The owner of the car also wanted a balance pipe installed in the system:

A H pipe gives these old American cars that deep V8 rumble, but an X pipe gives it better performance so we opted to go down the X pipe route:

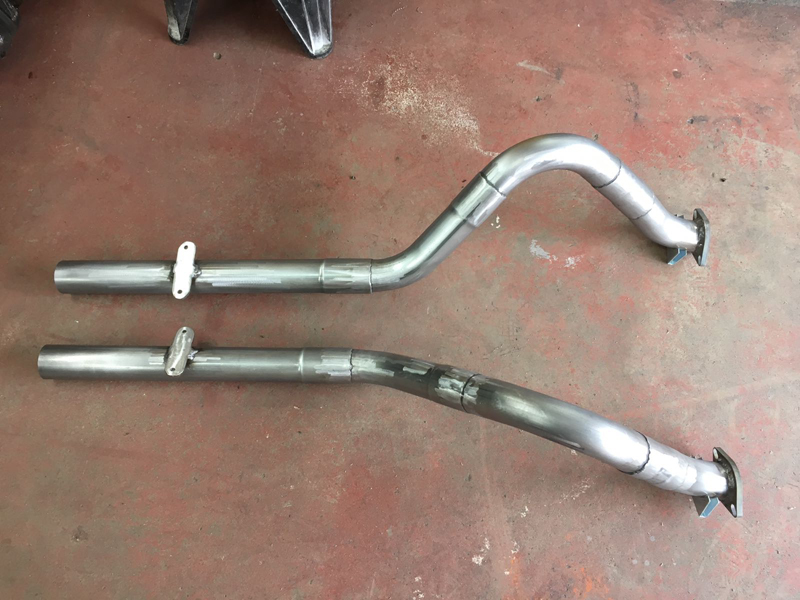
First we made our own X pipe:

And then welded it into the rest of the system and added some flanges to the rear silencers for the tailpipes to bolt to:

Next we fabricated the tailpipes to run from the silencers out to the rear of the vehicle:
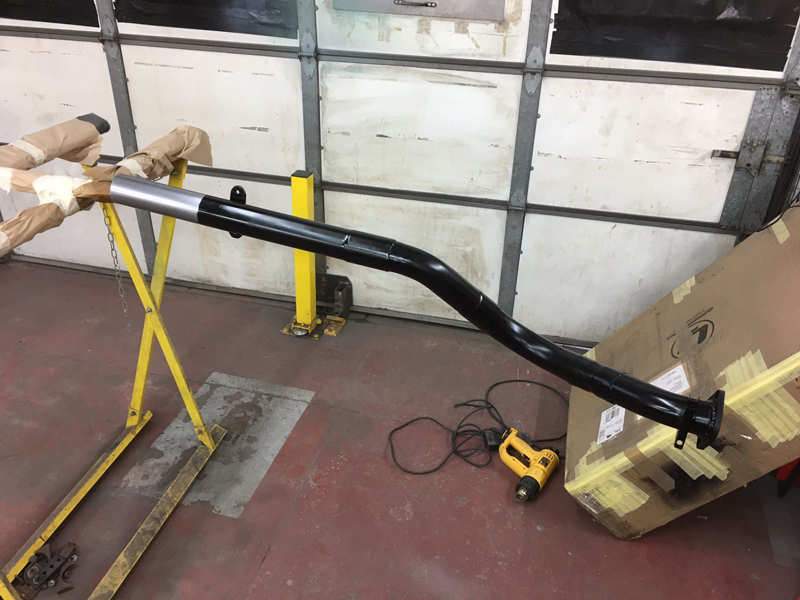
We polished the ends of the tailpipes to a mirror finish:

And then painted the tailpipes in an exhaust coating and clear coated the polished ends:
Then installed the tailpipes, the rear is supported with polyurathane mounts:
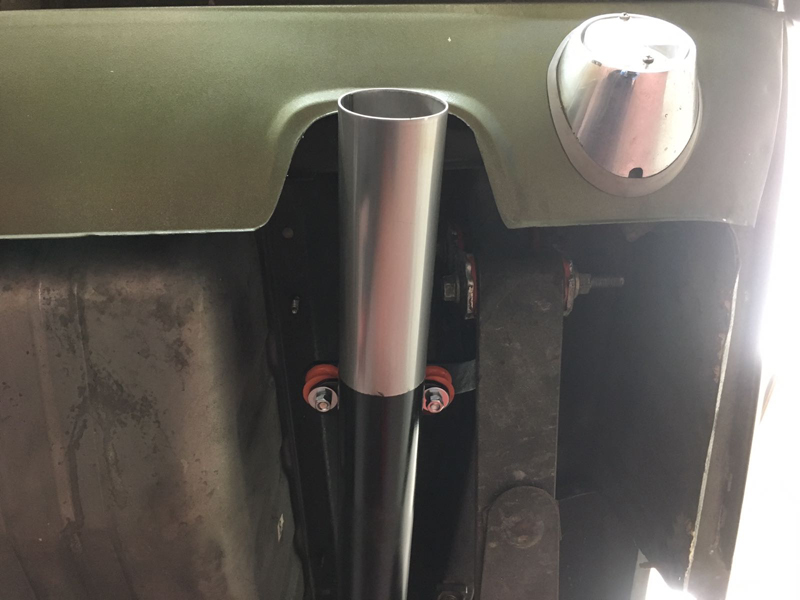
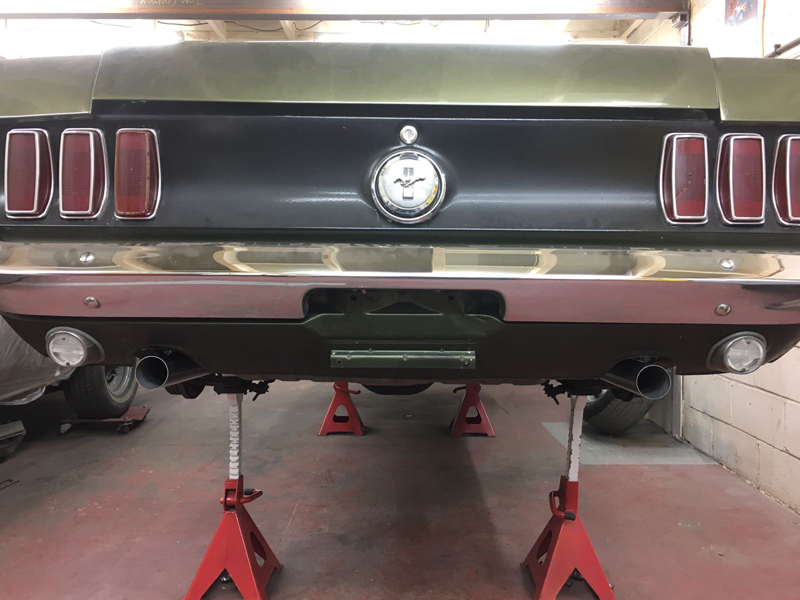
The exhaust now exits out the back of the vehicle as it should:
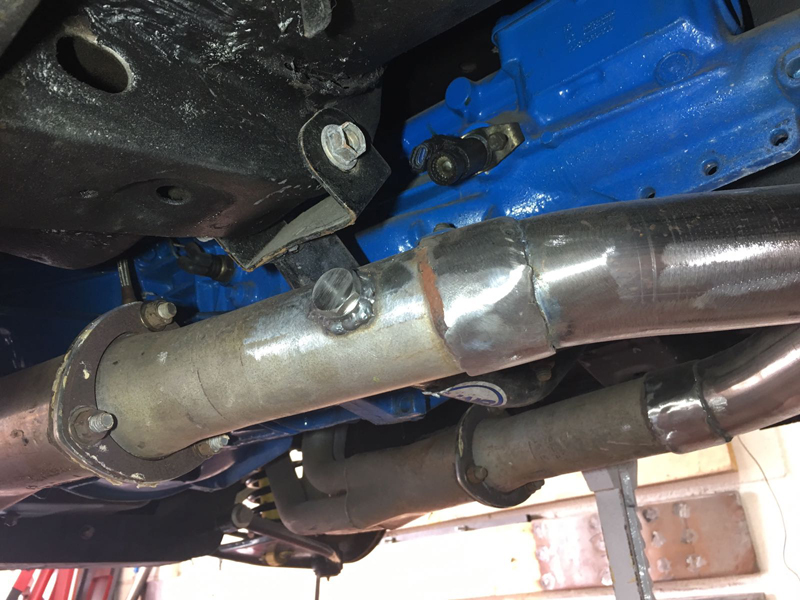
Next we needed to install some lambda sensor bungs in the front section of the exhaust for tuning the engine at a later point:
First we chose a place in the system to install them:
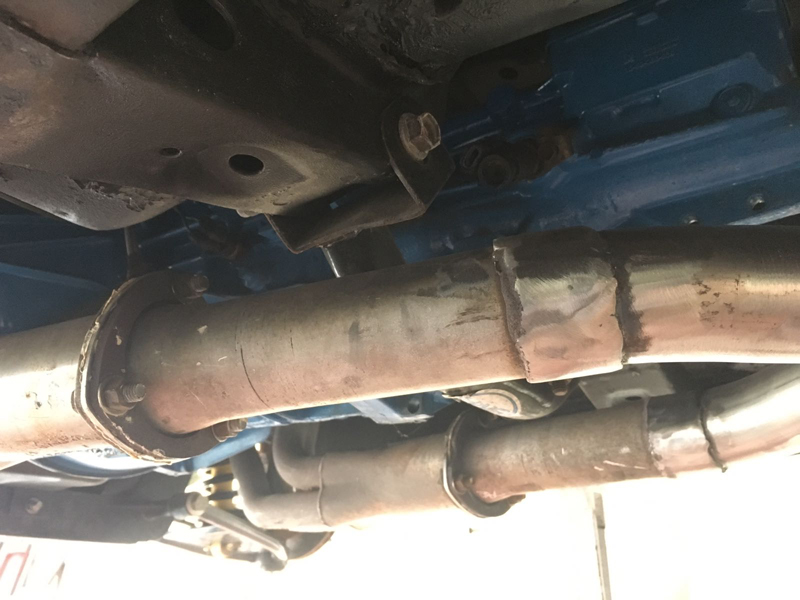
Then drilled a hole to insert the boss:
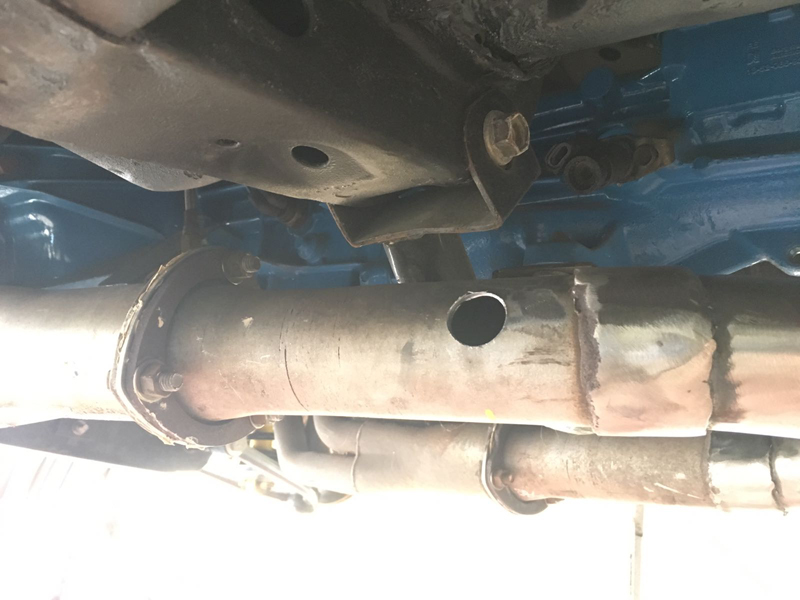
Then welded the boss into place:
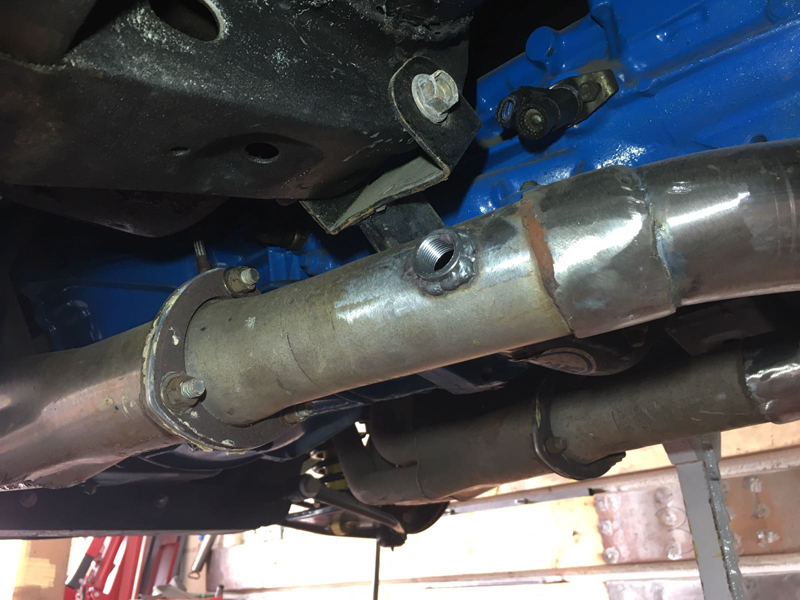
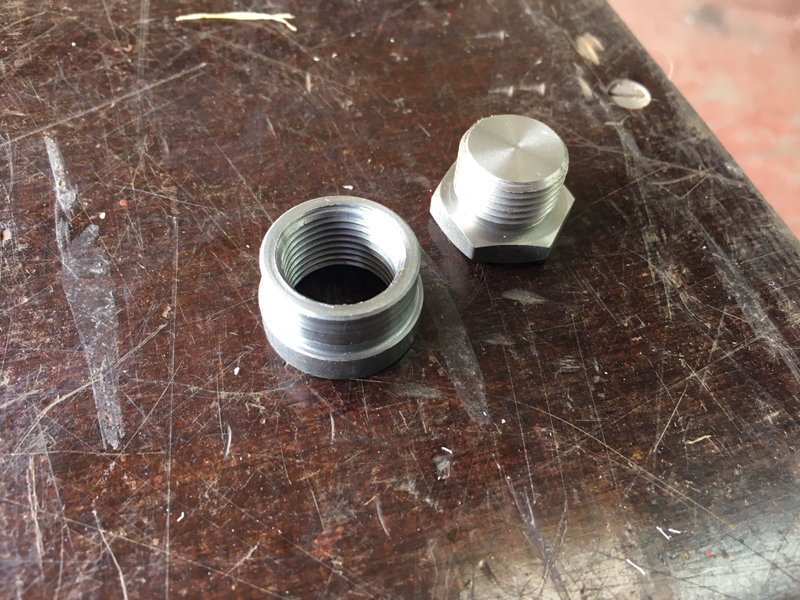
Then finally installed the blanking plug for now:
While working at the back of the car we noticed the reversing lamp lenses were damaged:
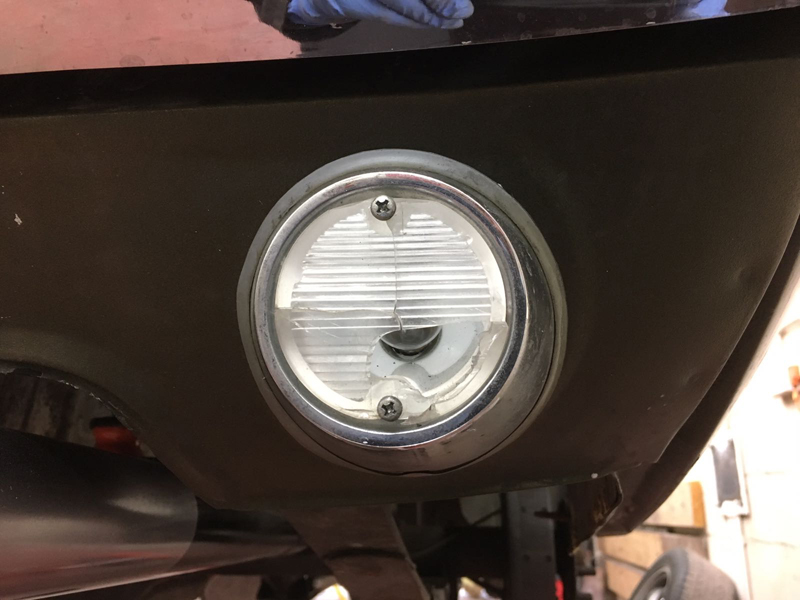
So we installed new ones along with new gaskets for the lenses:

The rear licence plate mounts where missing:
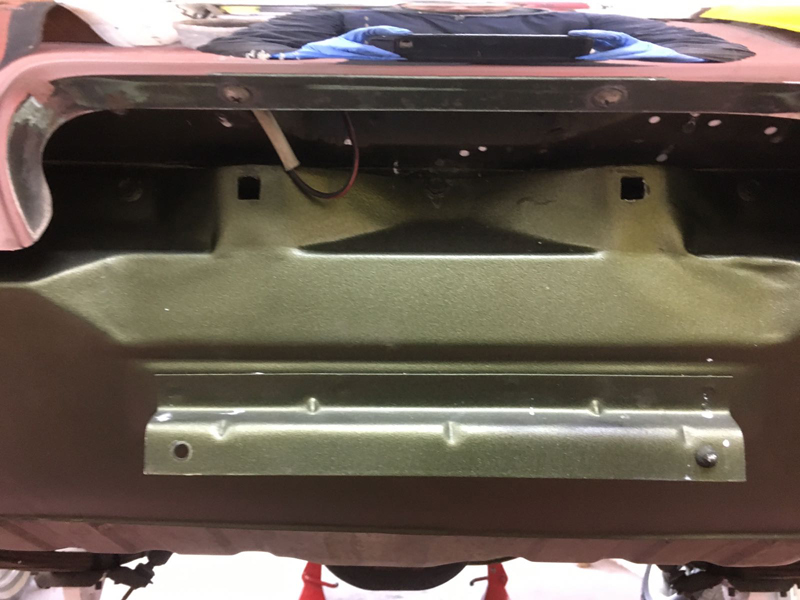
So we installed those:
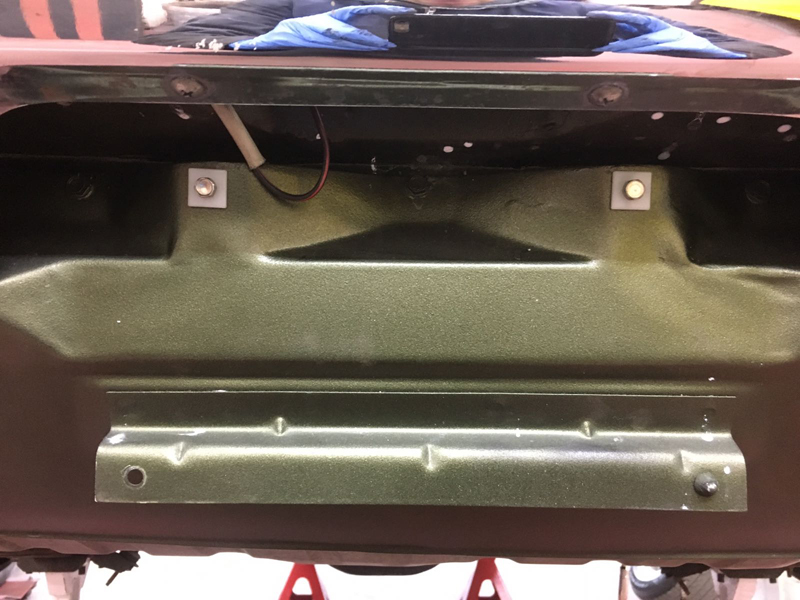
On the front the entire licence plate mounting bracket was missing:
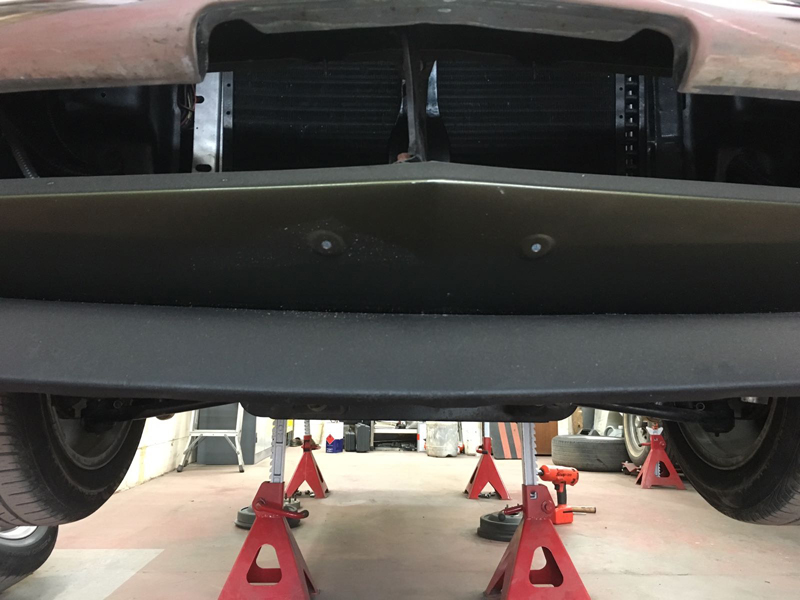
So we sourced the bracket and installed it:

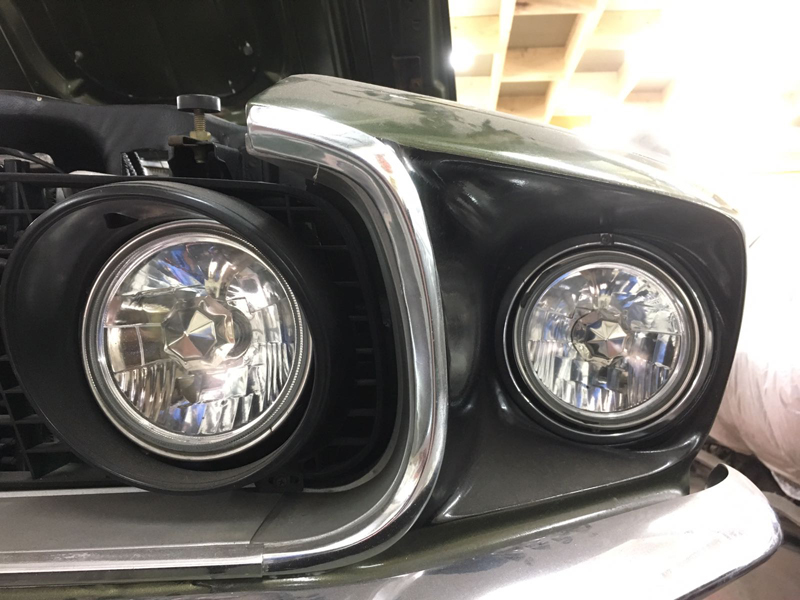
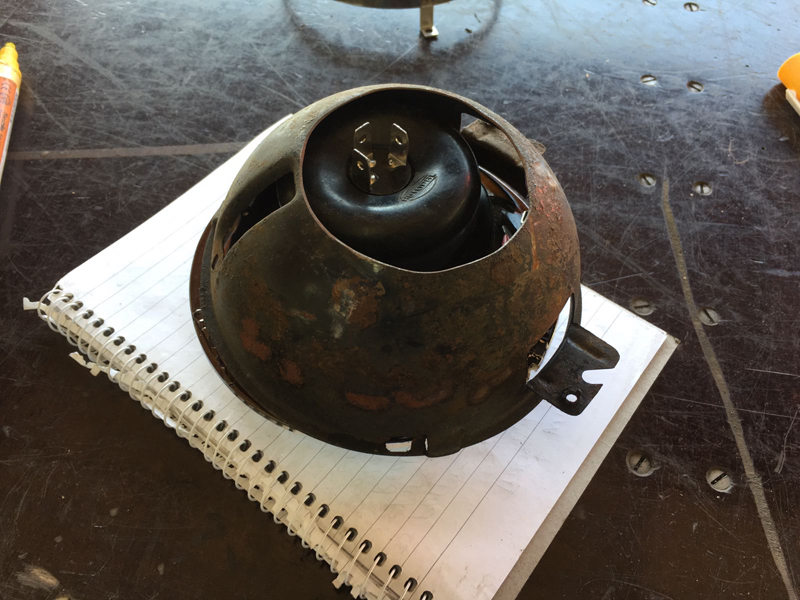
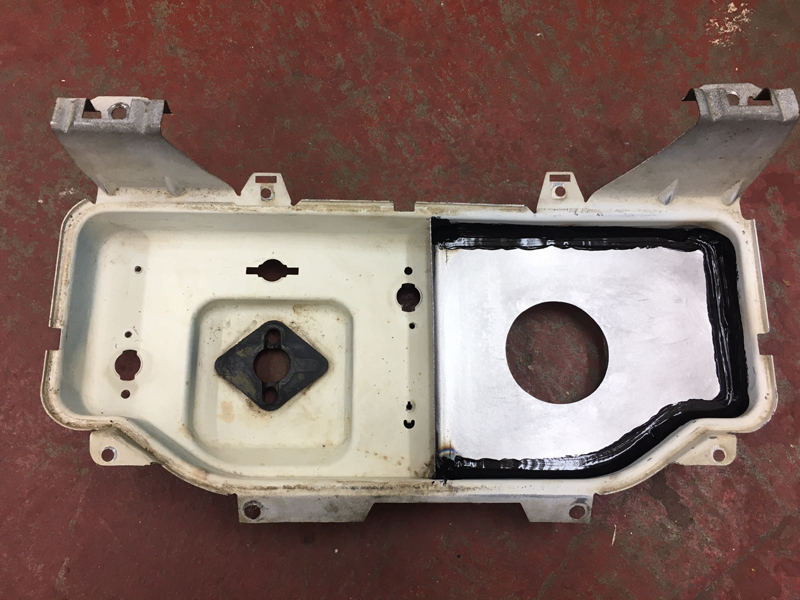
The headlamps fitted were still the left hand drive ones, so we had to install right hand drive versions and 1 of the lamps was cracked and not working at all:
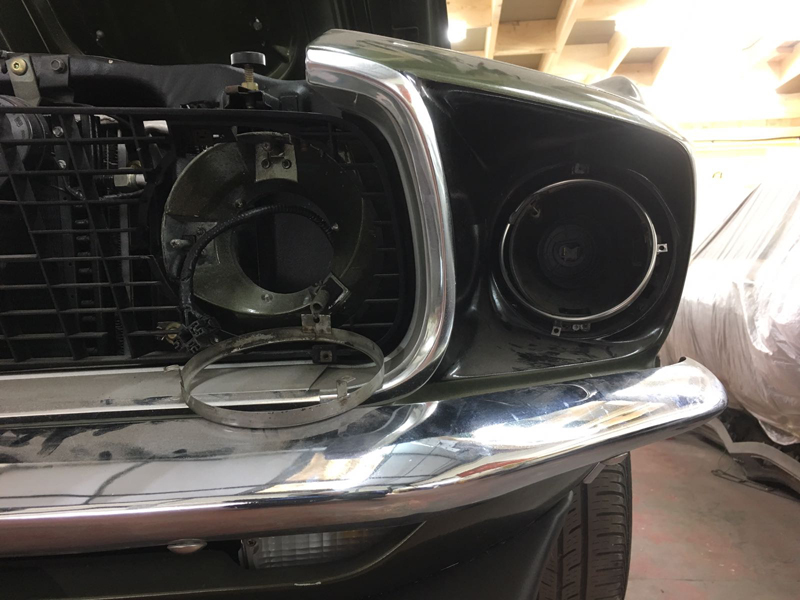
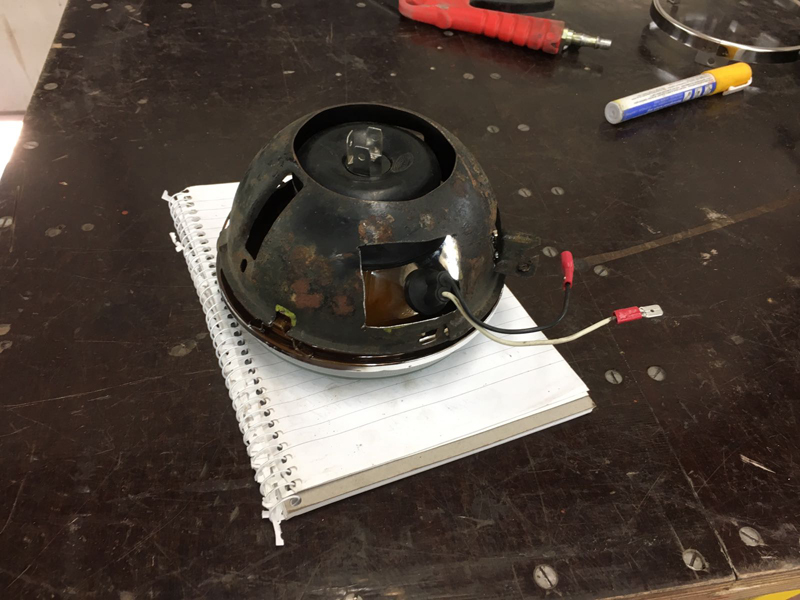
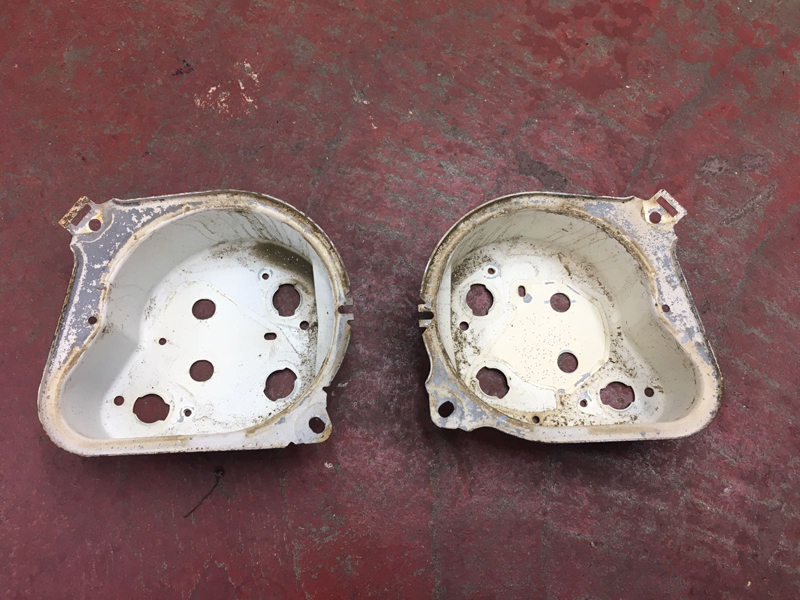
First we removed the original lamps to get to the headlamp buckets:
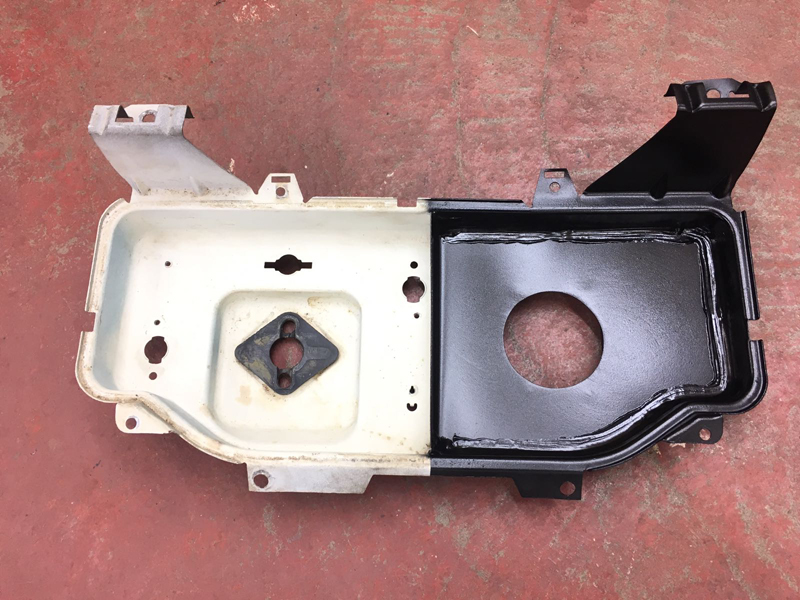
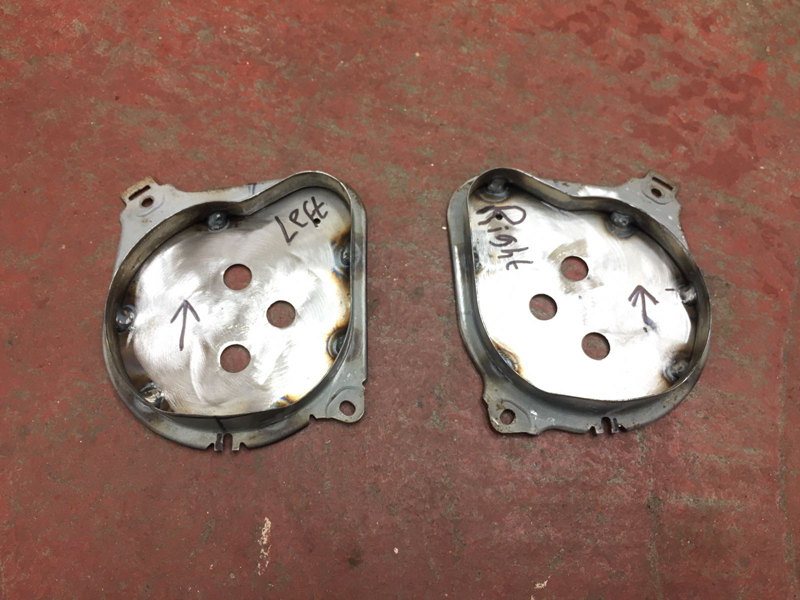
The new lamps have the sidelights built into them and didn't fit the buckets so we needed to modify the buckets:
After some cutting the headlamp slotted straight in:
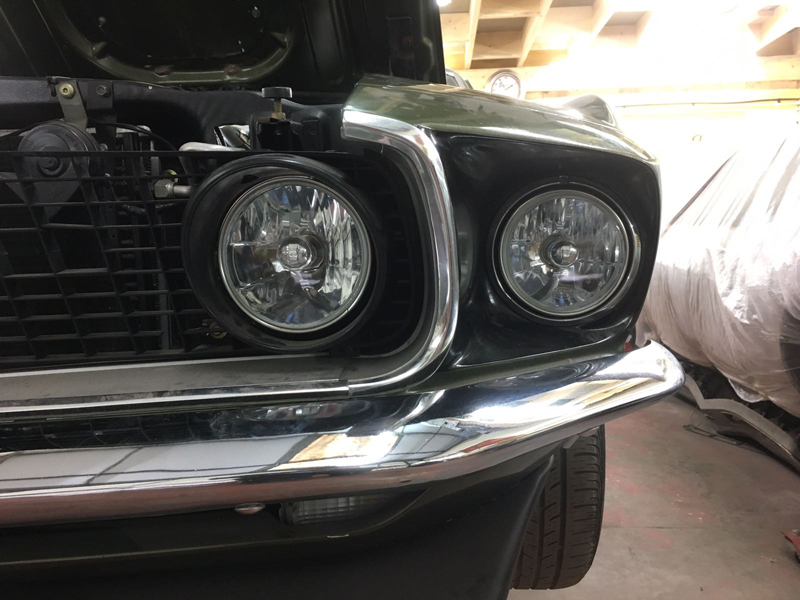
Then we could install the new headlamps back in the car:
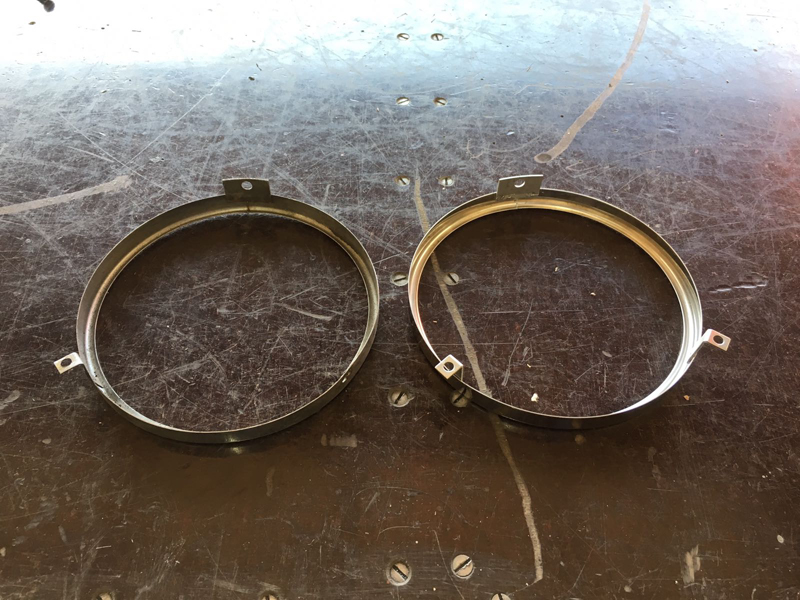
The passenger outer lamp retaining ring was broken and someone had secured it in place with some wire:
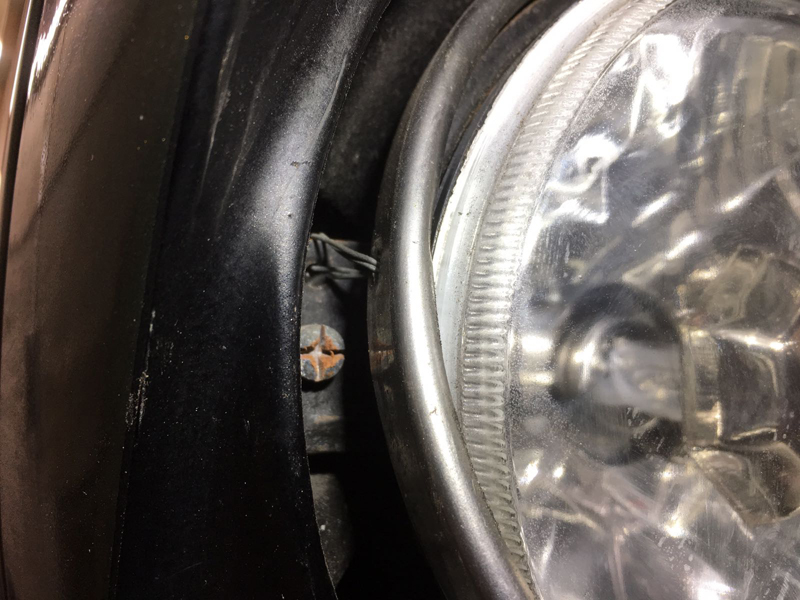
So we sourced a new ring so that the lamp could be installed properly:
With all 4 lamps now installed we could start re-wiring them, the original set up has the sidelight as part of the indicator, this isn't allowed for the UK:
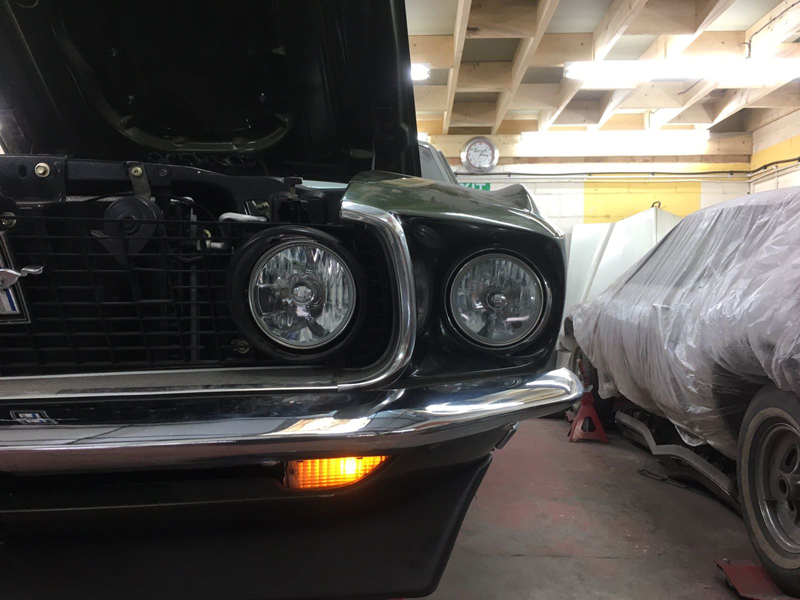
So we re-wired the front sidelights to come on in the headlamp insted:
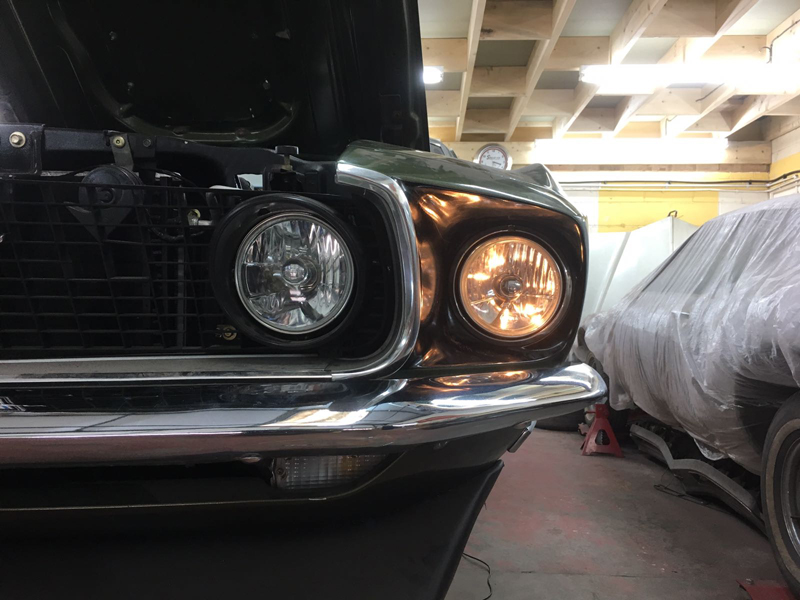
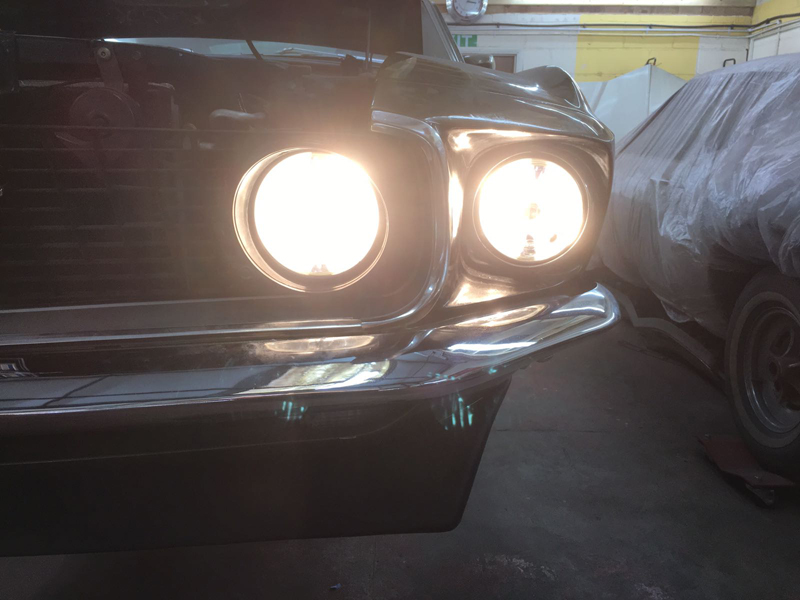
And now with all new lamps and new bulbs all the front lights are working correctly:
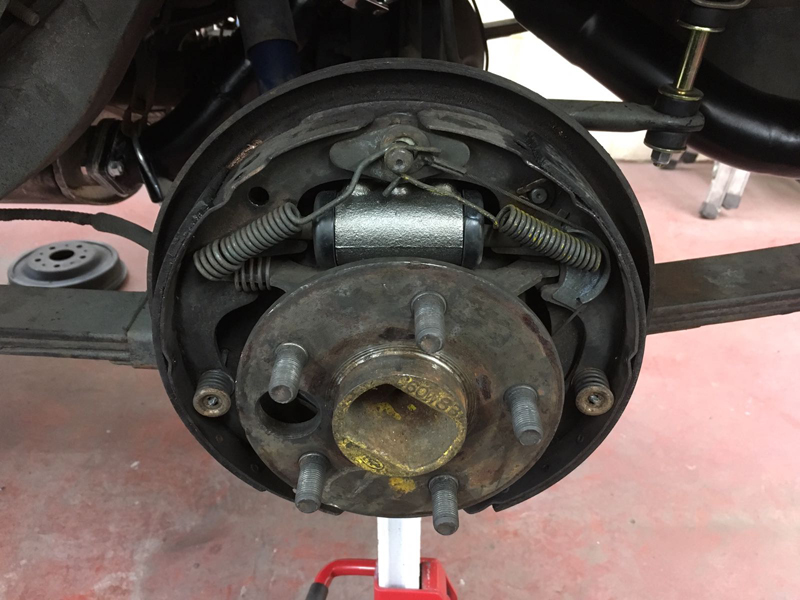
Next we have to tackle a few safety issues, the rear wheel cylinder on the driver's side was leaking, the passenger one was siezed and the driver's rear outer wheel bearing had play in it:

So we stripped the brakes down and pulled the drive shaft from the driver's side:
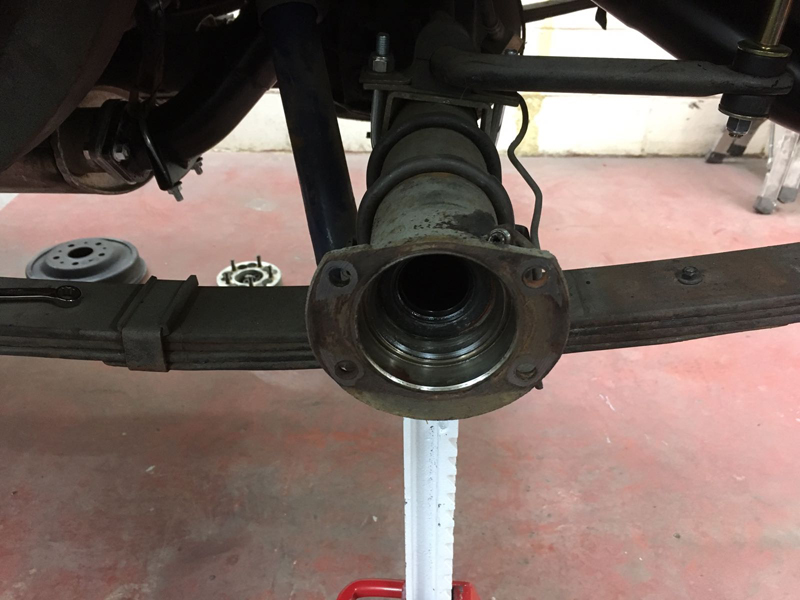
With the drive shaft out we can feel the play in the bearing itself:
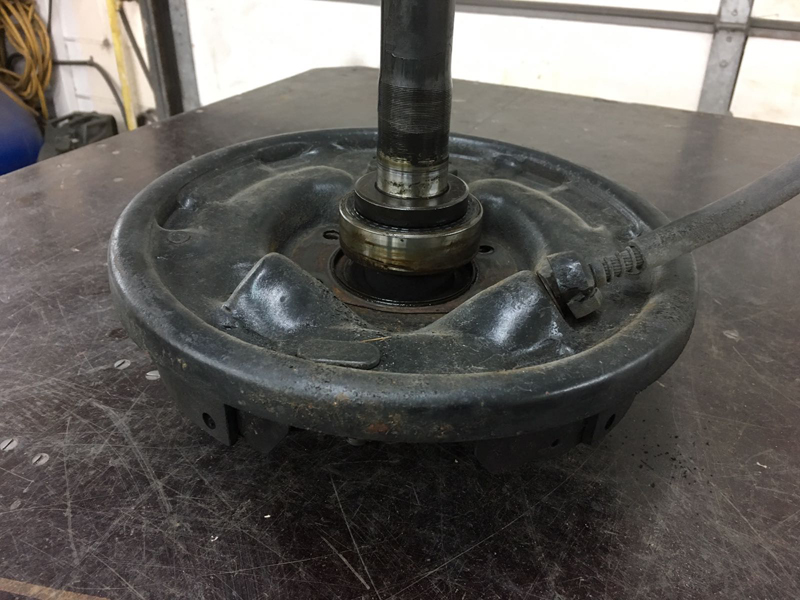
We pressed the old bearing off:
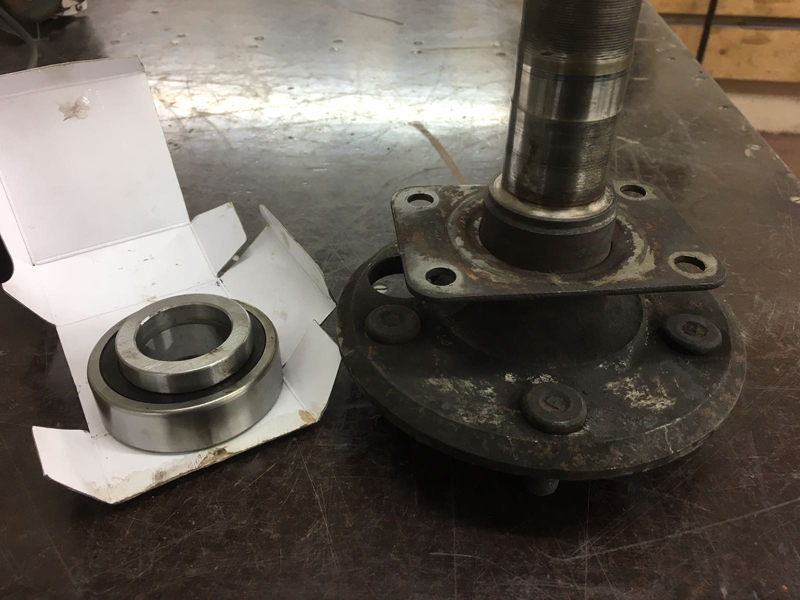
And then pressed the new bearing on:
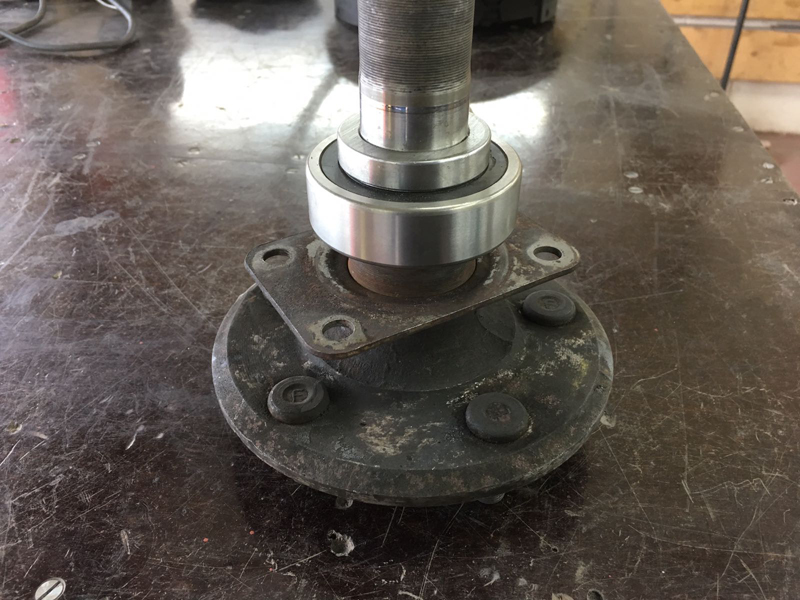
Then re-installed the drive shaft, cleaned and de-greased all the brakes and re-built them with new wheel cylinders:
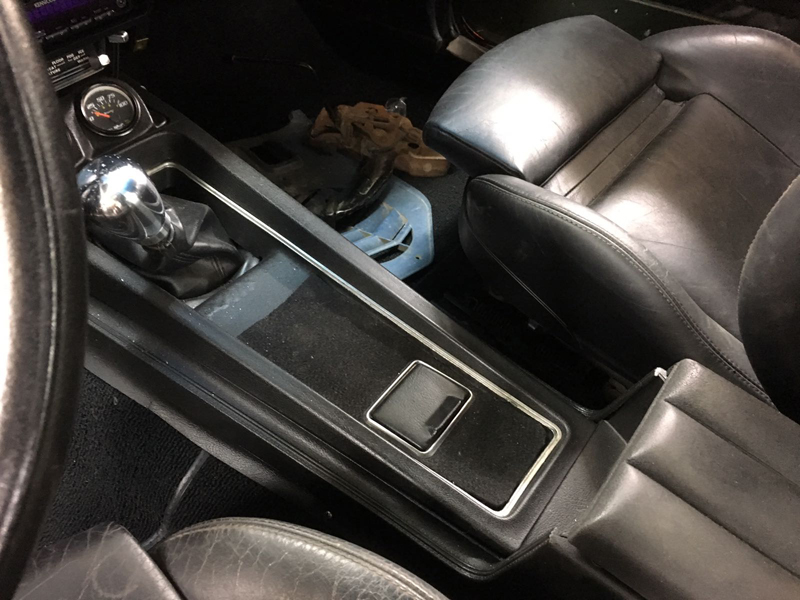
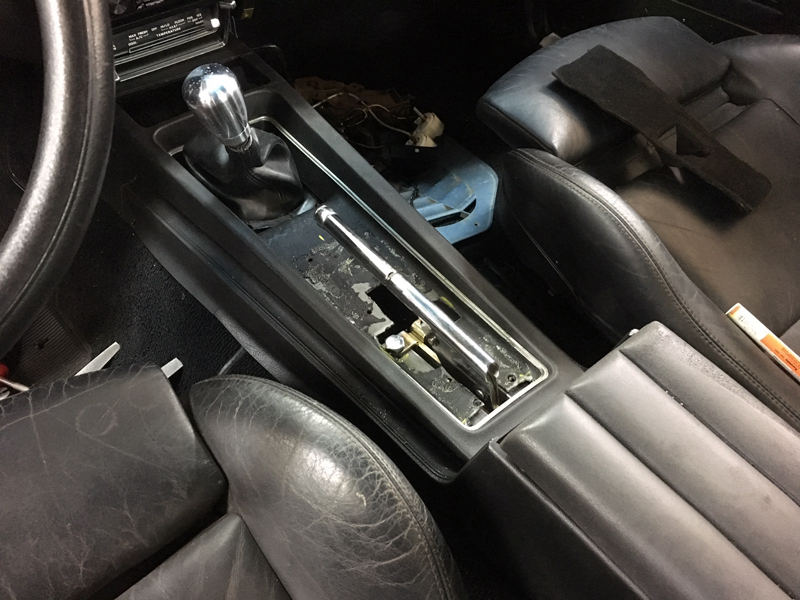
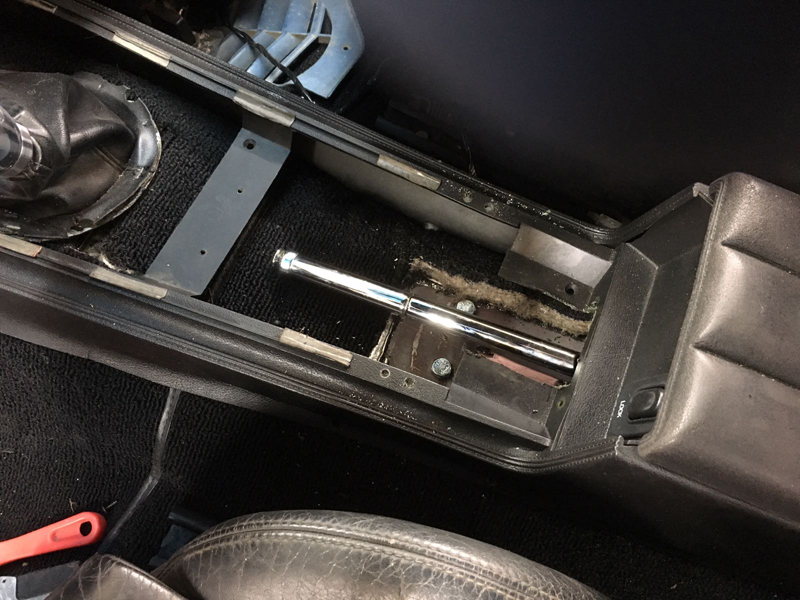
The original parking brake assemble on this car is a foot operated brake. Someone has installed a modern fuse box and several relays in the location where the parking brake should be mounted so we needed to come up for a solution for a parking brake. We opted to go for a hand operated brake set up much like a modern car that mounts behind the gearstick:

This car has a centre consol, so the first thing we had to do was remove that:
And then mount the hand brake assembly onto the transmission tunnel:
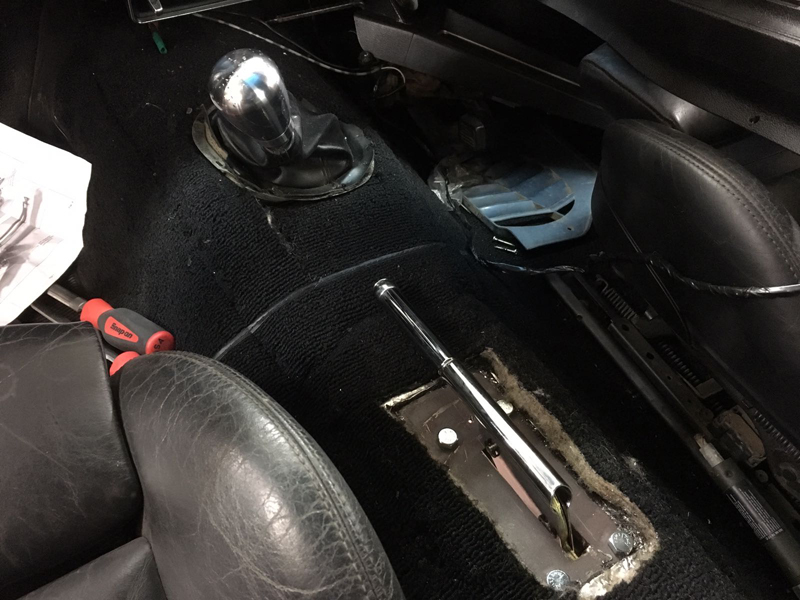
We was hoping the hand brake set up would be high enough to just clear through the consol but unfortunatly as we thought, it didn't so we had to come up with a solution:
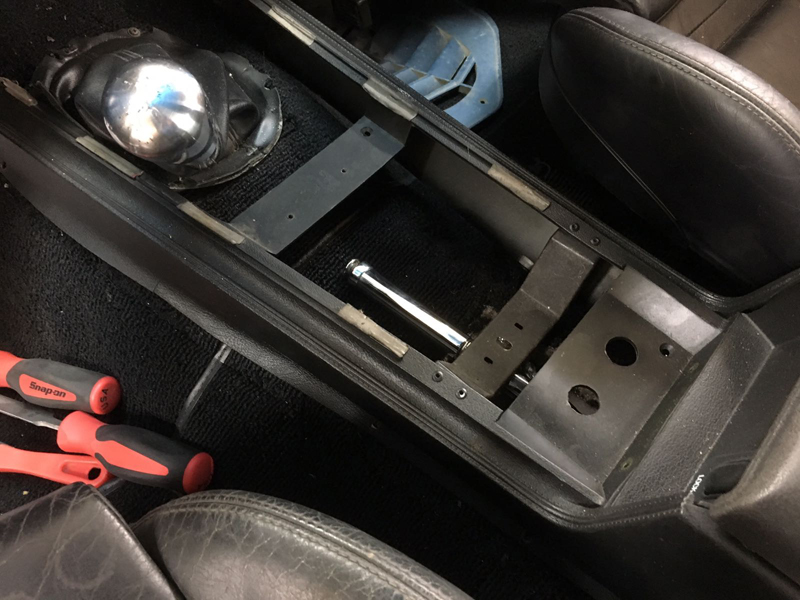
The solution was to use some box section steel and raise the assembly up a bit:
Testing it in the car seemed to raise it up by quite a bit:

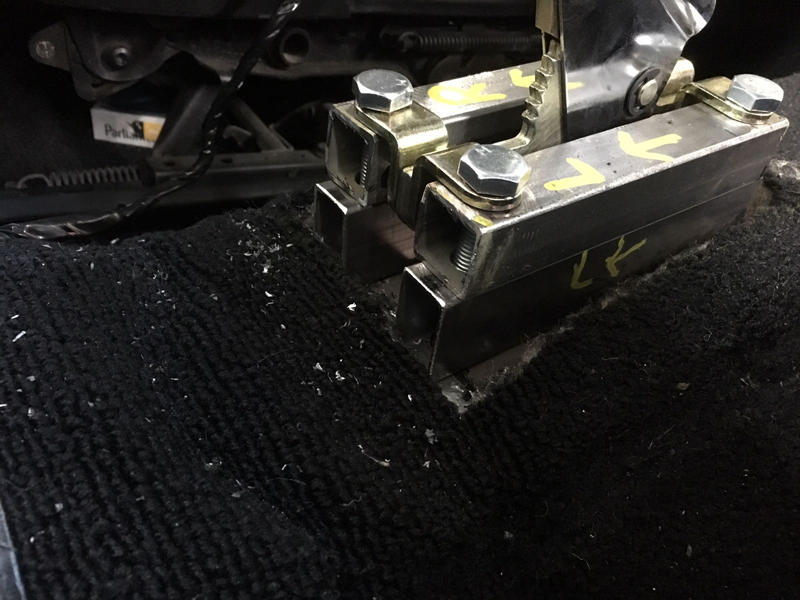
Once we had the height correct and tested, we removed the box sections and welded them together and capped off the ends to stop the box section crushing when tightening the mounting bolts up:

With the box spacers complete we installed the handbrake for the final time and re-checked the consol for clearence:
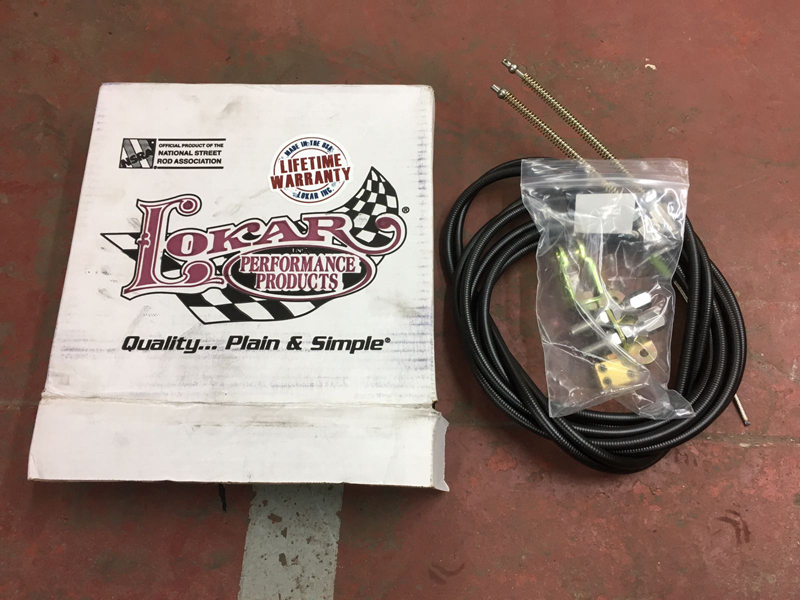
Next we had to install the new cable set up:
We had to make an opening in the floor for the cables to run through and then mounting the cable mounting bracket to the transmission tunnel:

Then route it along the floor under the car and secure it to the chassis rail:

Then the same thing on the other side:

Then connect it up to the brake shoes:

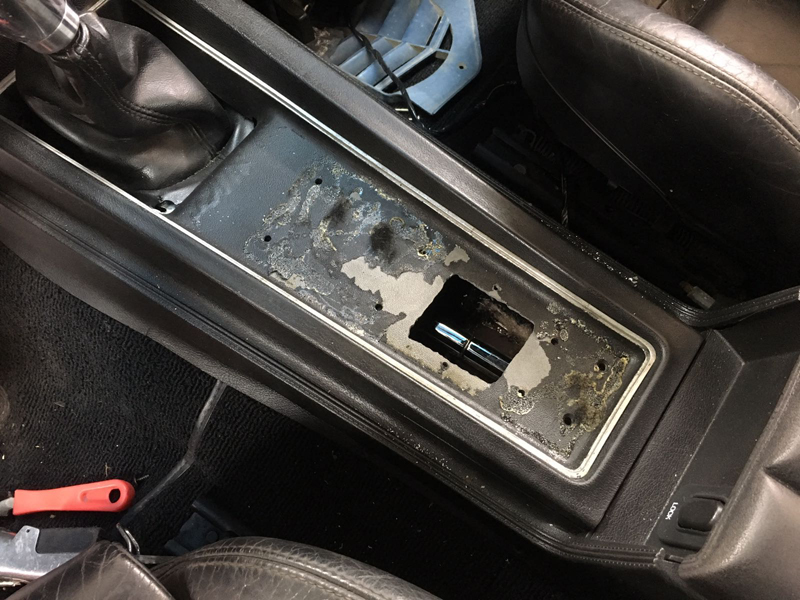
Once that was done we adjusted the cables and shoes so that it all works correctly. We can now move onto trimming the centre consol to get that to fit back around the handbrake:
First we cut a section out:
Then screwed the sides down to the box spacer and strenghtend the front up with a piece of sheet metal rivited between both sides:

The storage box at the rear of the consol was fouling on the cable bracket under it, so we cut a small section out the storage box and made a raised plate to cover the hole:

Drilled some holes to secure it down:

Then riveted it in place and sealed the edges with sealer so that no small objects in the box can fall out of it:

Once the consol was back together, we re-trimmed the top section with a new piece of carpet that matched the original, except this time ran it the full length of the consol:

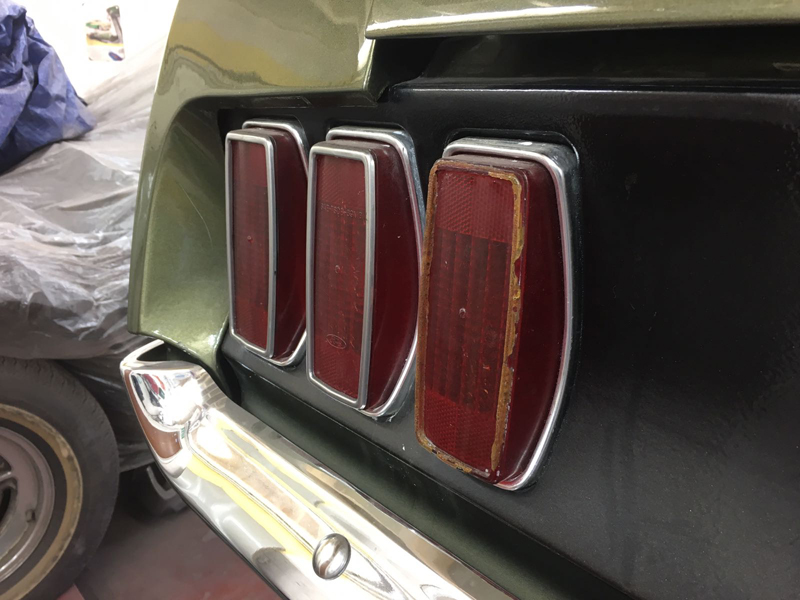
Next we had to address the rear lights to convert them to UK spec. The owner of the car wanted us to do something a little special with them so we set to work:
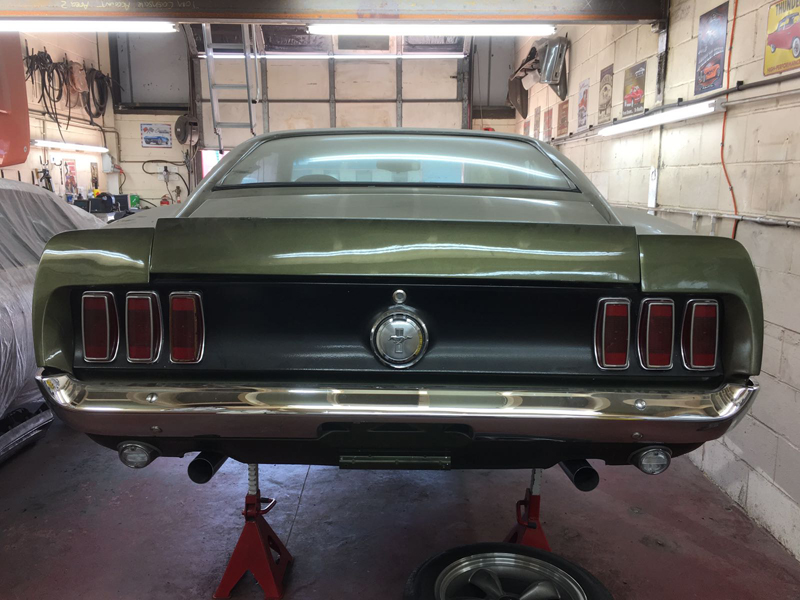
This is the factory set up, 3 lenses that stick through the body and stick out, as you can see they are worn and cracked a some of the trim is missing:
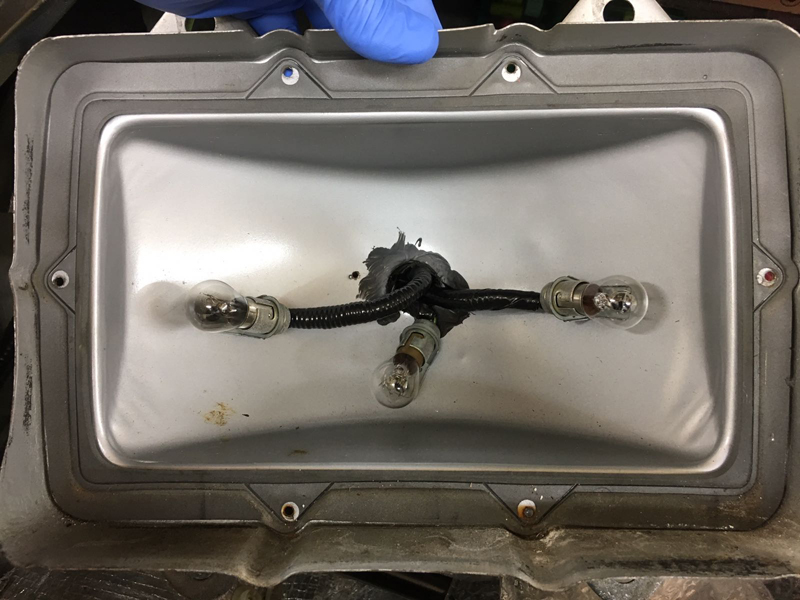
Someone has previously modified the lamp buckets to try and convery the rear lights to sequential rear lights, they added the 2 extra bulbs into the rear lights but not the light dividers:
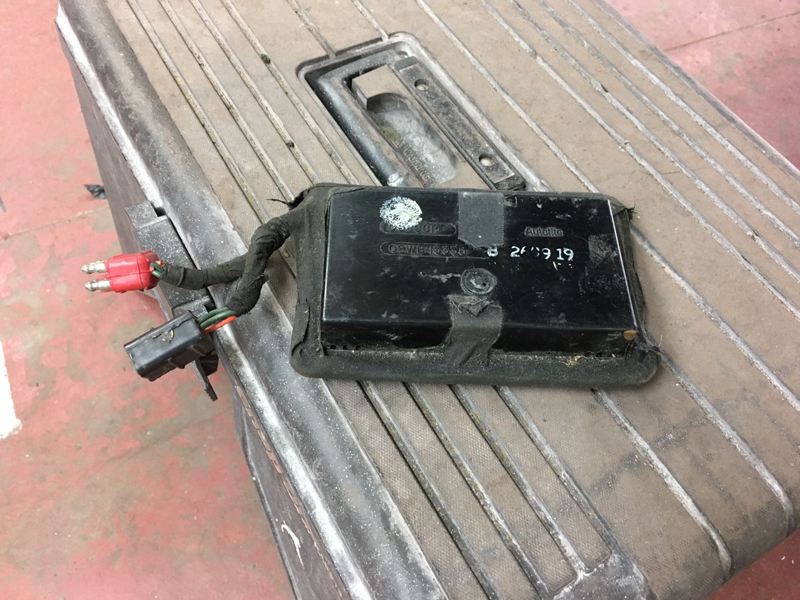
This is the factory sequential module that someone had added into the rear light wiring harness:
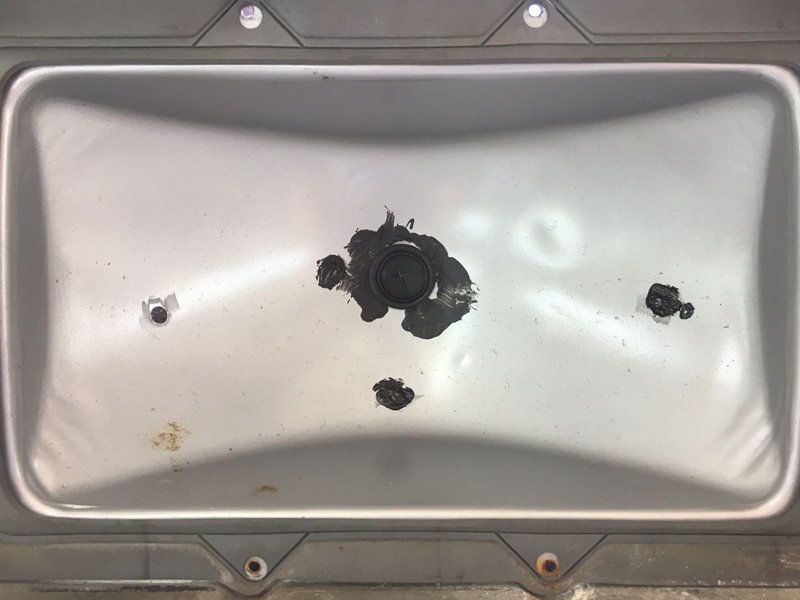
We removed the 3 bulb set up, drilled the centre hole larger for a wiring grommet and used some sealer over the rest of the holes that were no longer needed:
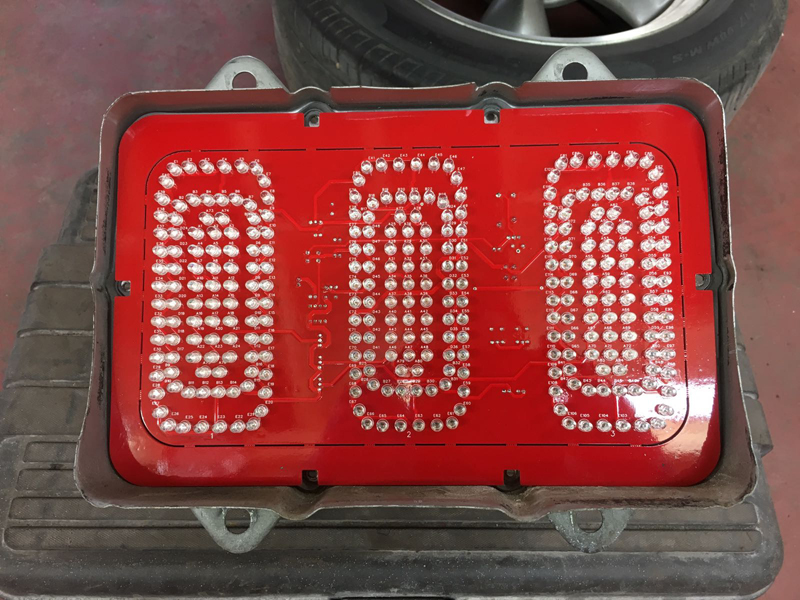
We are using an LED sequential rear light conversion kit, this removes the factory module and has a printed circuit board with everything built into it. First we fitted the circuit board into the lamp bucket:
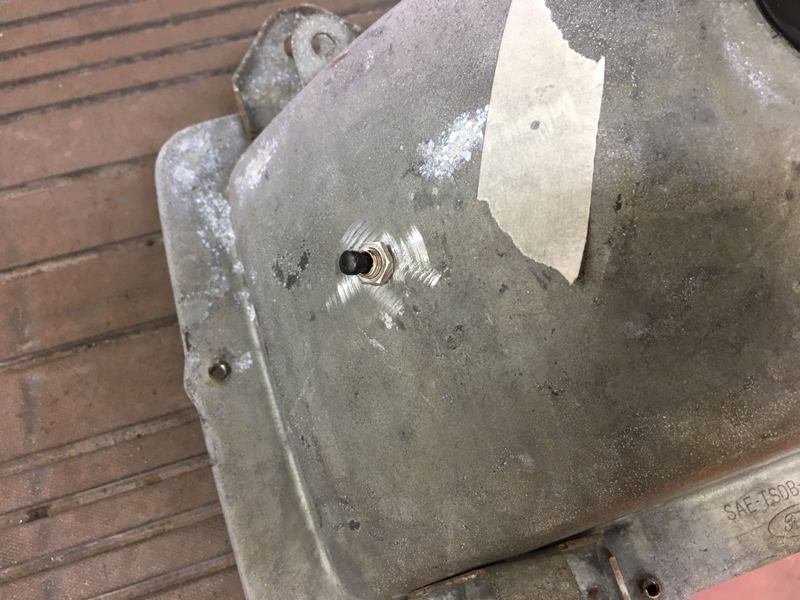
Then fitted the adjustment button on the rear of the lamp. The set up has 7 different sequential settings which can be adjusted at the press of a button on the rear of each lamp:
The new set up also includes new flush mount rear lenses:
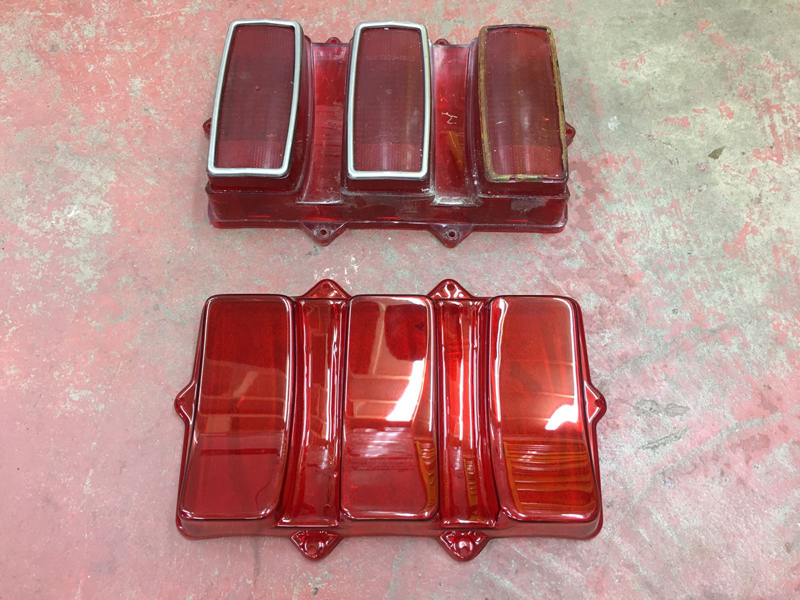
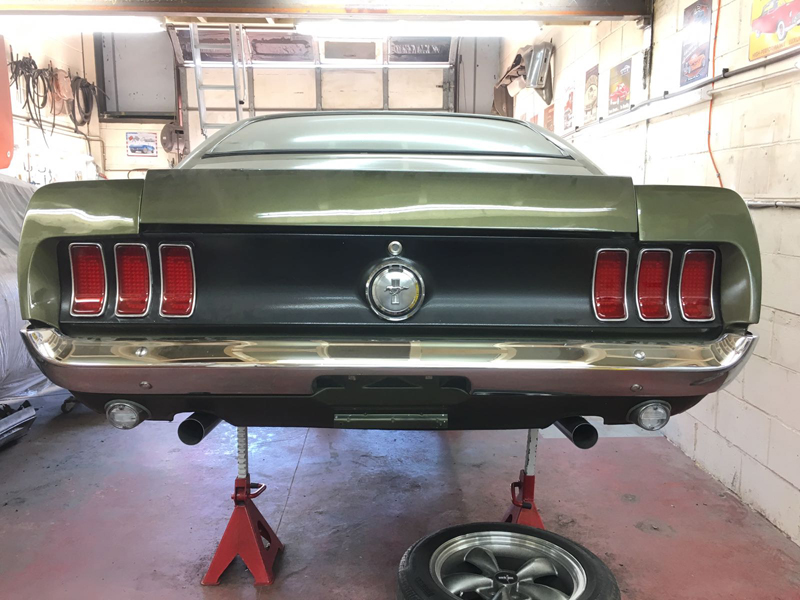
Which when fitted keep the look of the back of the car alot smoother:
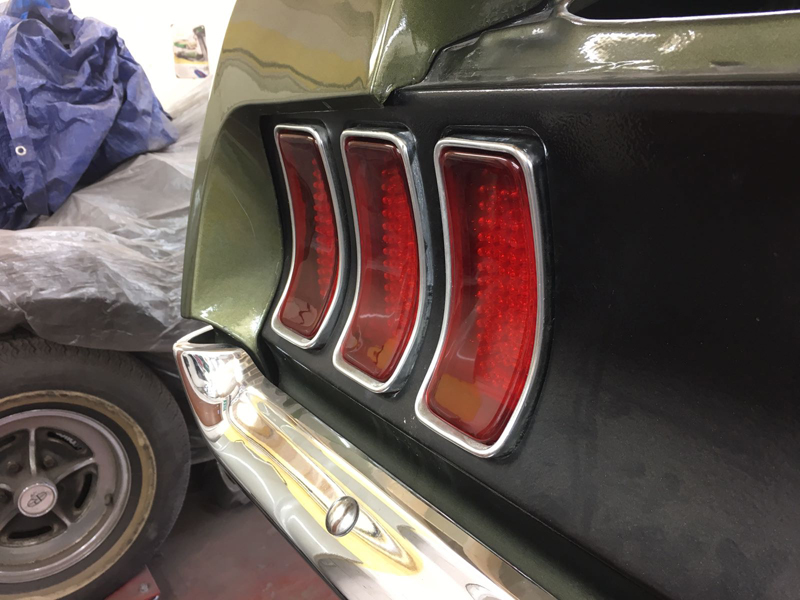
With both lights installed it totally changes the look of the car and the indicators are so bright that they actualy shine an orange light through the red lens which keeps it all legal:
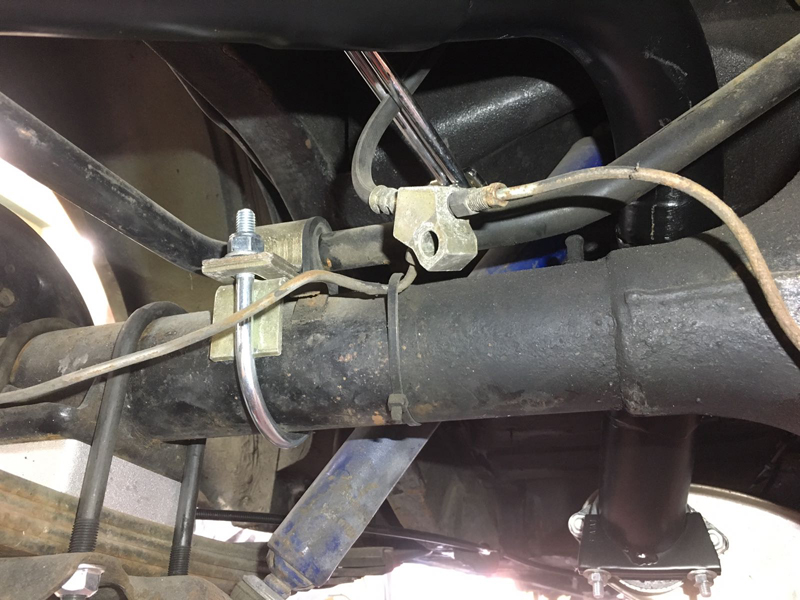
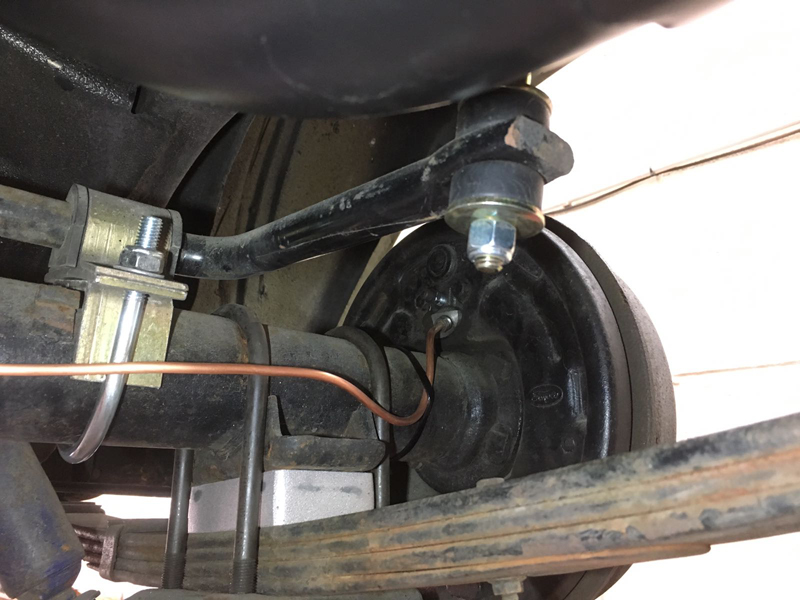
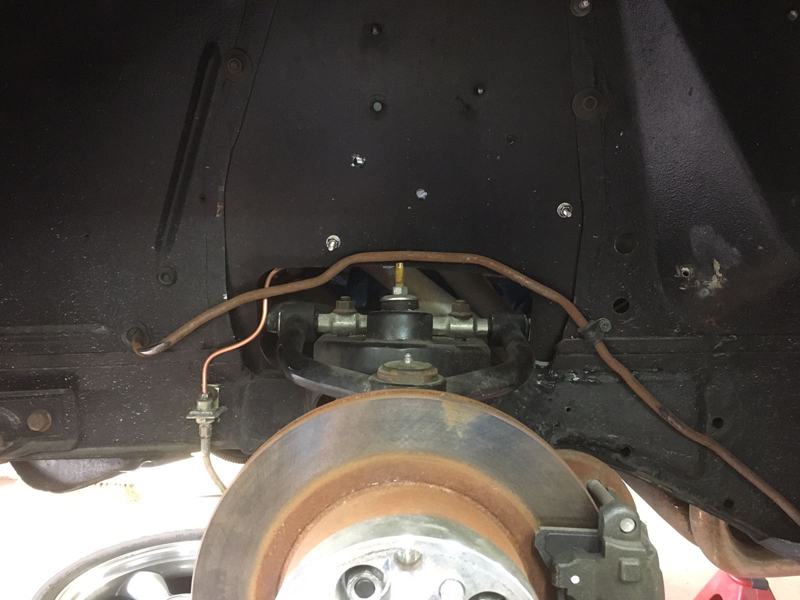
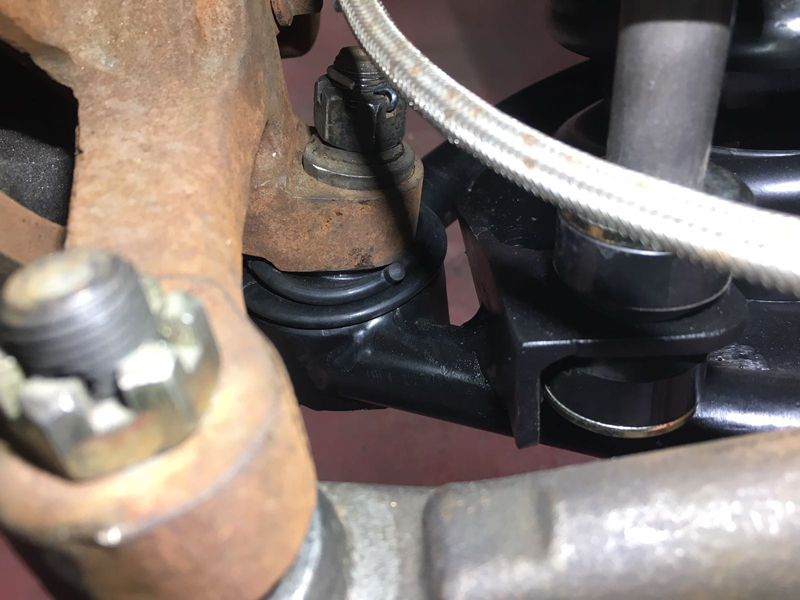
Next we had to address the issues with the rear brake line set up, appart from the brake hose clamp which is ours, this is how the set up was when it came into us, all cable tied to the rear axle in random places:
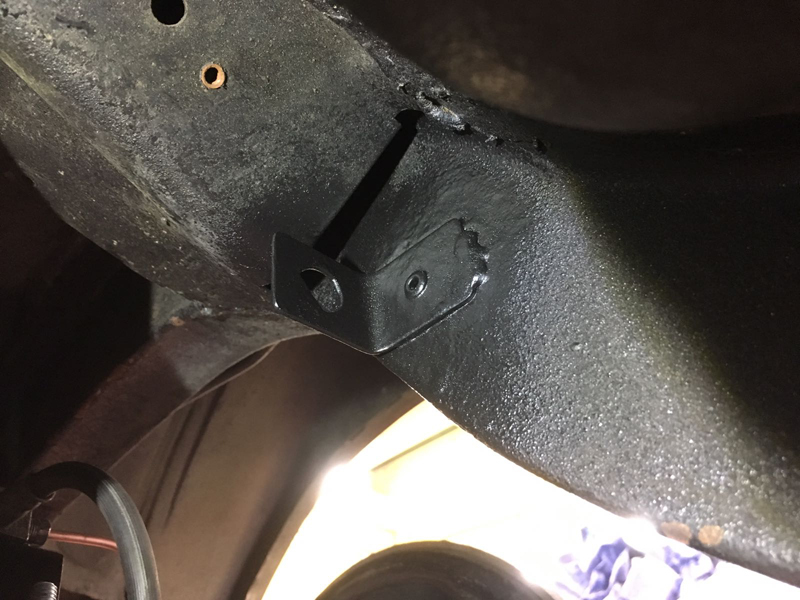
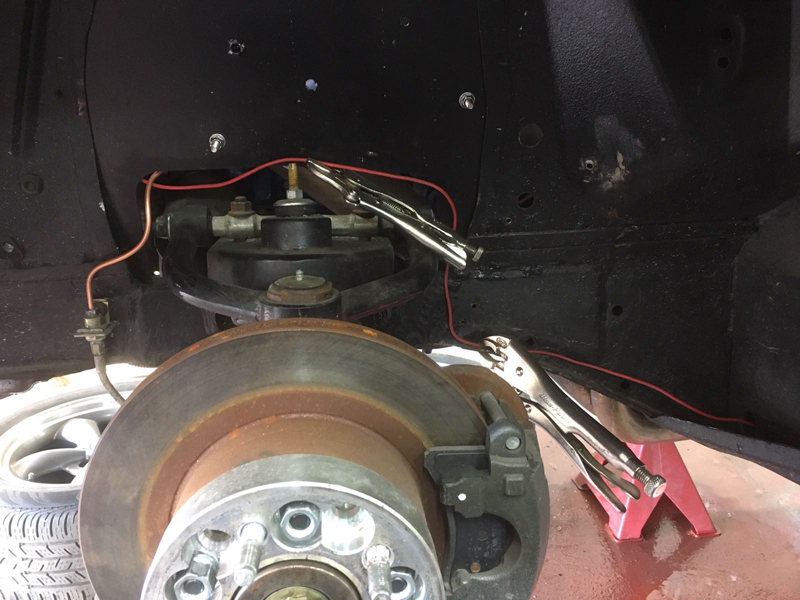
So we fabricated a small bracket which would mount to the rear anti-roll bar mount:
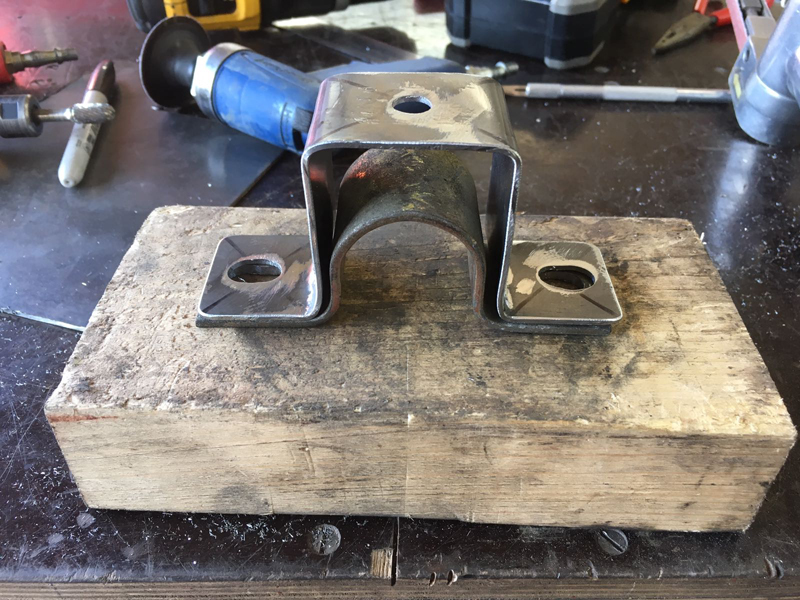
Then added a small tab to make sure the brake hose can only be mounted in one place:
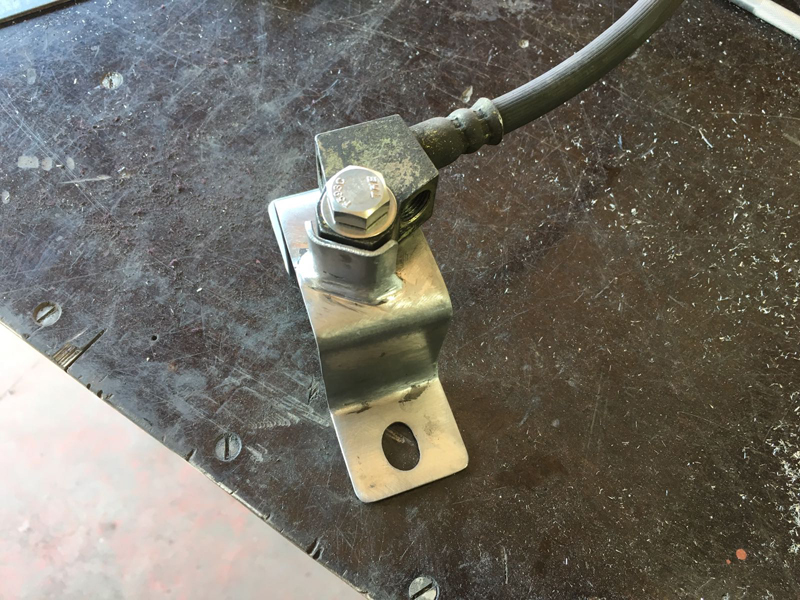
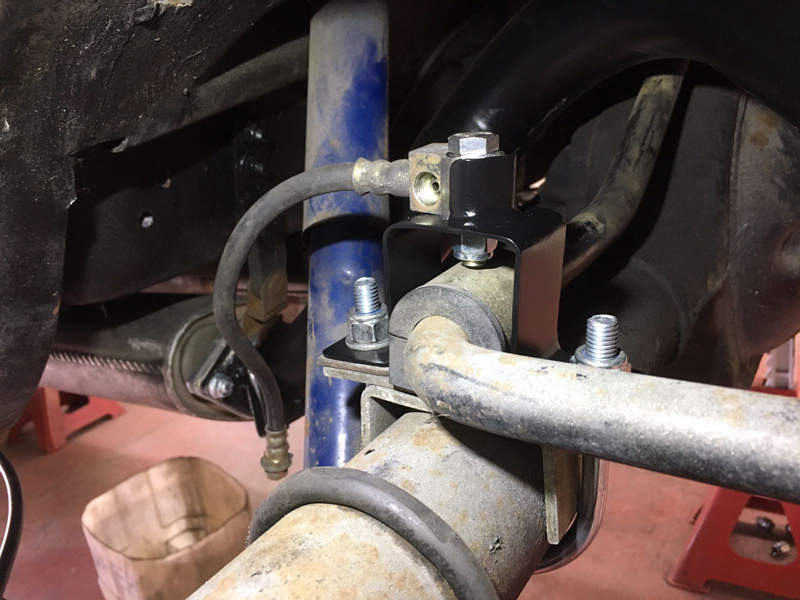
Then a quick coat of black paint and the bracket was complete, we then mounted it into place and fitted the hose to it:
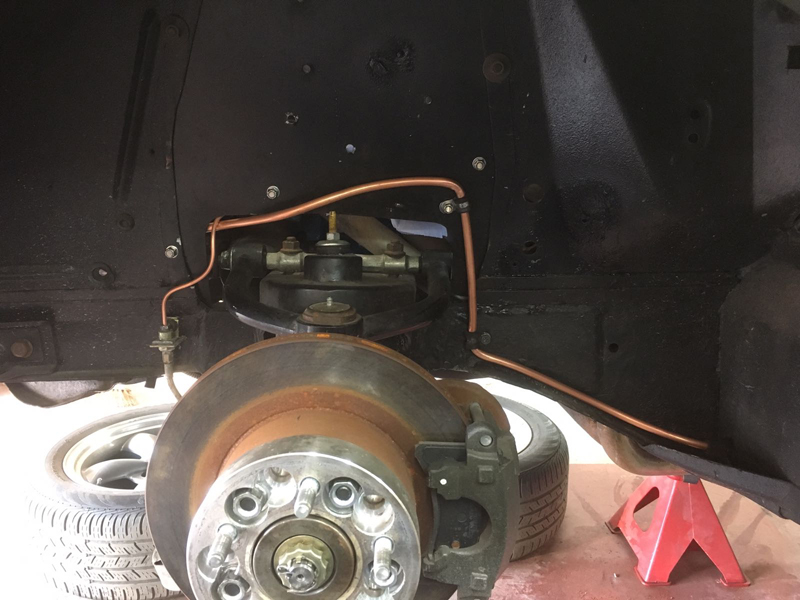
Then started making new rear brake hard lines, starting on the driver's side:
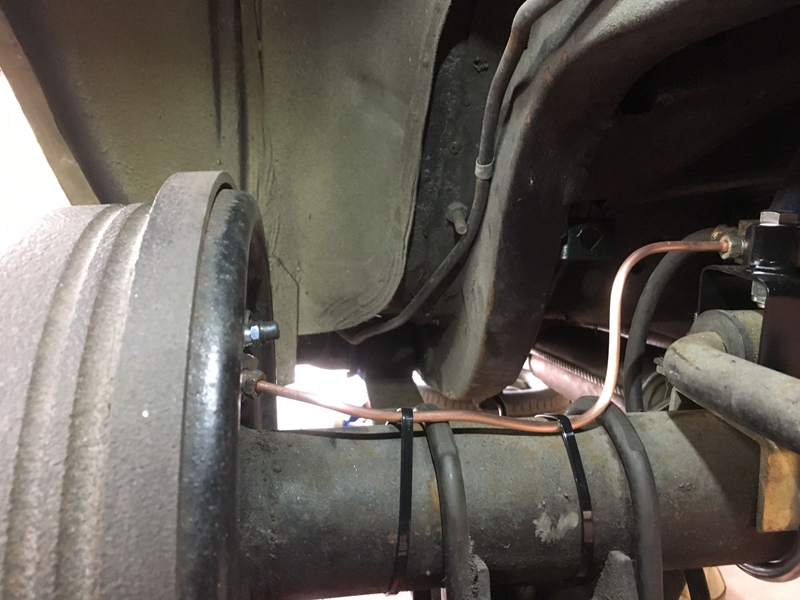
Then accross the rear axle:
And finally onto the passenger side:
We then made a small tab that the other end of the brake hose will attach to and secured it to the chassis:
Then fitted the hose to it and joined the metal hard line back up to it:

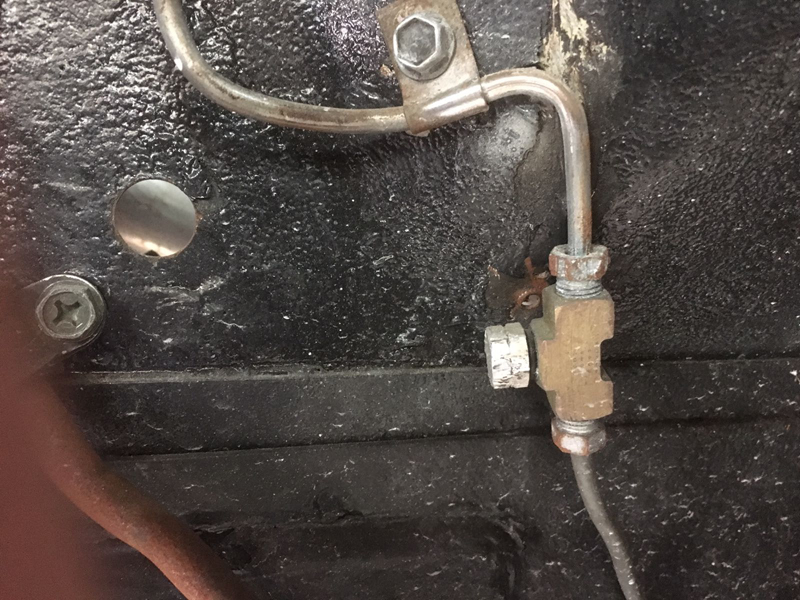
This was the front brake line set up, a proportioning valve was fitted into the lines and just hanging on the lines:
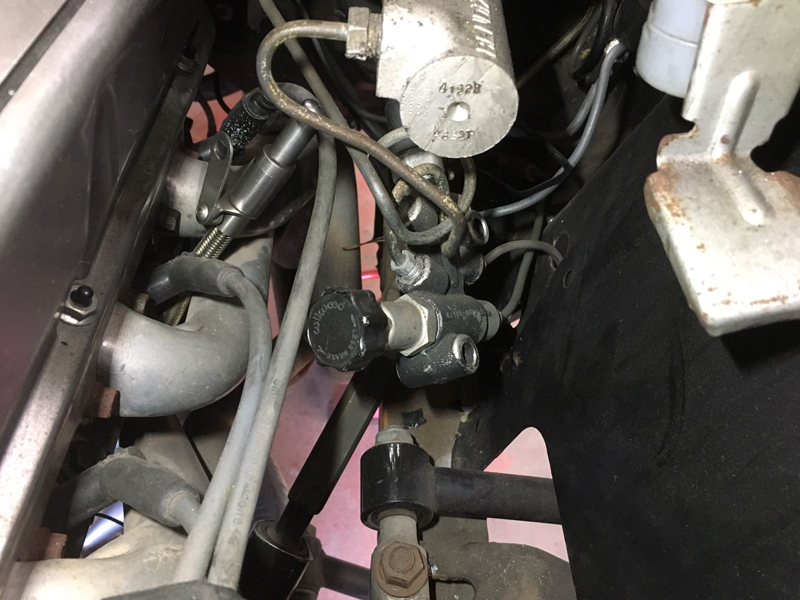
There was a joiner section in the driver's front hard line with a blanking plug with a rubber seal in it to stop it leaking and the line was rubbing on the wheel on full lock:
We removed the proportioning valve to find that someone had flared the metal lines with the wrong style flare and this had damaged the sealing face of the valve:
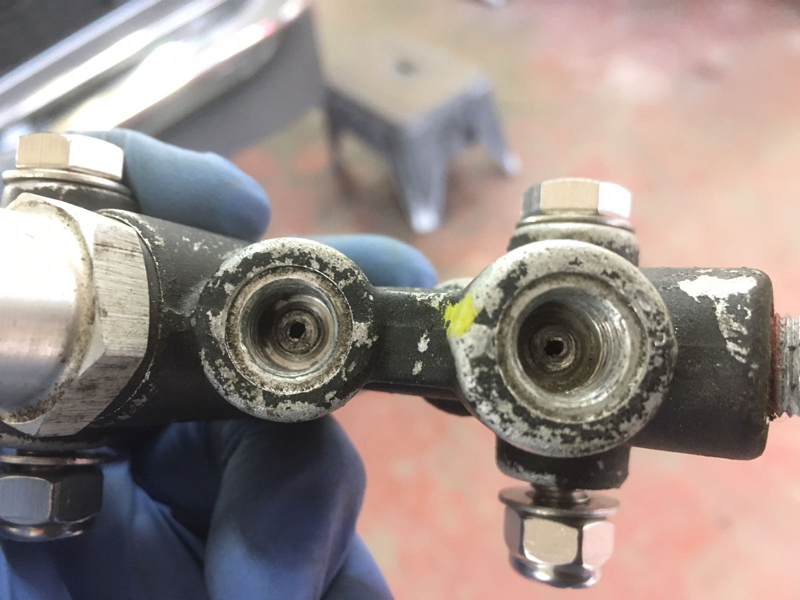
So we had to replace the valve:
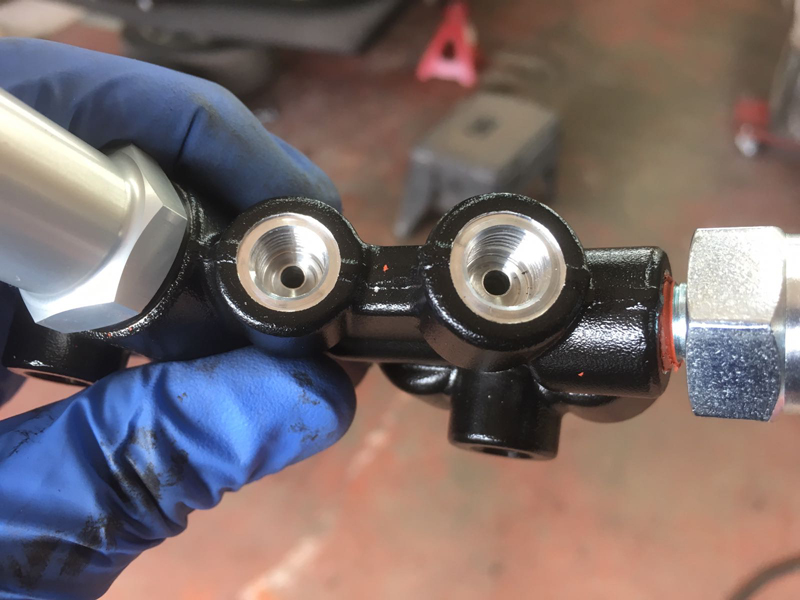
This is how the outlet ports should look:
We replaced the metal line in the driver's wheel arch so that it was clear of the wheel on full lock now but the fuel hard line was still rubbing:
So we re-designed the line using some wire and clamps:
And then made a metal version which will clear the wheel on full lock:
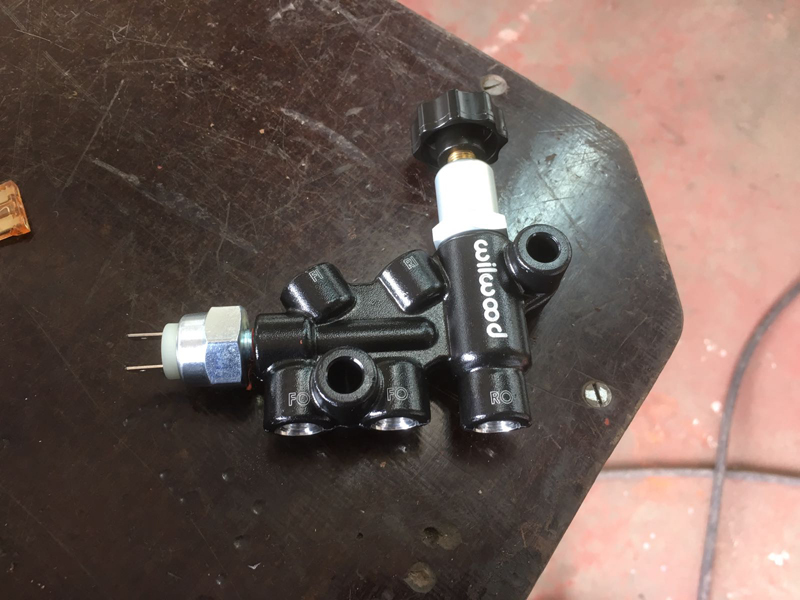
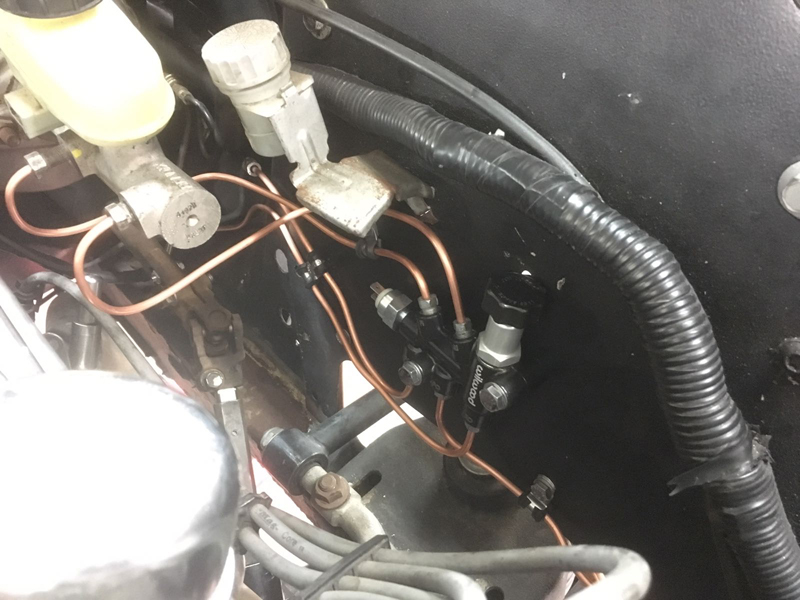
We then mounted the new proportioning valve to the inner wing and re-made all the lines that run to and from it so its neater and that they all have the correct ends on them:
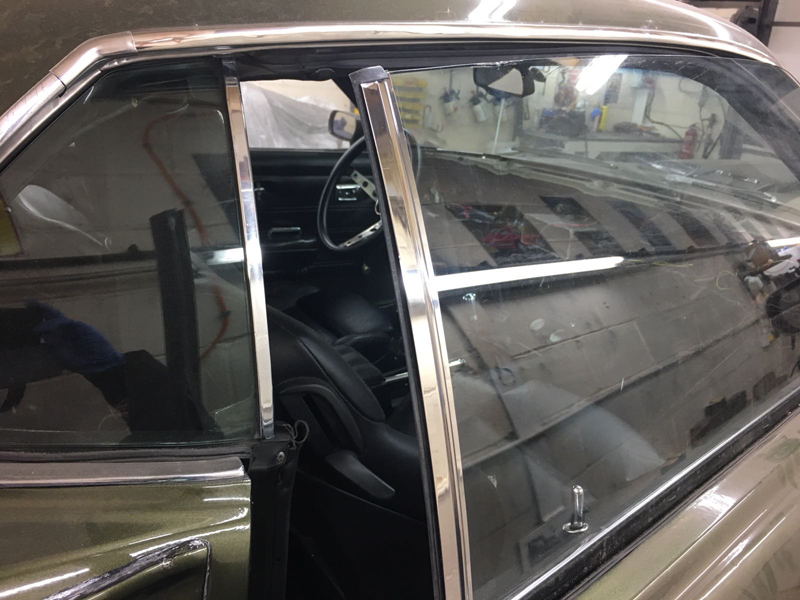
With the braking system complete we had another small piece of trim to install that was missing, the bonded on moulding that attaches to the door glass on the passenger door:
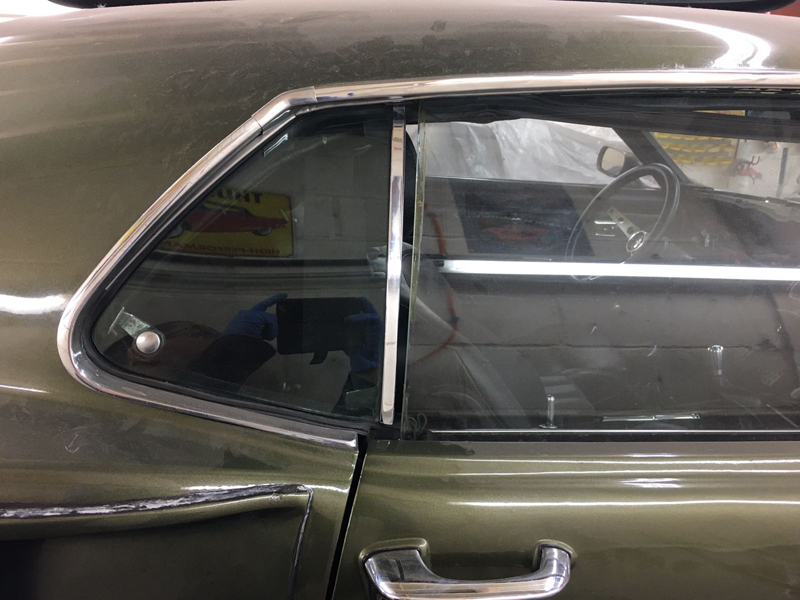
We ordered a new moulding, rubber seal and a bonding kit to bond the moulding onto the glass:

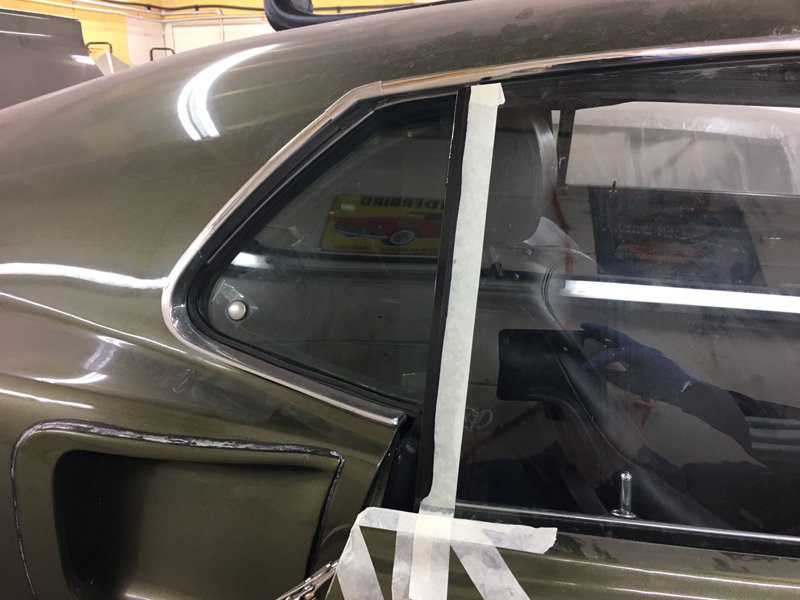
First was to mask up the edge of the glass and apply the bonding primer to the glass:

We applied it to both sides and the back edge of the glass:
And then the inside of the moulding itself:
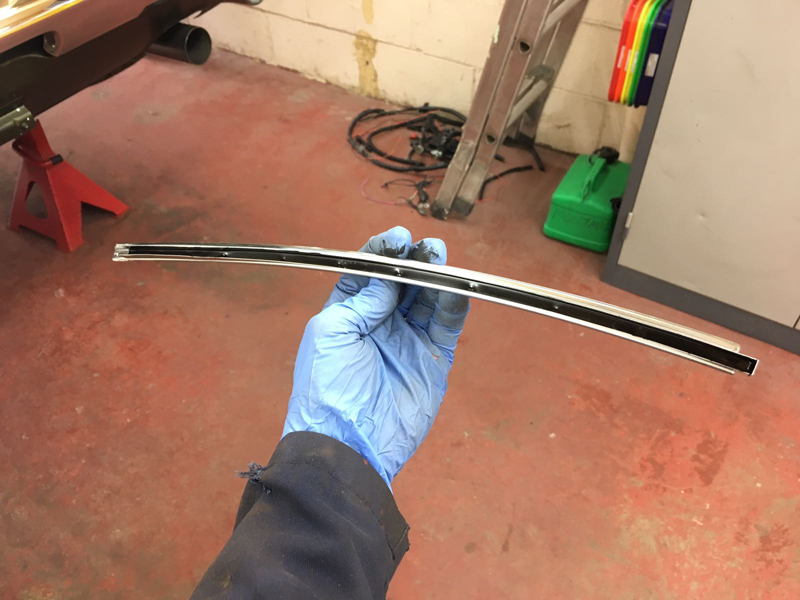
Then applied a thin bead of the bonding agent onto into the moulding and then stuck the moulding onto the glass:
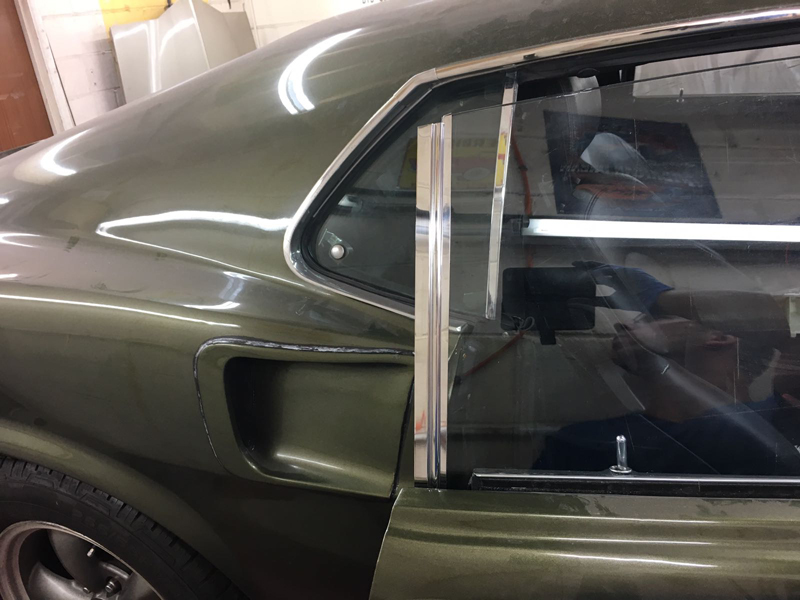
Once the moulding was on the glass we install the new rubber seal into the moulding:
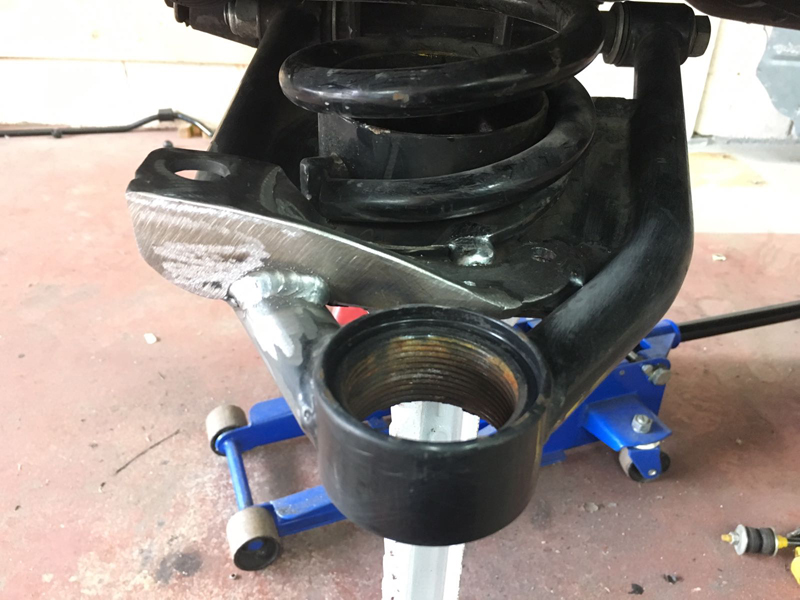
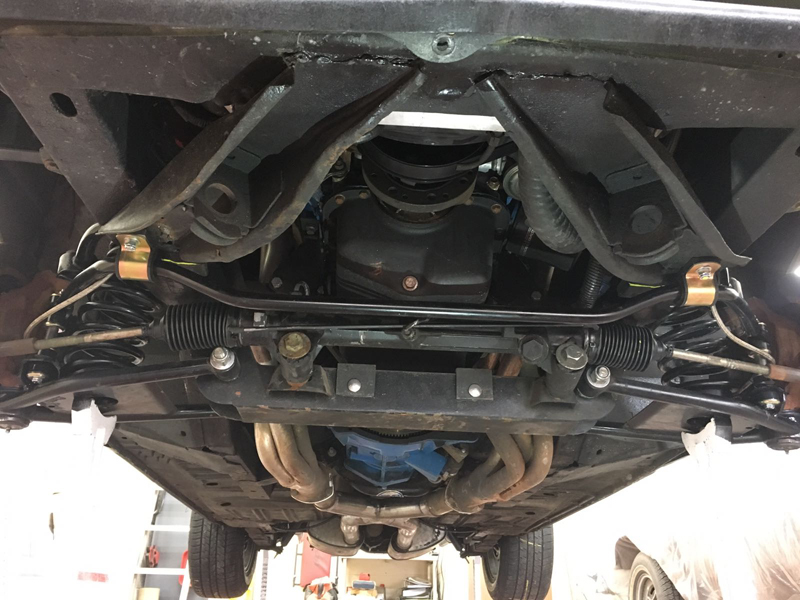
With the previous task complete we has to address a more involved task. Someone had converted the entire front suspension and steering set up to an aftermarket Mustang 2 kit but when they did it they never install a front anti-roll bar:

We ordered a front anti-roll bar kit that works with these Mustang 2 front end kits but the lower arms that were on the car had the wrong attachment on them for this roll bar kit:

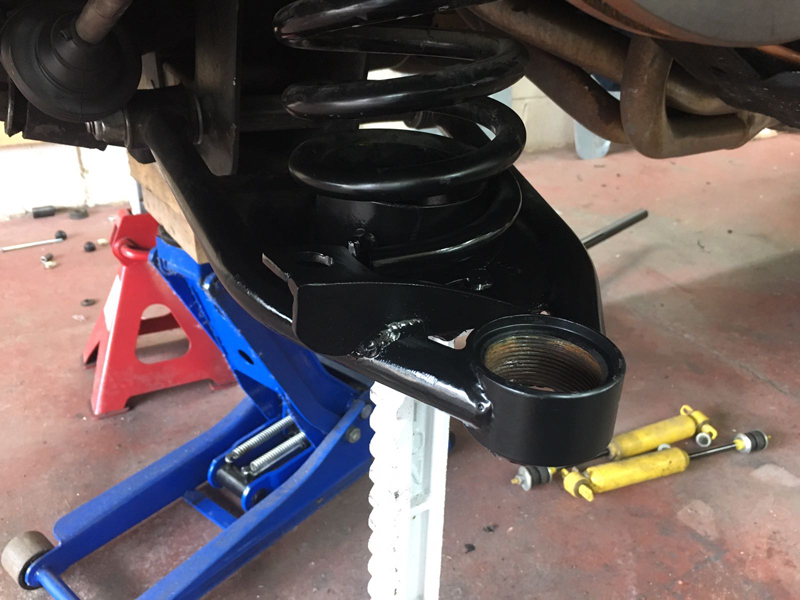
So we dropped the lower arm down:
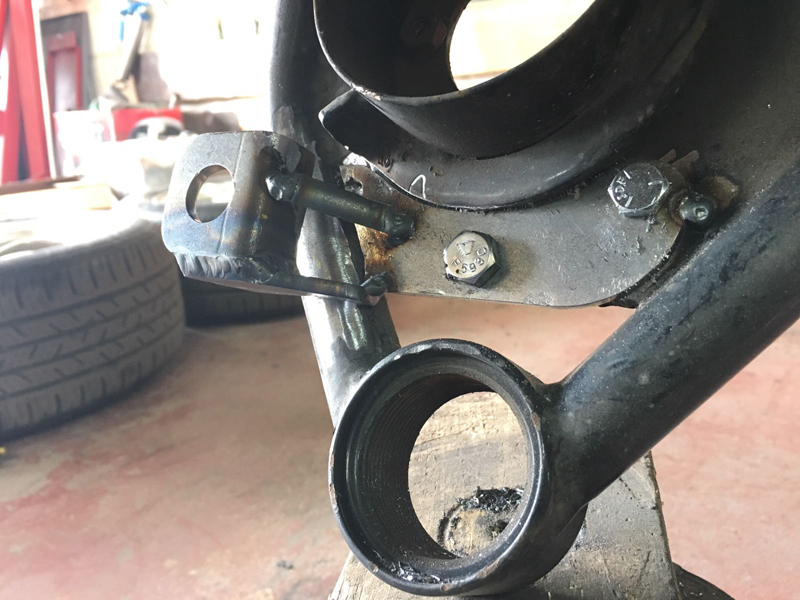
Then removed the ball joint to protect it and set about cutting the incorrect bracket off the arm:
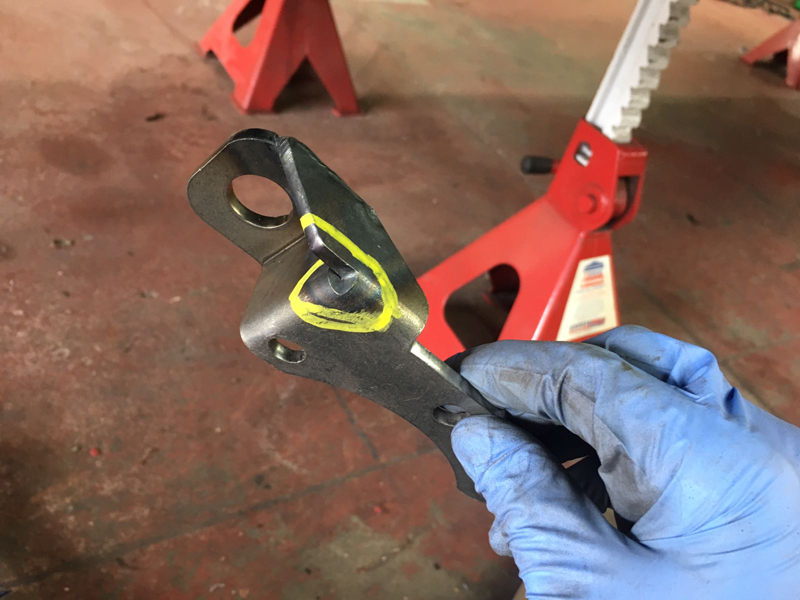
With the wrong bracket out the way we could trial fit the new bracket but as you can see the bracket doesn't quite fit these style arms:
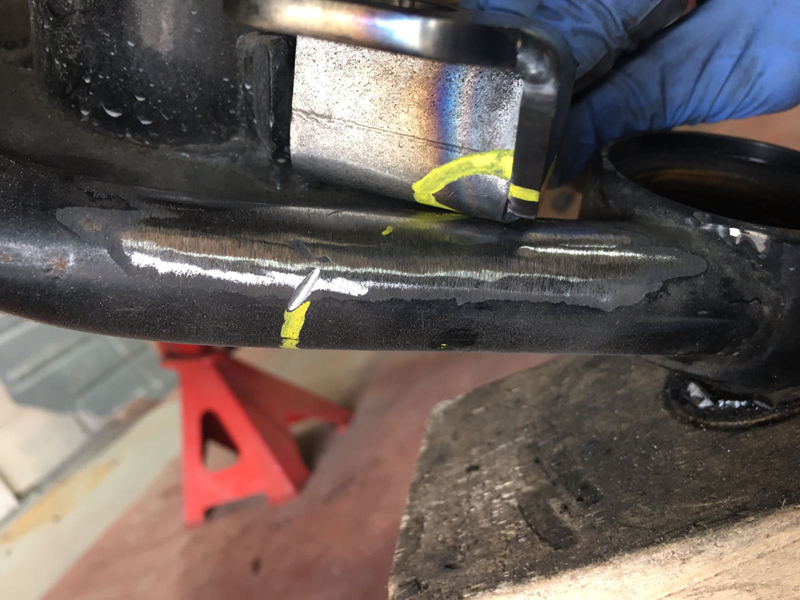
We marked how much material of the new bracket would need to be removed:
Then cut it out and bolted the bracket in place to make sure it fits:

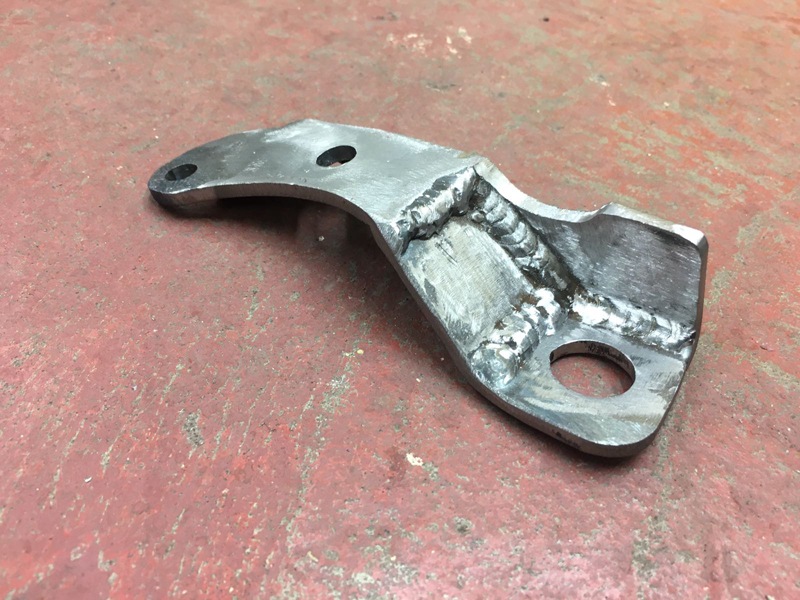
Happy with the fitment of the bracket, we welded in a small support piece onto the bracket to stop it moving since so much material was cut away:
Then removed the bracket from the arm and modified the bracket and strenghtend it back up:

The bracket now has its strength back and will bolt straight onto the suspension arm:
We did a final test fit of the bracket:
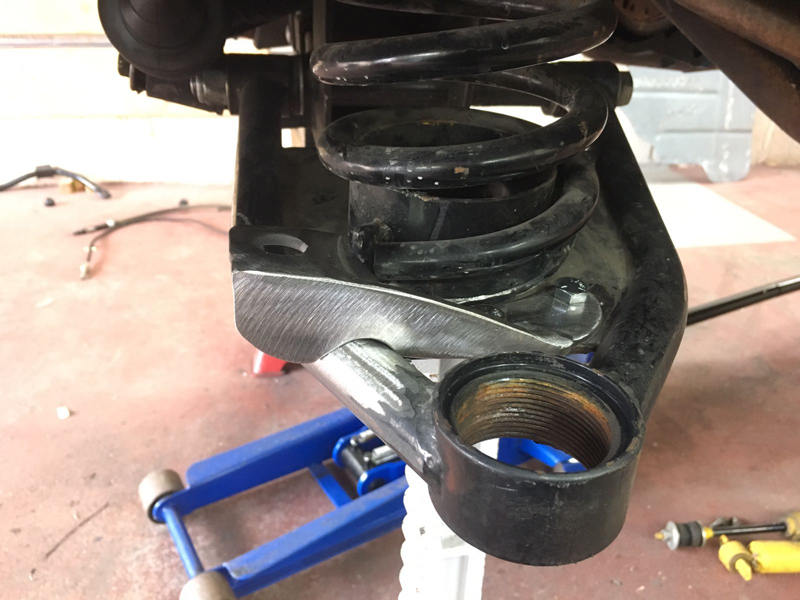
And then welded it to the arm for added strength:
Then finished it off with some black paint for a more factory finish:
We had to do the same to the other side then with the arm side of the install complete we had to address the chassis side. The kit comes with these U shaped bolts that need to be installed in the chassis:
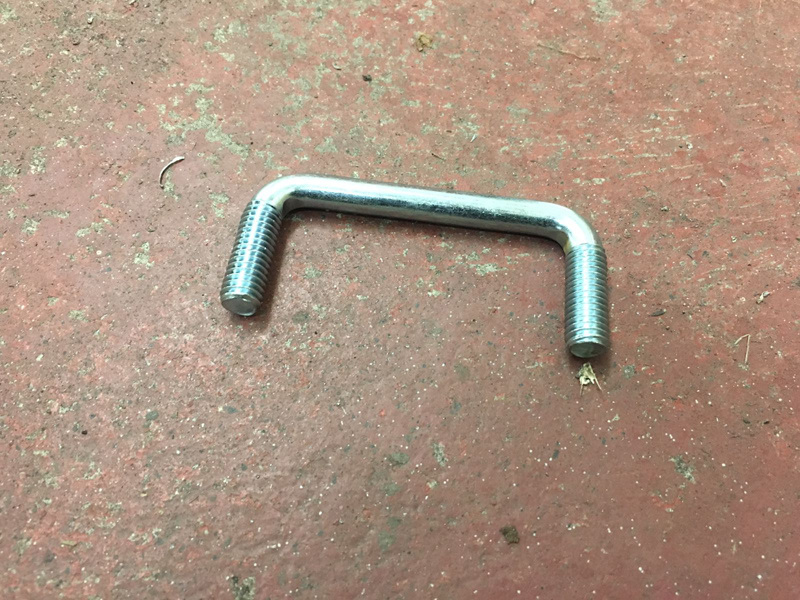
First we did some measurements as per the install kits instructions and then drilled 2 holes:
Then fed the U bolt through the chassis:
With both U bolts in place we could mount the new front anti-roll bar up to the chassis:
And then attach the end links onto the lower suspension arms:
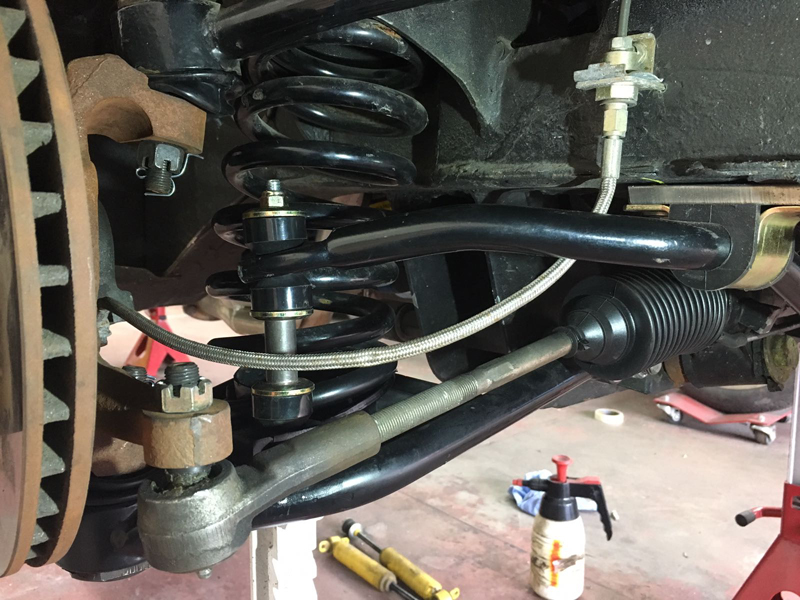
The upper and lower ball joint dust boots on both sides of the car were all split:
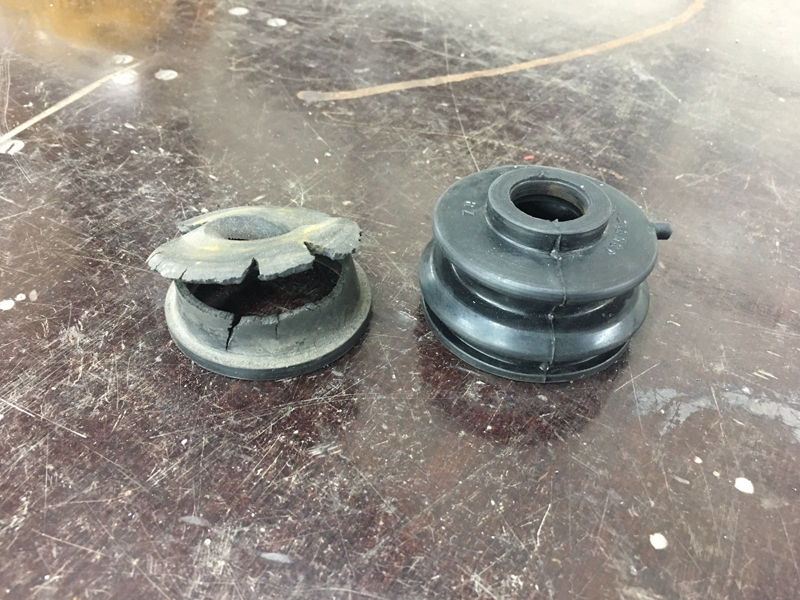
So whilst working in this area we replaced the boots with new ones:
Another thing that was missing from this car was the passenger front wing, rear splash shield:
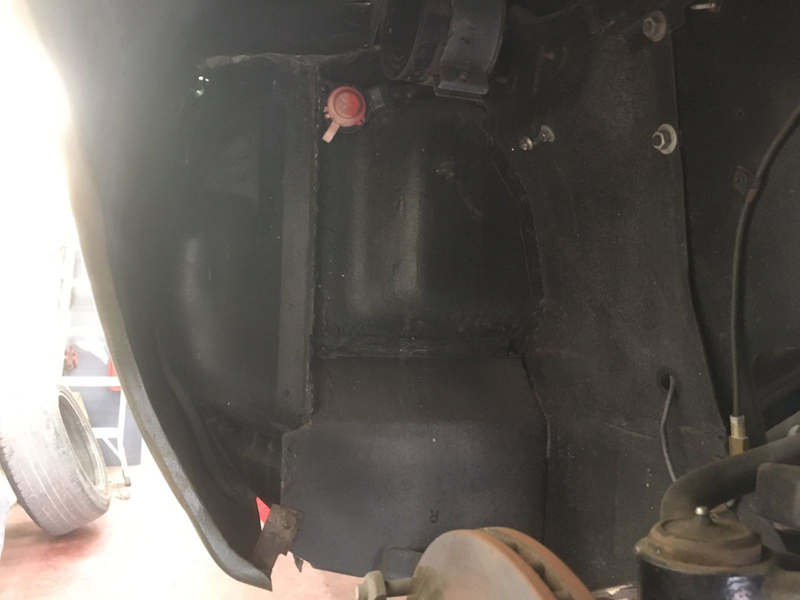
Brand new splash sheilds are available but only as a set of all 4 and quite expensive, so we sourced a good used item for this side and fitted it:

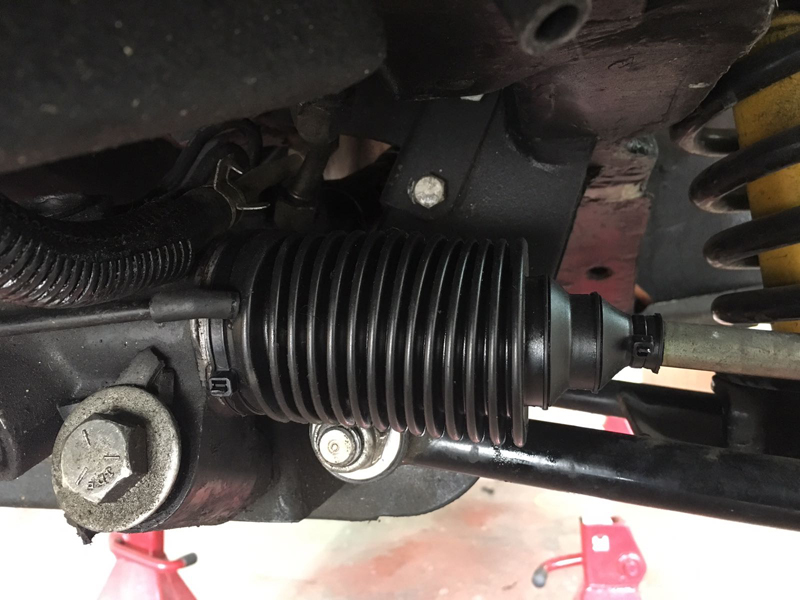
Next we had to address the issues with the steering, first was the steering rack boots that were torn:
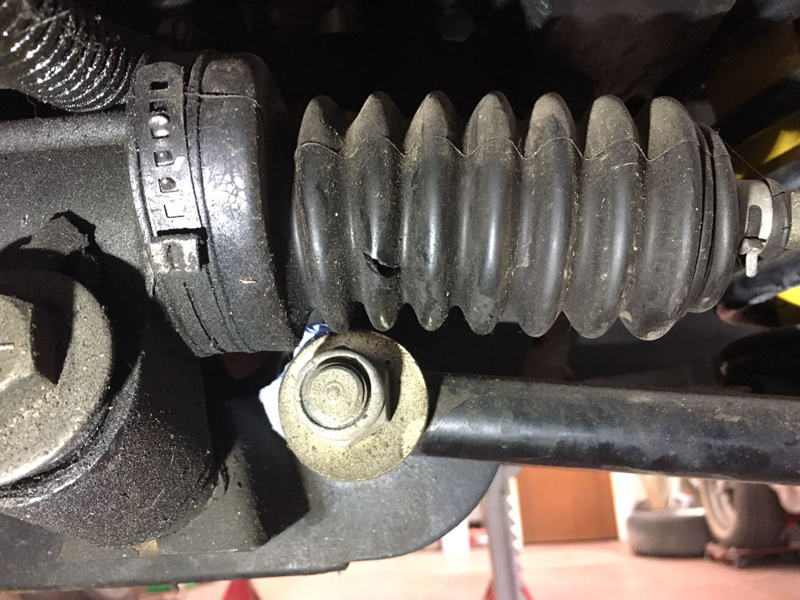
We replaced both boots with new ones:
Also the washer on the driver's side lower suspension arm mounting bolt was the wrong size:
So we replaced it with the correct one to match the rest of the washers:
The steering rack mounting bushes were completly worn:
So we removed the old ones and cleaned out the holes in the rack for the new ones to go in:
We were supplied with new polyurathane rack mounts:
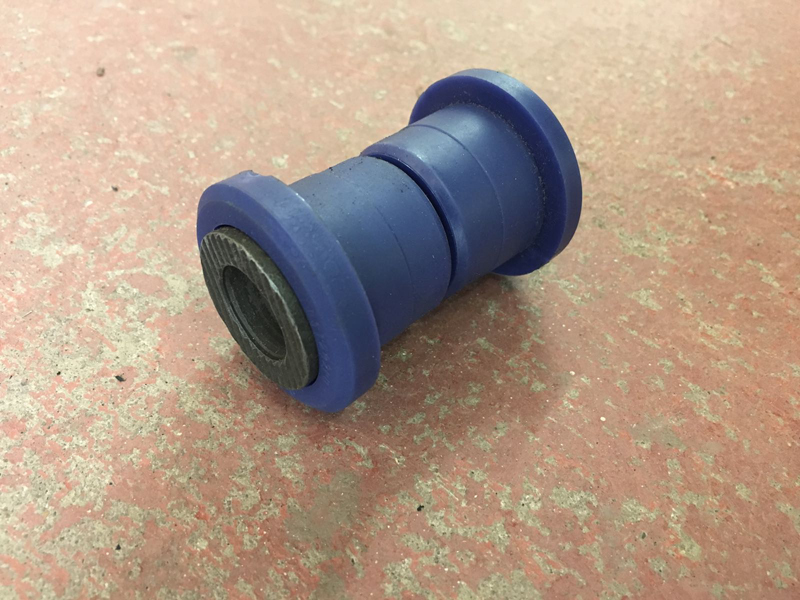
Which we installed in the rack:
Next up was the mess of a lower steering column. This was one of the most dangerous things on this car that needed addressing:

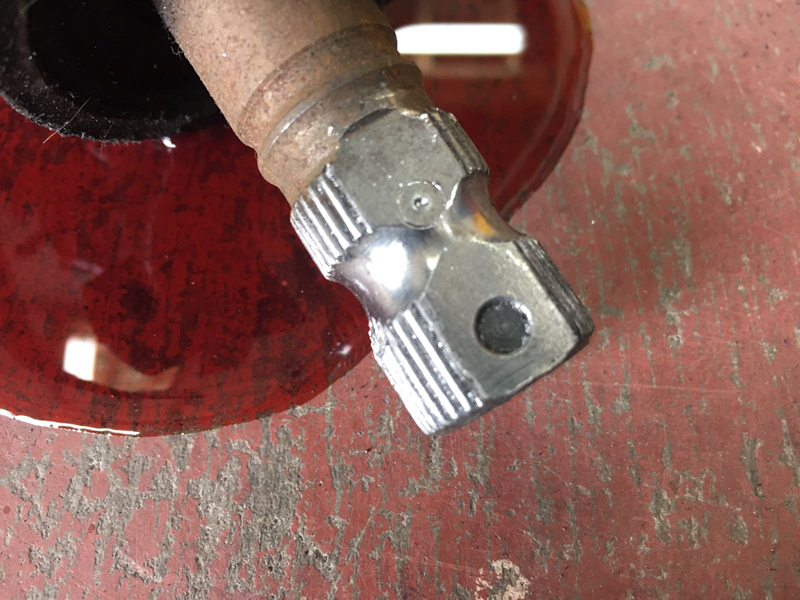
The lower column was made from a mismatch of cobbled together, ground down and chopped up parts from several different cars:

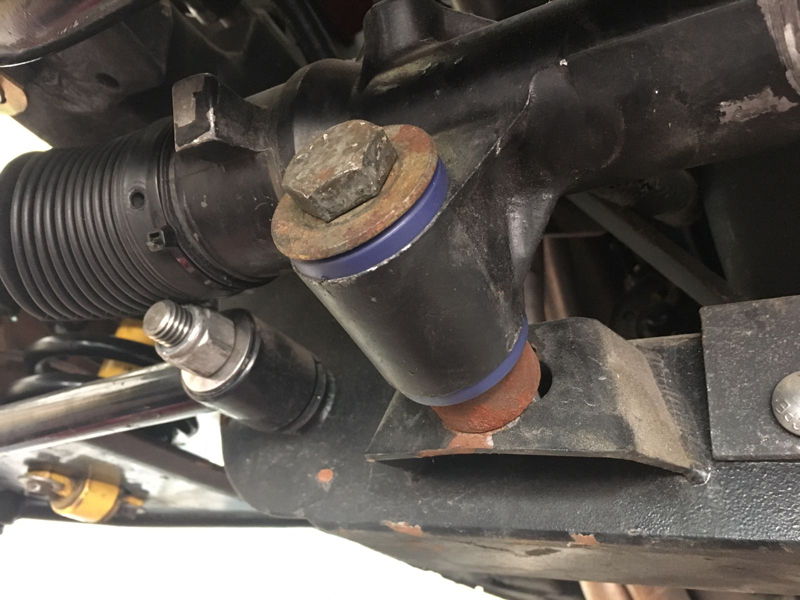
This is the part that goes onto the steering rack, because it was the wrong one someone just ground out some of the splines and hammered it onto the rack:

The pinch bolt that clamps it onto the rack had been cross threaded into it and wasn't tight because it had pulled the thread out too much:

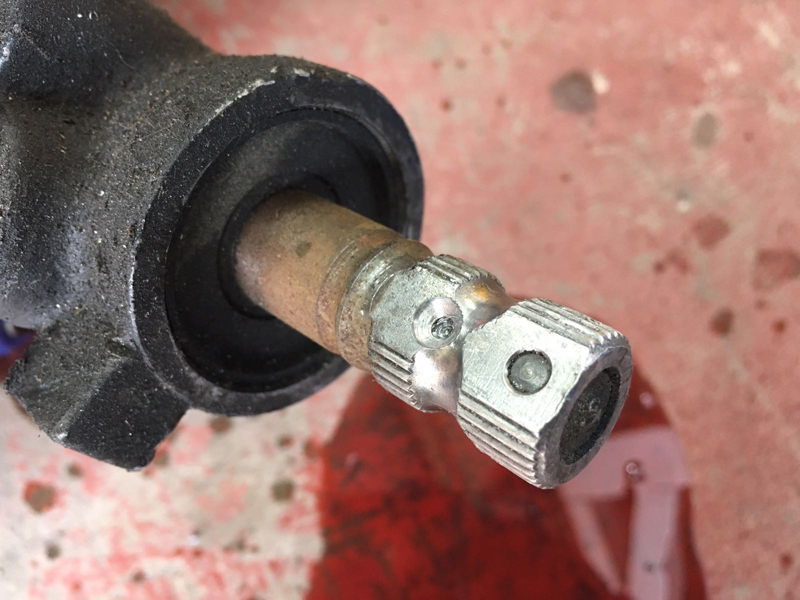
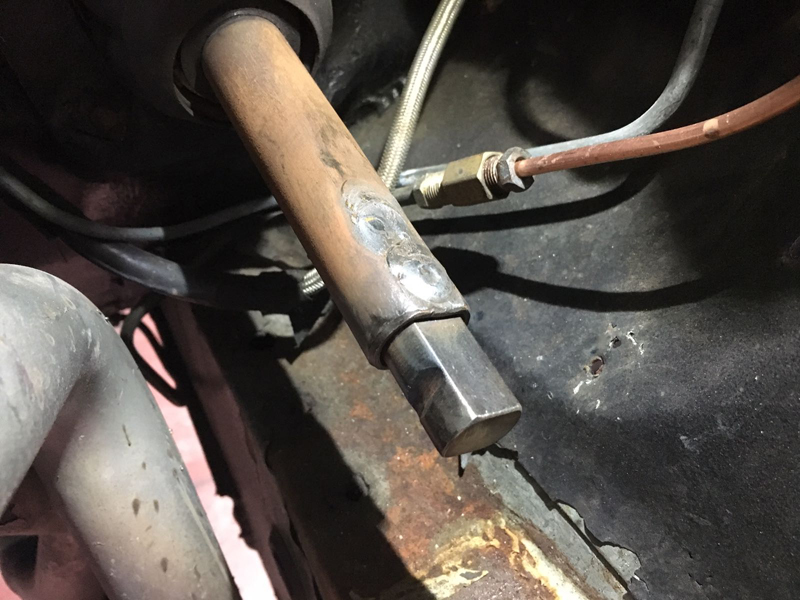
Someone had ground the end of this bar down to make it fit into the upper column:

The lower column was too long actualy causing the upper U joint to bind:

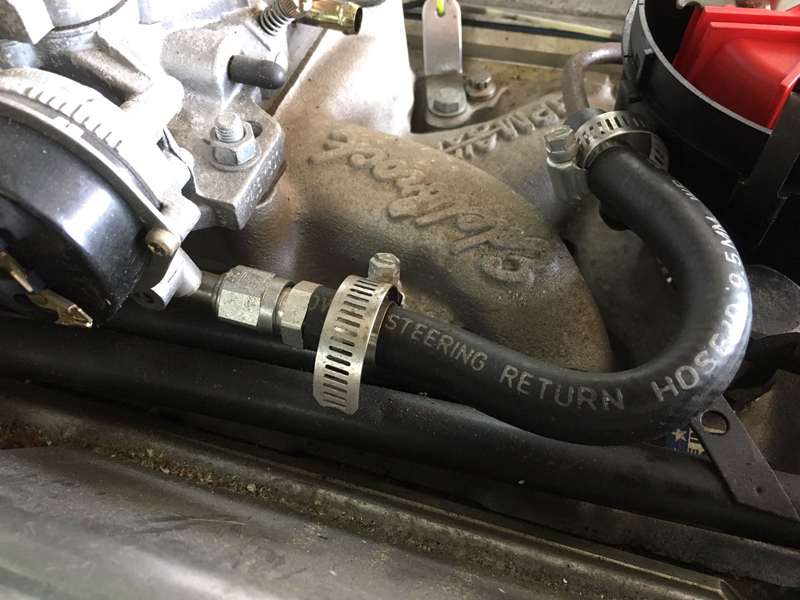
We had to remove the rack to get the column out as it was too long and also the high pressue power steering hose was leaking and had the wrong fittings in it:

Someone had made a replacement high pressure line from a braided hose with an assortment of fittings which was causing leaks:
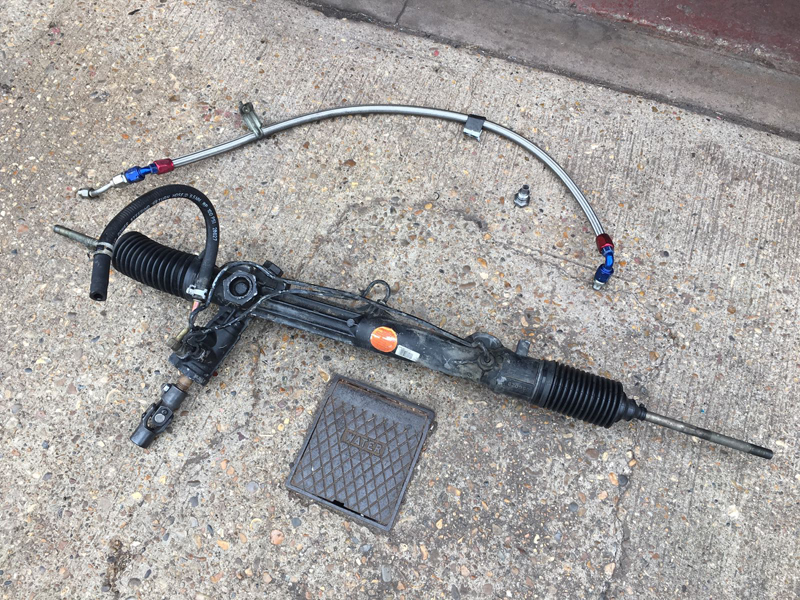
We took the rack to a local hydraulic specialist who fabricated some proper hoses for it which wouldn't leak:

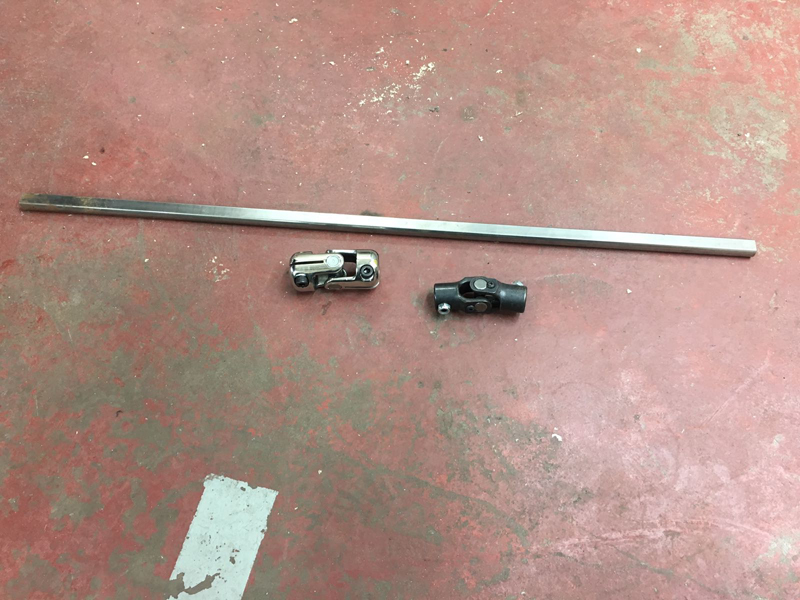
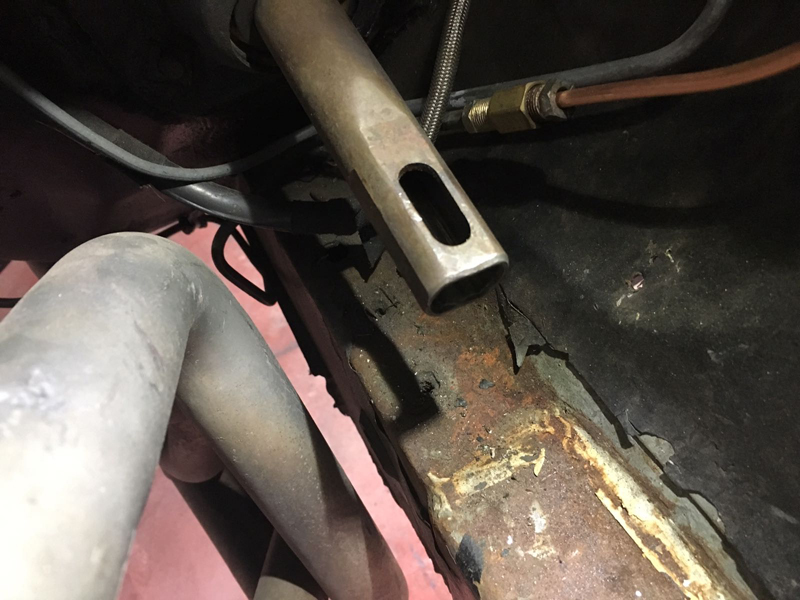
With the power steering hoses sorted we set about fabricating a new lower column from the correct parts:
First we located the final fit location of the lower U joint on the rack and marked where the locking bolt will hit the rack:
Then drilled it lightly so that the pointed tip of the locking bolt will securely lock itself in the rack:
We then installed the lower U joint onto the rack then installed the rack back onto the car:
Next we had to tackle the lower part of the upper column. This is what we had to work with:
We cut a short section of the new steering column D bar to length and inserted it into the upper column and then welded it in there:
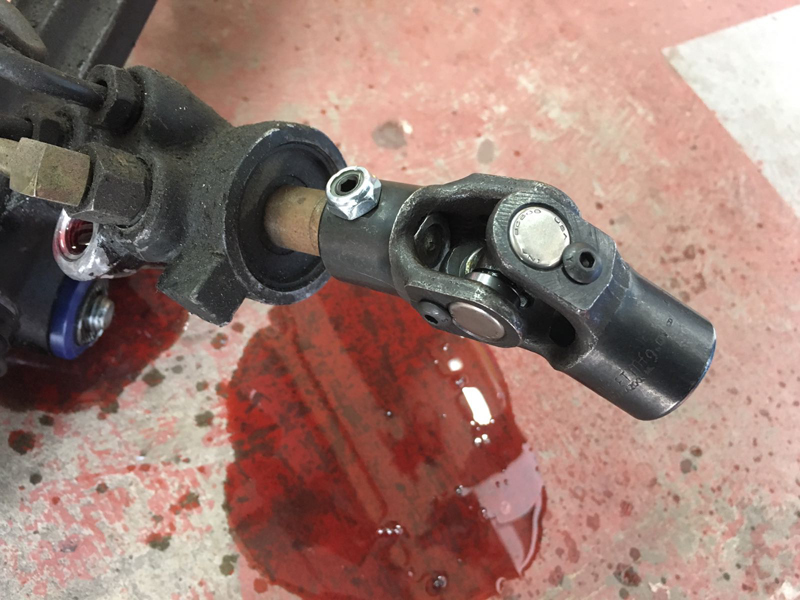
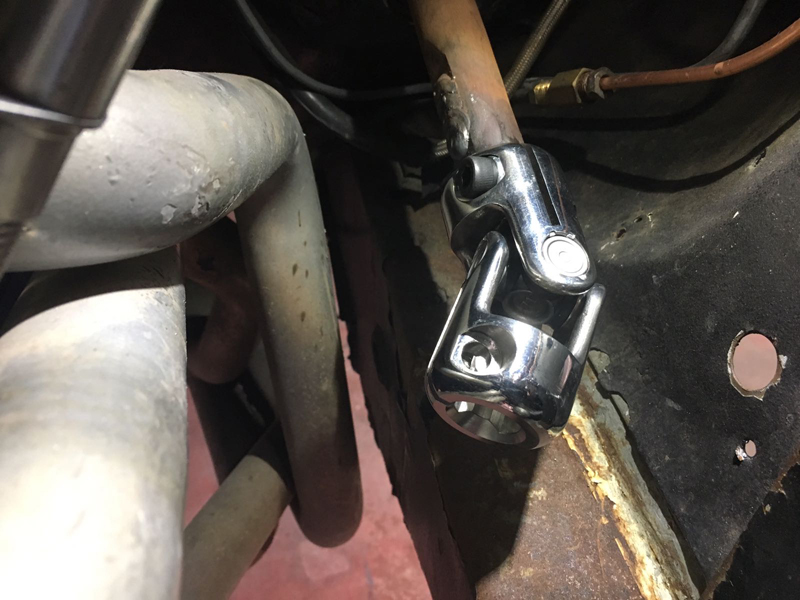
This let us install the new upper U joint onto the bottom of the upper column:
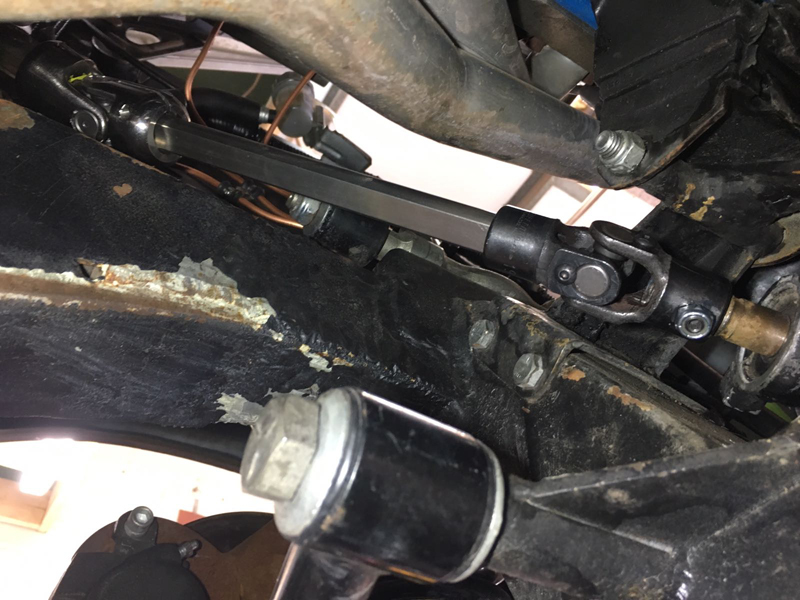
We then measured the distance between the 2 U joints and cut a section of the D bar to length:
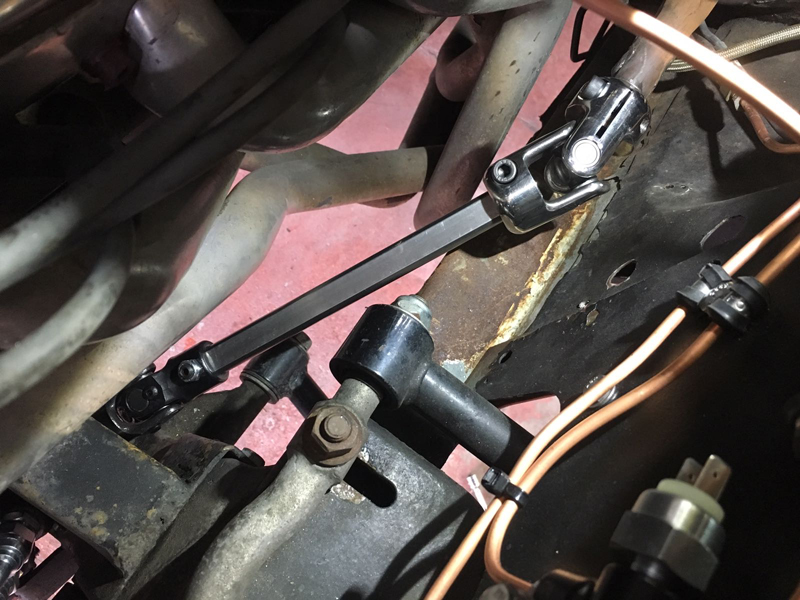
And inserted it between the 2 joints and tightend it up. The new steering column is now complete and operated as it should, smoothly and safely:
All that was left to do on the steering was to replace both track rod ends:
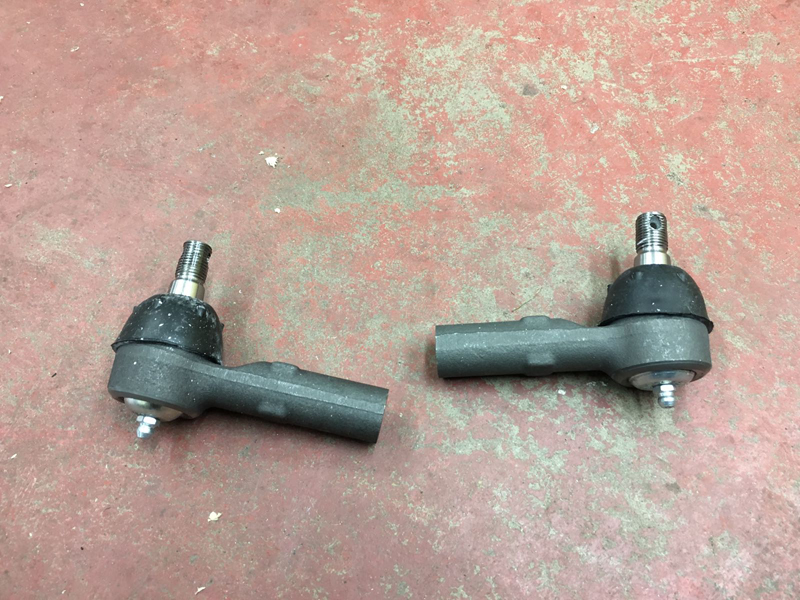
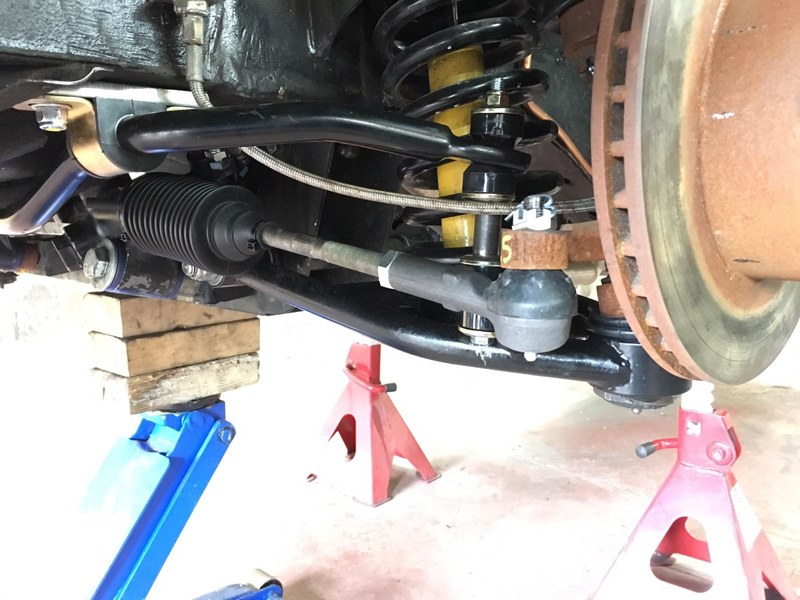
We installed the rack ends onto the vehicle and the split pins to keep them secure:
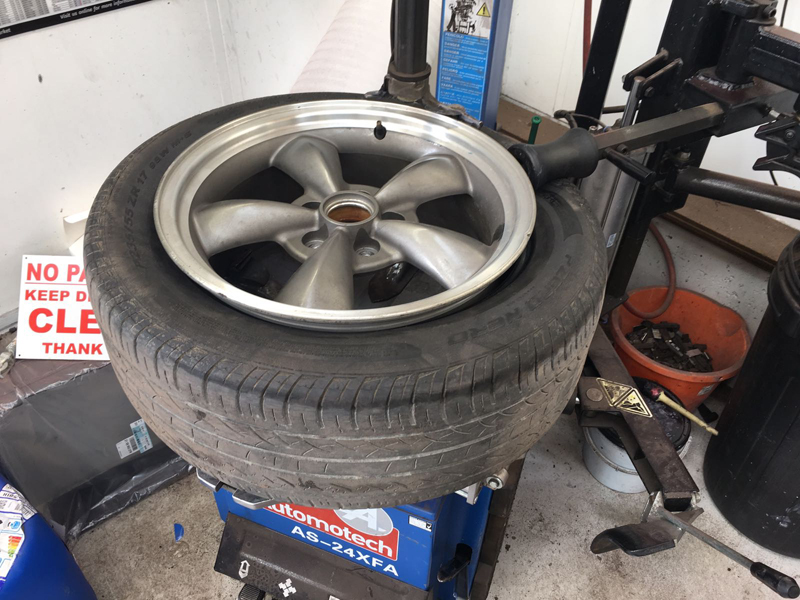
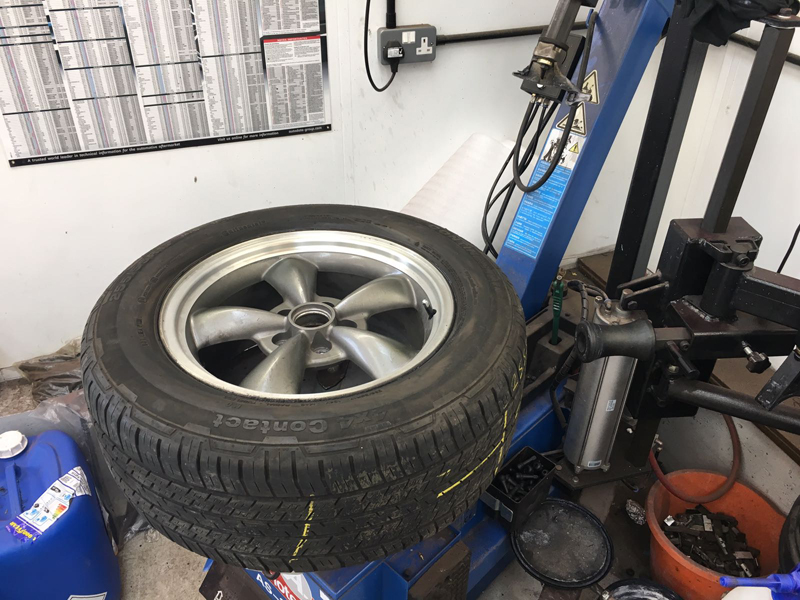
The rear tyres were quite low on tread and very old and perished, so the owner supplied some replacement tyres for the car that were also slightly wider to give the vehicle a more agressive look. We took the wheels and tyres to a local tyre shop to have them swapped over:
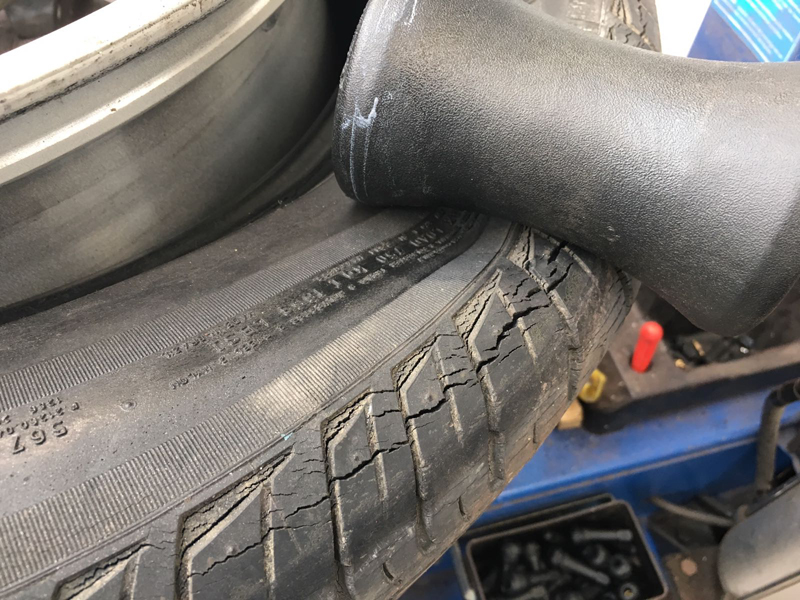
Here you can see how perished and split the old tyres were:
The replacement tyres were mounted onto the rims with new valves installed at the same time:
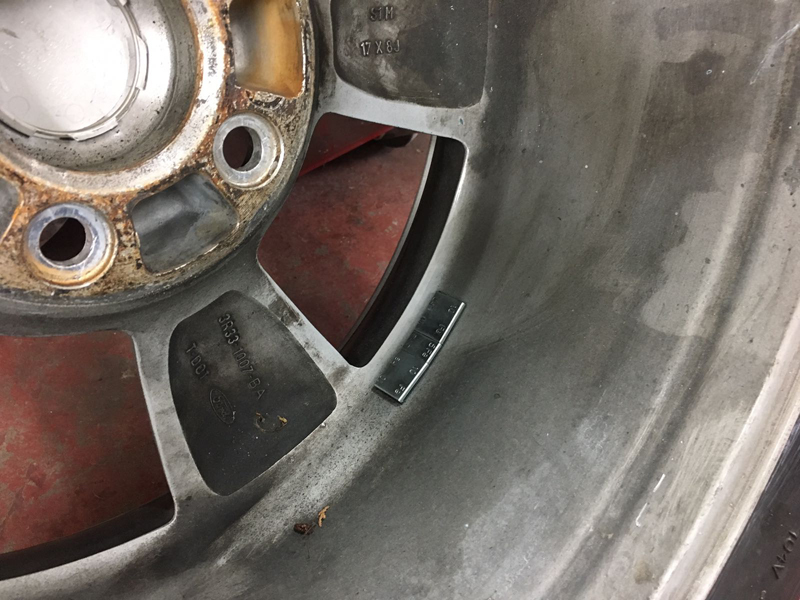
Once the tyres were installed on the rims they were put on the balancing machine:
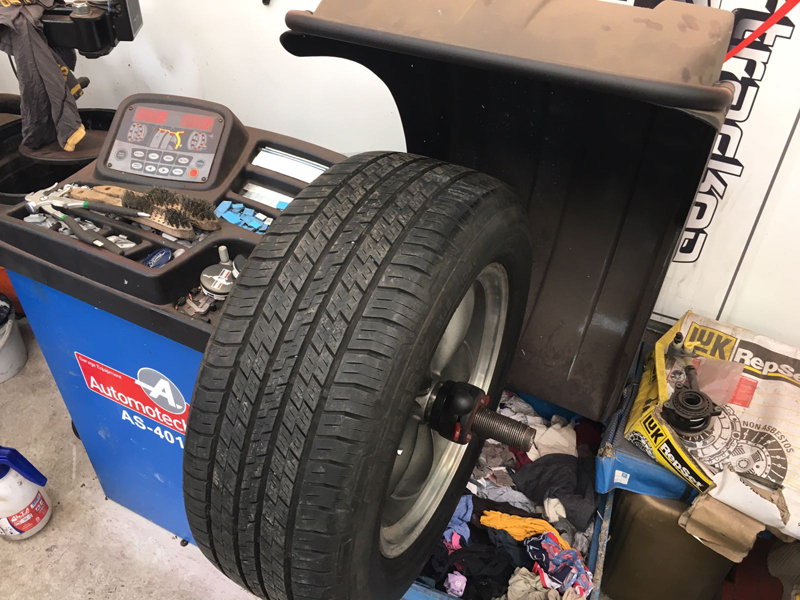
And balance weights added to the wheels where they were most out of balance:
With the tyres now balanced we mounted the wheels back on the car and tigthend them up to the manufactures spec using a torque wrench:
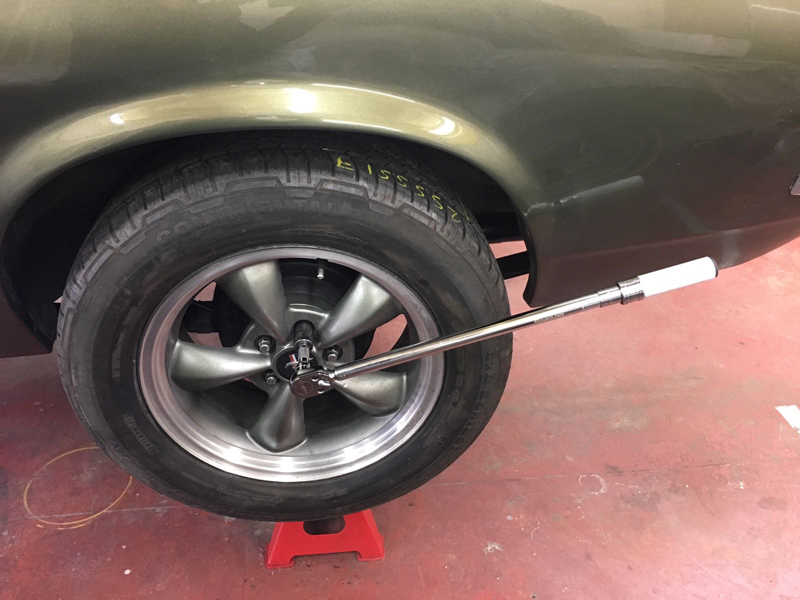
The new tyres fill the wheel arches a little more and look nicer than the old ones:
Next we had to address an issue with the wipers not working. The first thing we noticed was the switch was uplugged, so we pluged it in an operated the wipers and it blew the fuse. We removed the switch and stripped it down and cleaned it out and re-greased it and replaced the fuse. This made the wipers work without blowing the fuse but the switch was worn and the circuit over-ride in the switch kept tripping in and out and also wouldn't operate the windscreen washers properly so we had to replace the switch in the end:
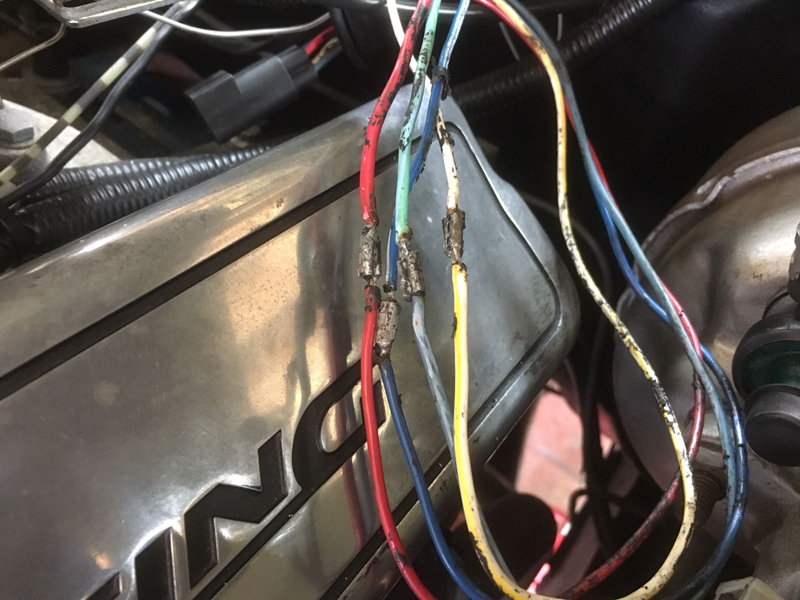
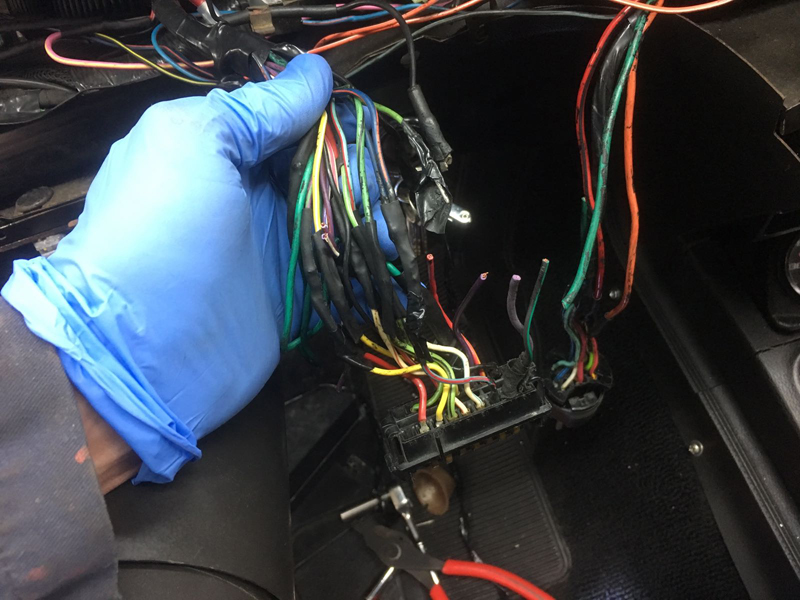
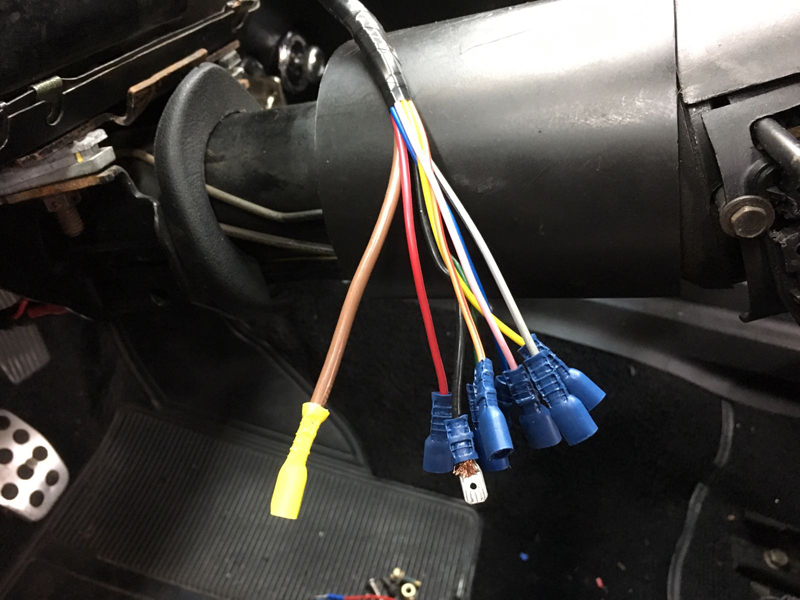
With the new switch in the circuit over ride wasn't tripping out anymore and the washers worked correctly but every now and again the wipers kept stopping. We un-plugged the switch and the wiper motor and tested the wiring to find that 2 of the wires were making contact somewhere in the loom, so we stripped the electrical tape off wiring loom for the wiper motor to find that someone had done previous repairs to the loom and not insualted the repairs causing a short in the circuit which was causing the wipers to stop:
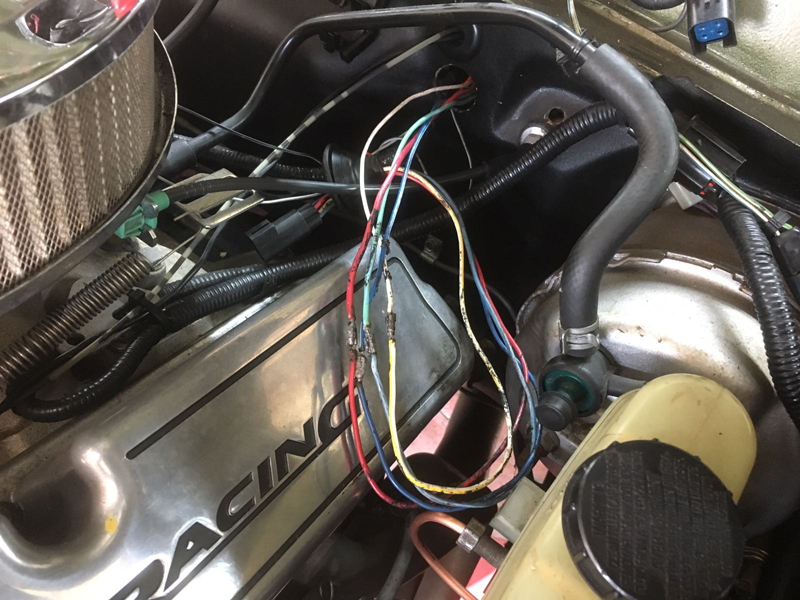
Here is a close up of the wiring. All 4 of these wires were touching eachother. We taped each wire individually and then re-wrapped the entire loom:
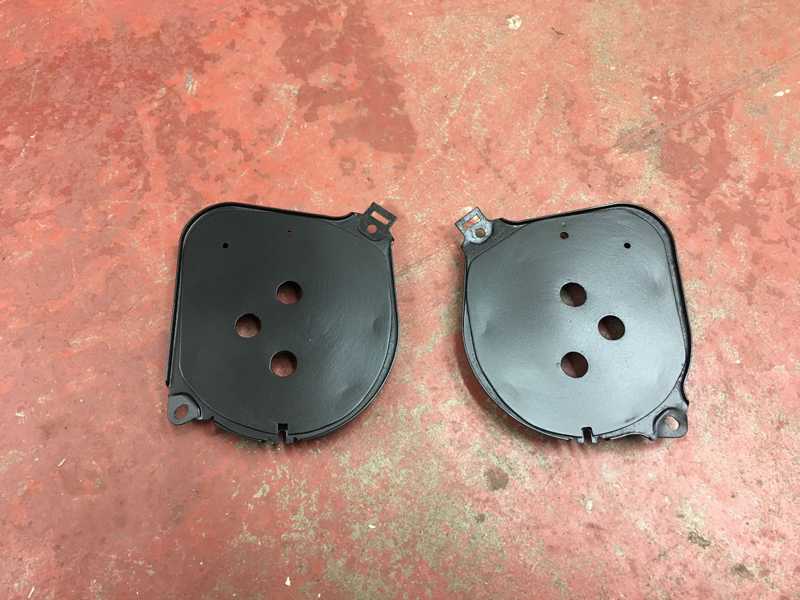
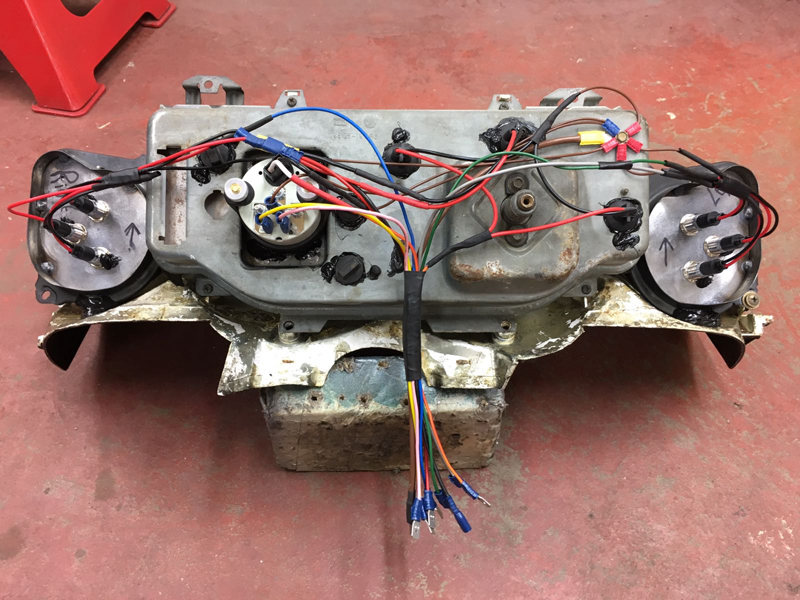
With the wipers taken care of and the dash still in bits we decided to take a look at the dash not working properly, none of the gauges worked at all and only some of the lights worked so we pulled the gauge cluster to investigate:
This was the wiring plug that feeds the cluster, not exactly a good sign:
And this is the printed circuit board on the back of the cluster, something has shorted out and damaged the board:

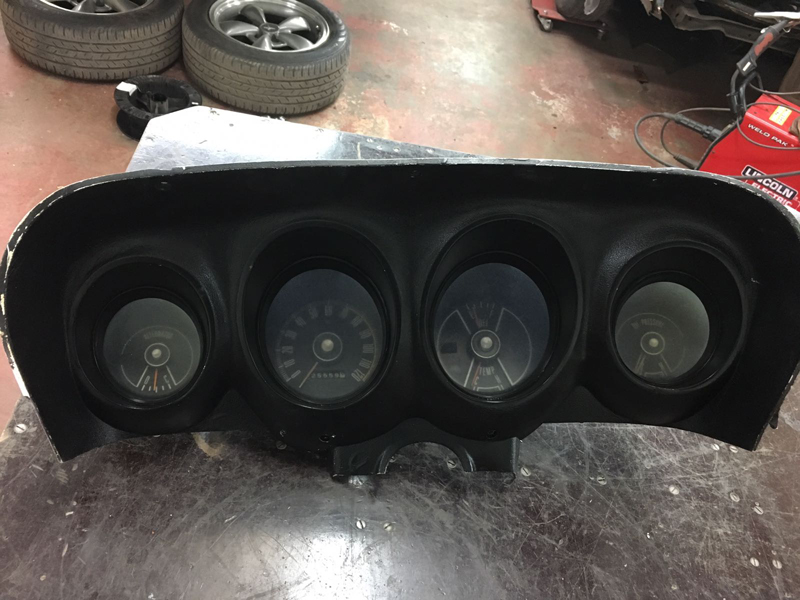
The car already has an aftermarket add on oil pressure gauge and water temperature gauge in the centre console, after speaking with the owner of the car about the problems with the instrument cluster he asked if we could make a custom gauge cluster just incorporating a fuel gauge, speedo and warning lamps, so we agreed. We would be using small fuel gauge and placing it next to the speedo. We used an old oil pressure gauge that we had laying about for mock up purposes:
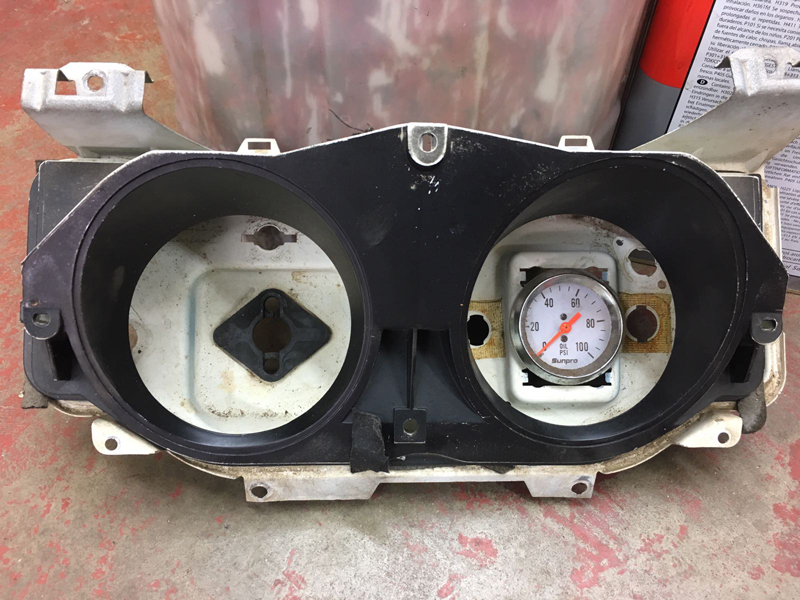
First we fabricated and welded in a plate into the original gauge housing that would support the new gauge. Being that it is not a structural thing and simply just holding a gauge we only added a few welds onto the plate:
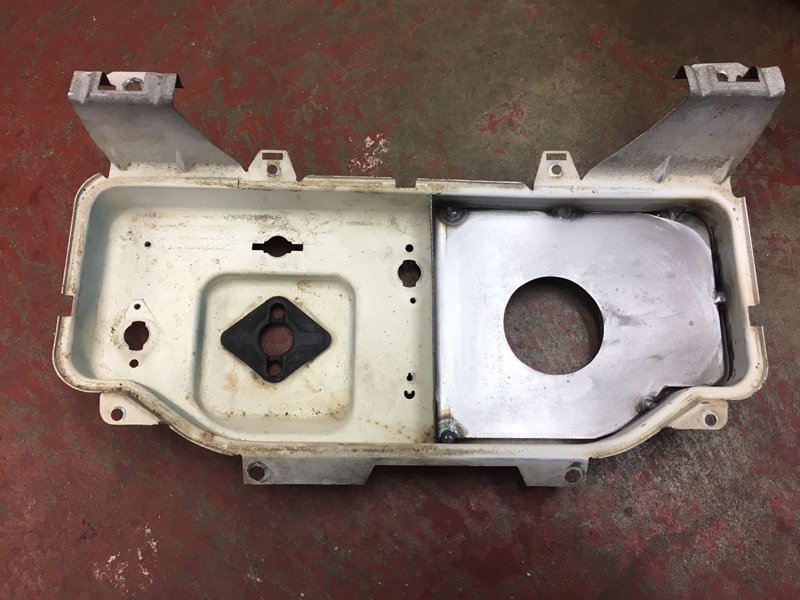
Then filled the rest of the gap with a high strength bonding agent, this will fill all of the gaps and stop light coming through the backing and stop dust and dirt getting behind the cluster lens:
Once the bonding agent had dried we sprayed this half of the cluster satin black:
These are the original side gauges that are either end of the cluster, we plan to add warning lights into these:
Again we fabricated plate to go into the gauge pods and welded them into place:
We ground the welds that penitrated through to the front and tidied them up a little then applied the bonding agent to the rear again to seal them up:

Then painted them satin black:
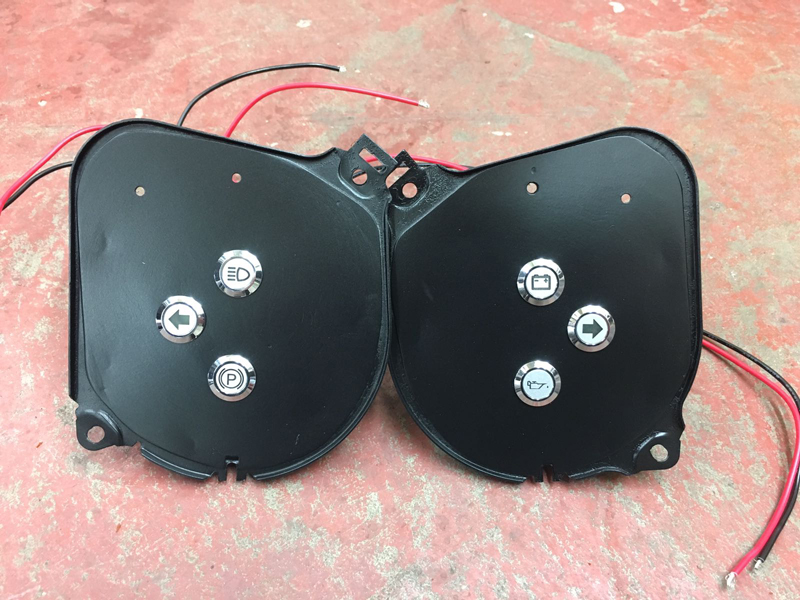
Once the paint had dried we added the aftermarket warning lamps to the pods:
The lenses for the cluster were faded and you could barely see through them:
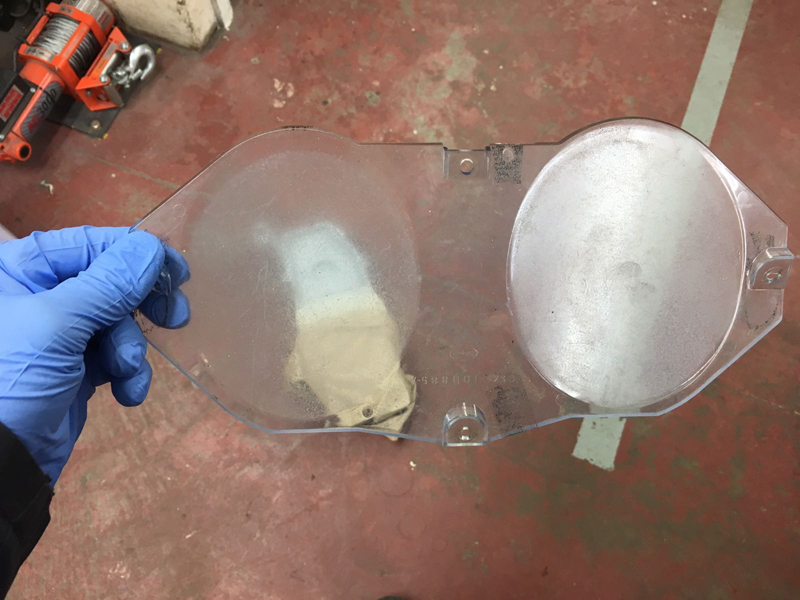
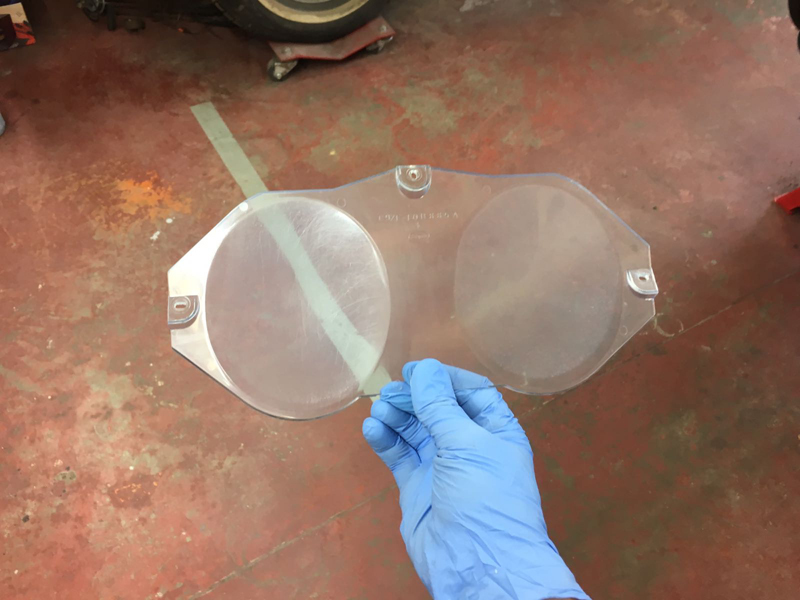
So working to a budget we decided that rather than replace the lenses we would polish them:
This is the fuel gauge that we chose to use:

With all the individual parts of the gauge cluster now complete we re-assembled the whole thing:

Then wired up the rear of it:
Then we cut off the original connector on the car off and worked out which of the wires we would need to run to our moddified cluster and made the corrosponding wiring loom to mate up to the gauge cluster:
All that was left to do now was install the cluster and re-assemble the rest of the dash:
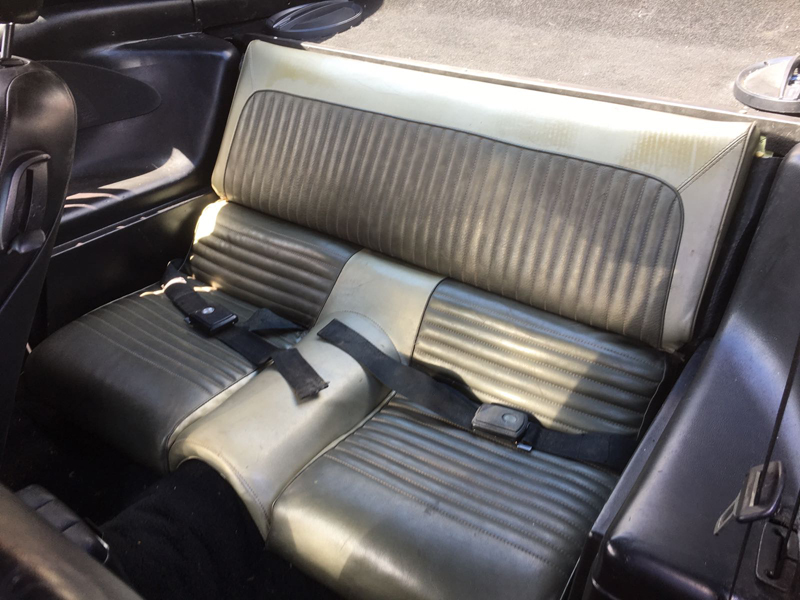
With the dash part of the interior complete there was only one job left on the inside of the car to finish before the interior was completed and that was the back seat. The car originally came into us with no back seat. When we asked the owner where the seat was, he said it was missing when he got the car. So we were able to source a compete second hand rear seat for the car:
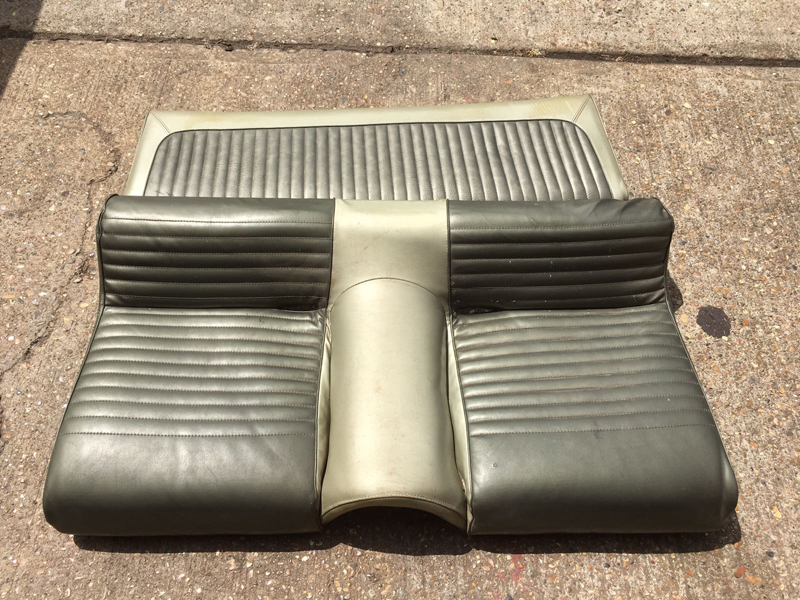
After a quick clean up the seat went straight in, in time the owner plans on having the seat re-trimmed in black to match the rest of the interior:
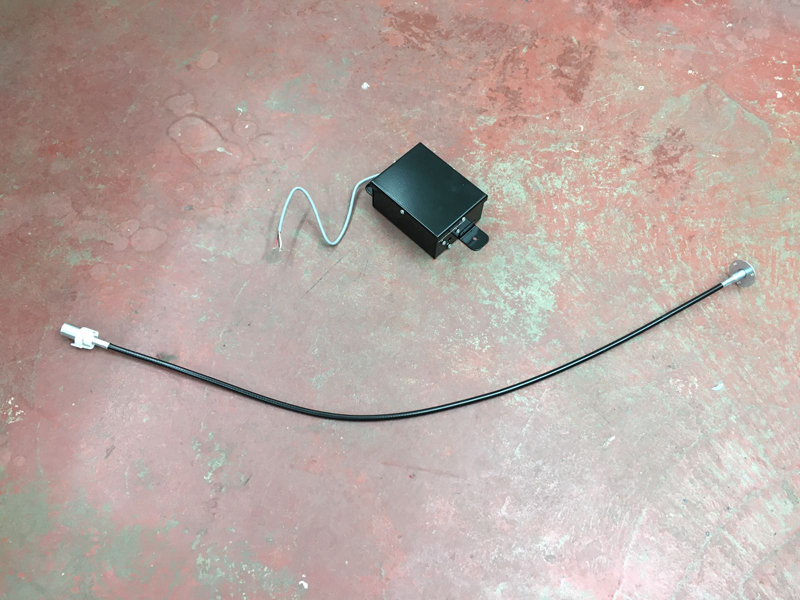
There was one job left to tackle on getting the gauges all working and that was the speedo. The car has a modern manual transmission fitted in it that doesn't have a speedo cable:

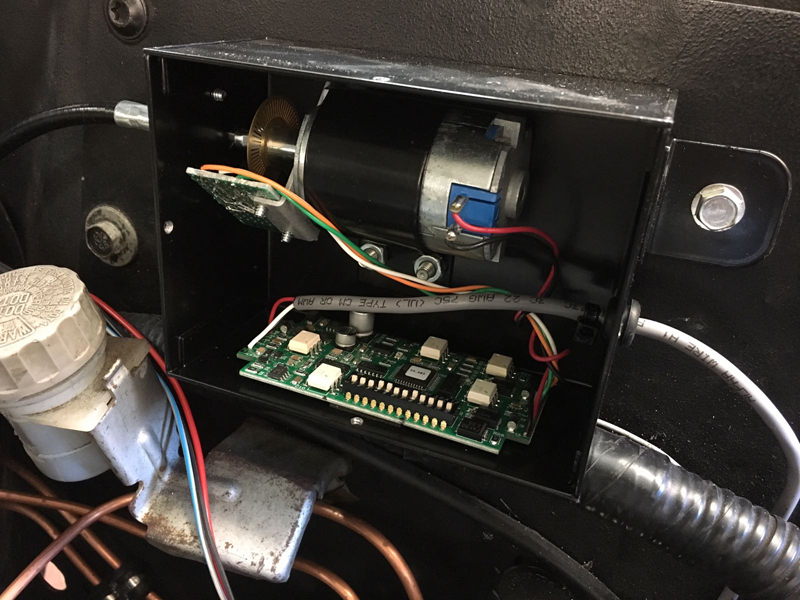
You need a conversion kit that uses the electronic output of the gearbox to send a signal to a control box that uses that signal to spin a speedo cable which connects to the back of the original speedometer, this is that kit:
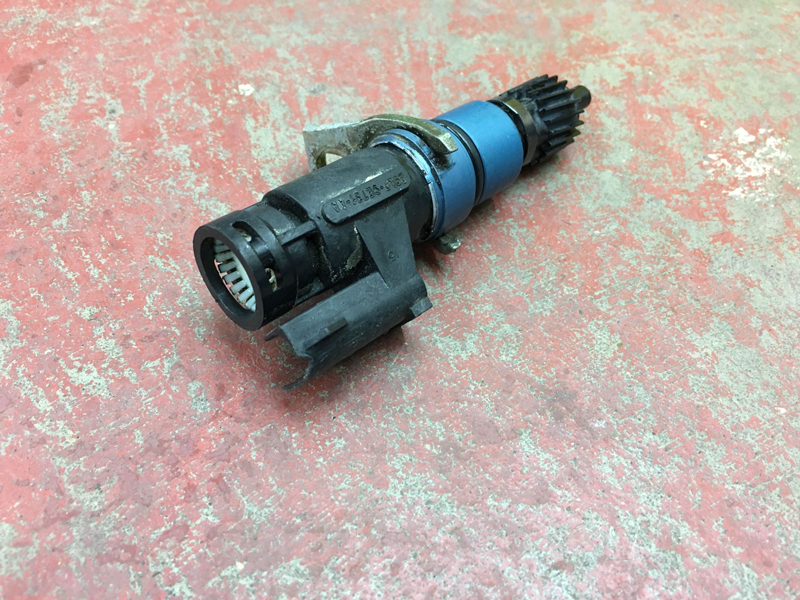
First we has to remove the electronic speedo drive and clean it and replace the seal on it as it was leaking:
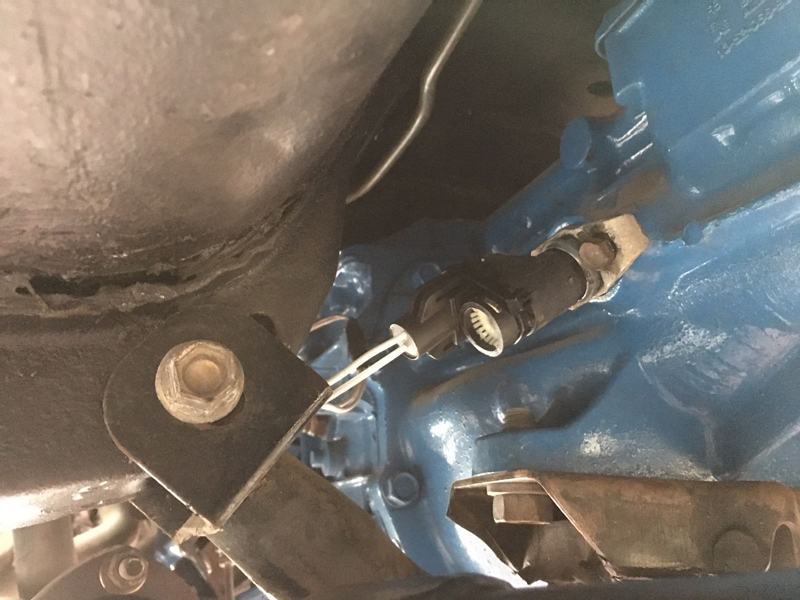
Then run a wiring harness from the speedo sensor up to the control box that will be mounted in the engine bay:
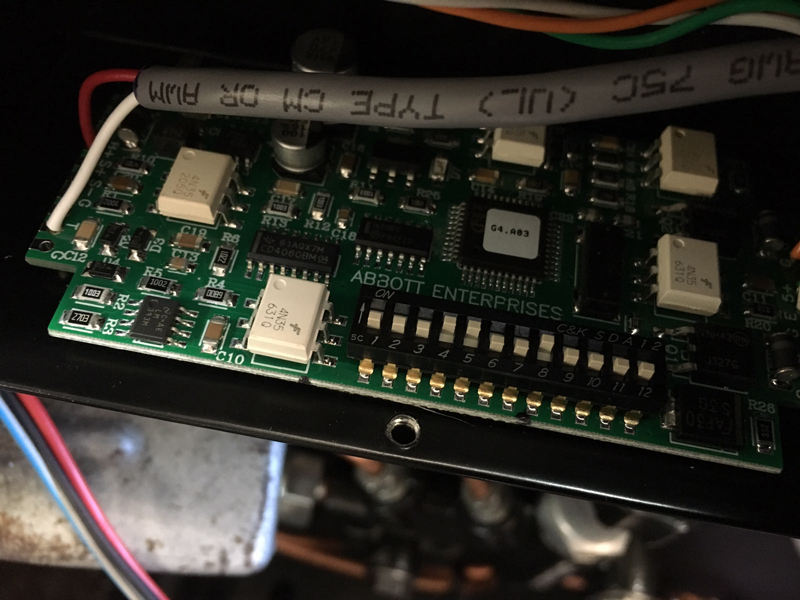
Here you can see in the control box that the wiring goes in from the sensor on the gearbox to the circuit board which feeds the motor that turns the cable coming out of it:
And here are the 12 switches used inside the control box that are used to calibrate the speedo to the vehicle:
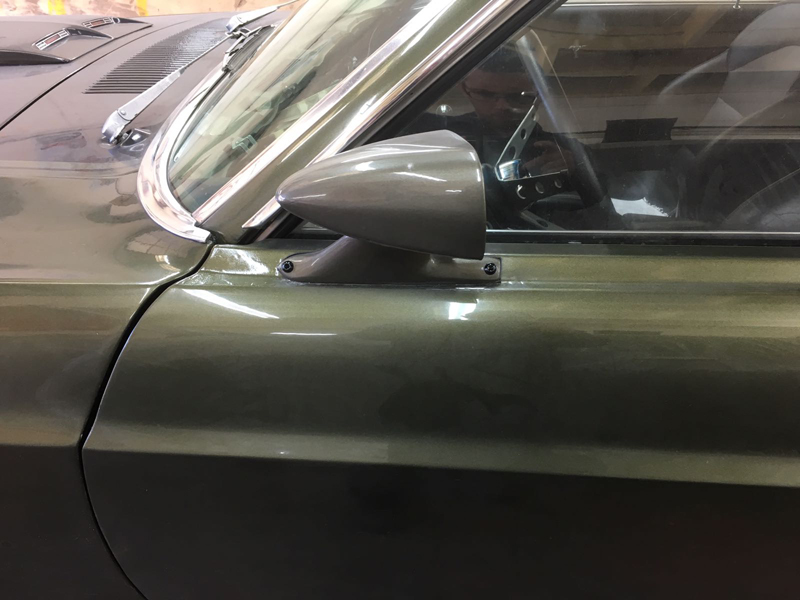
The owner of the car asked us if we could do something with the door mirror mounting bolts as they stood out like a sore thumb:
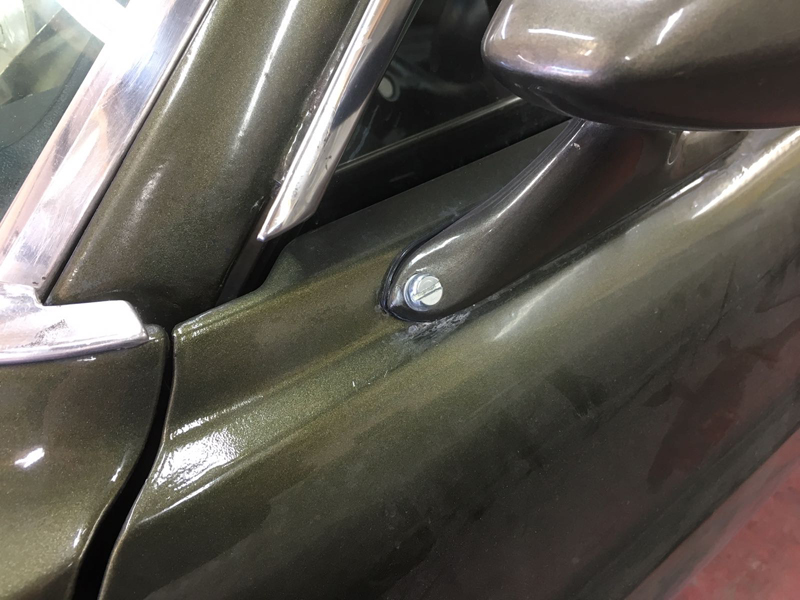
So we sourced some button head stainless bolts that were plaited black:
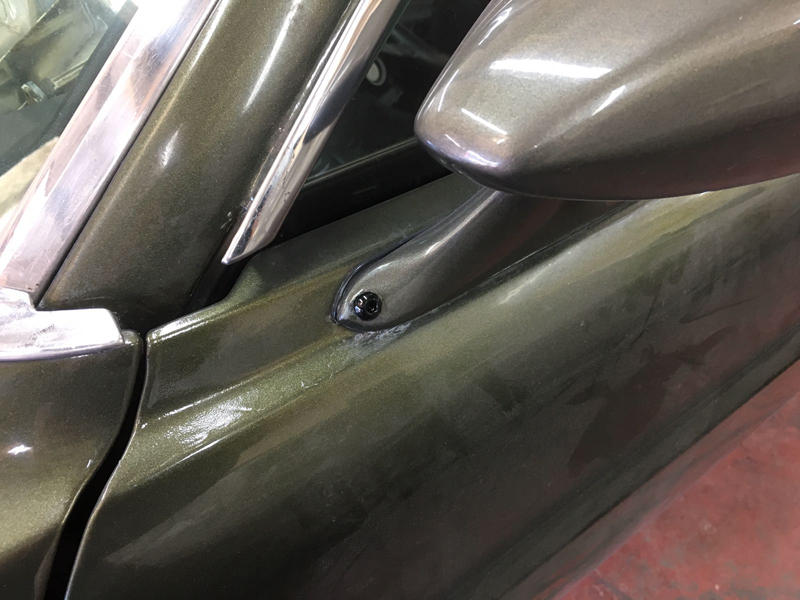
Which don't stand out quite as much:
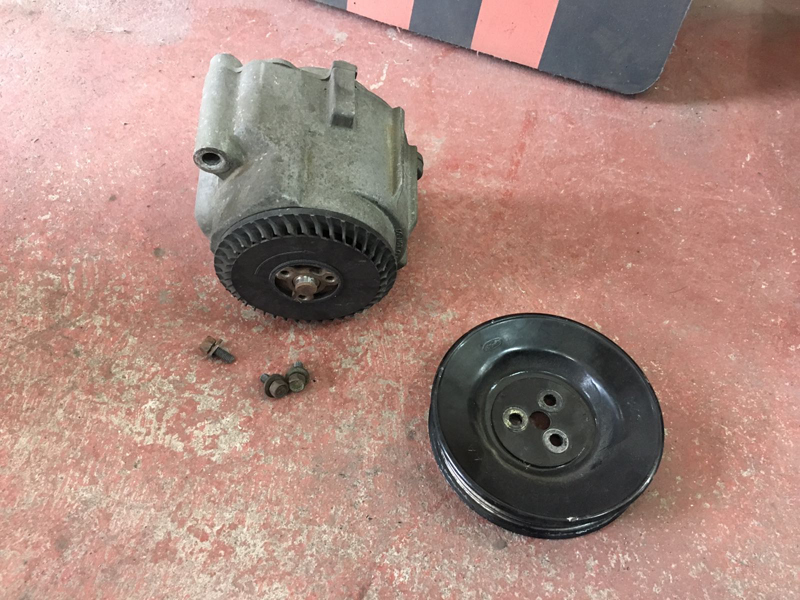
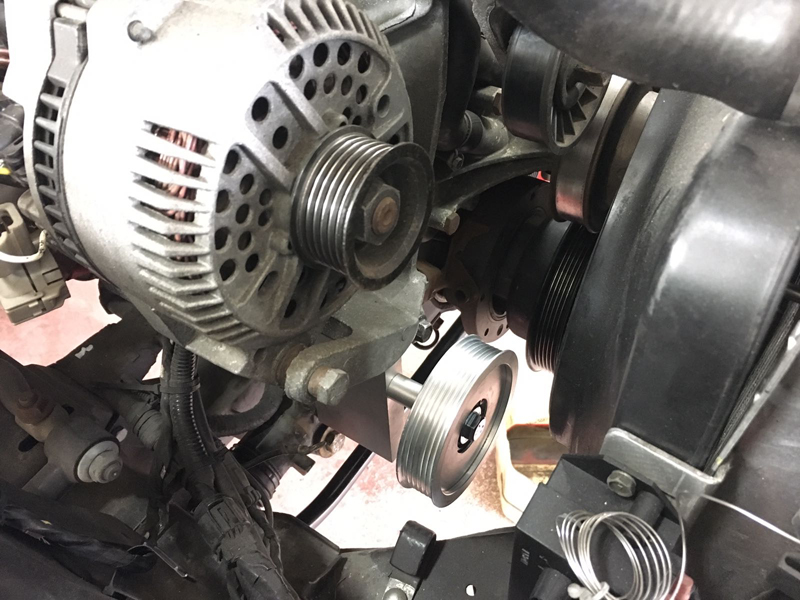
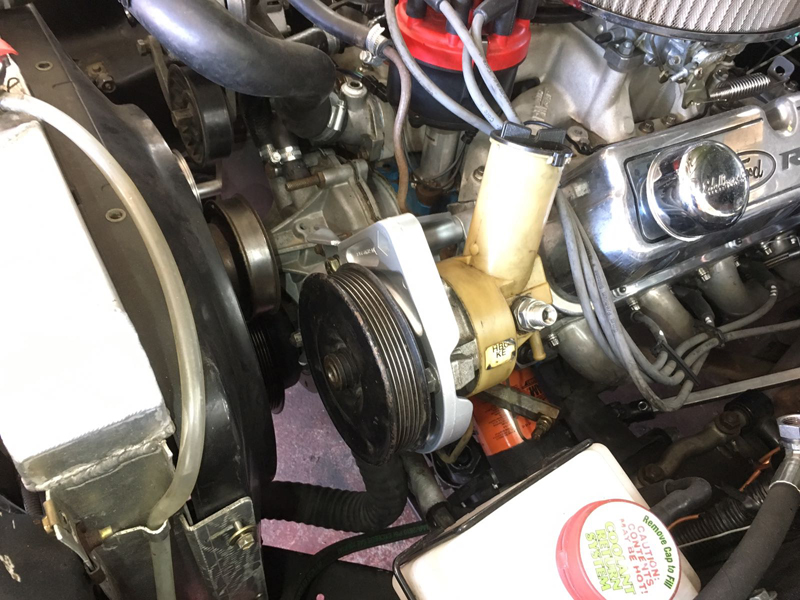
The owner of the car also discussed with us deleting the AC set up which wasn't actually connected up and the SMOG pump set up as its not actually required to be on the car since its a later engine in an early car, this is the SMOG pump set up at the very bottom:
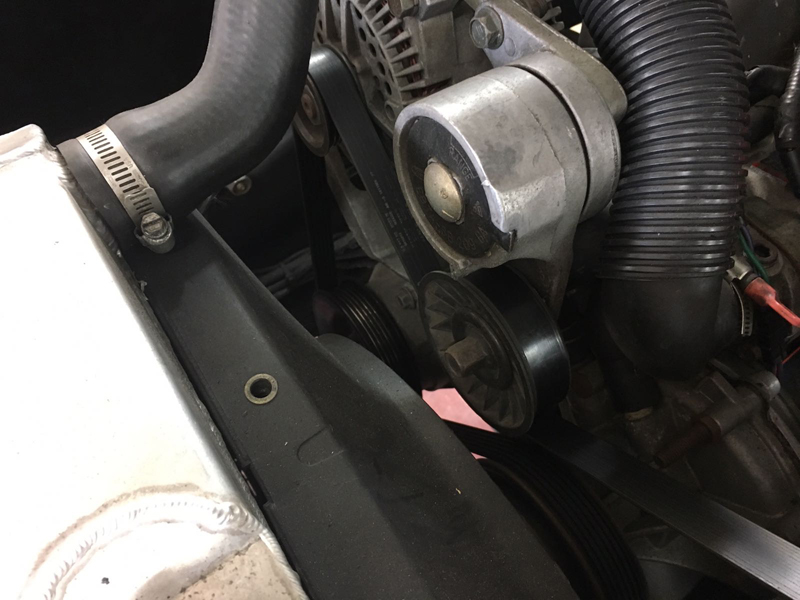
First we removed the SMOG pump:
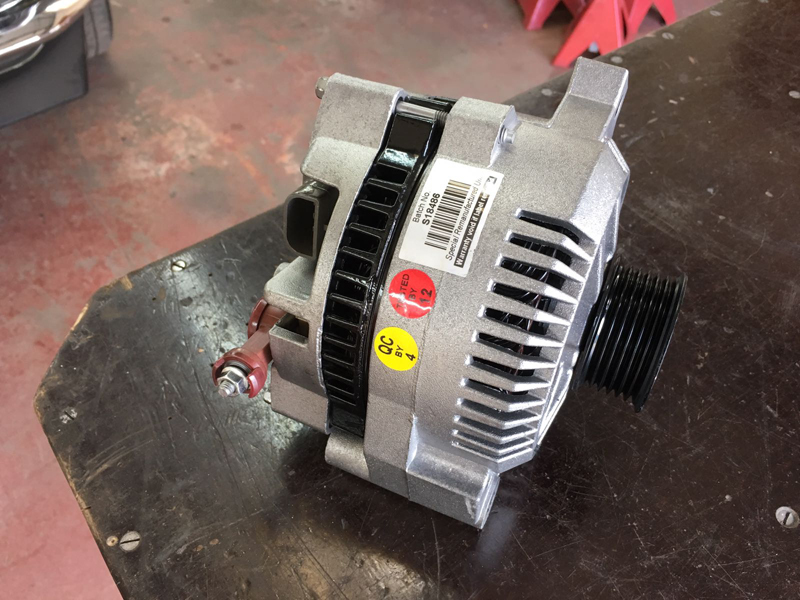
We had to also remove the alternator during this process and noticed with it off that the bearings were very noisy when spinning the pulley:
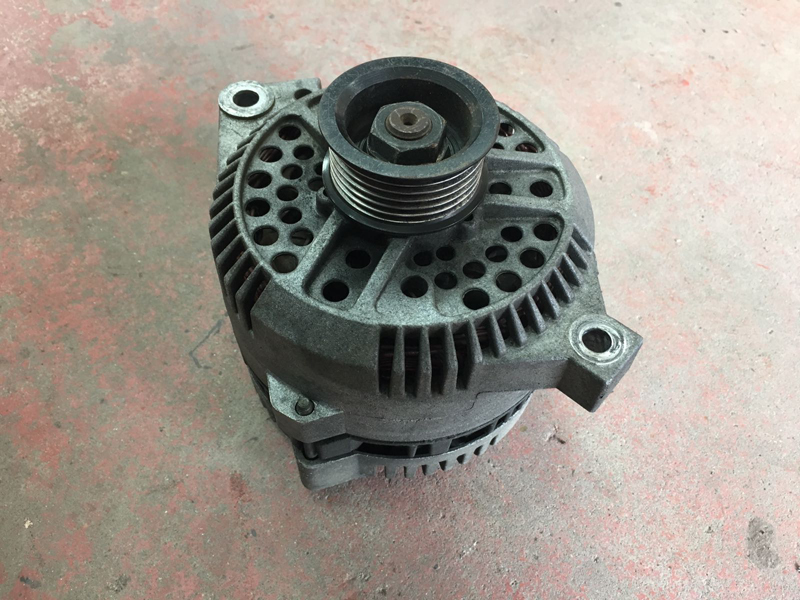
So we sent the alternator away for a rebuild where it was tested and all the worn components were replaced and it was given a fresh coat of paint and a clean up:
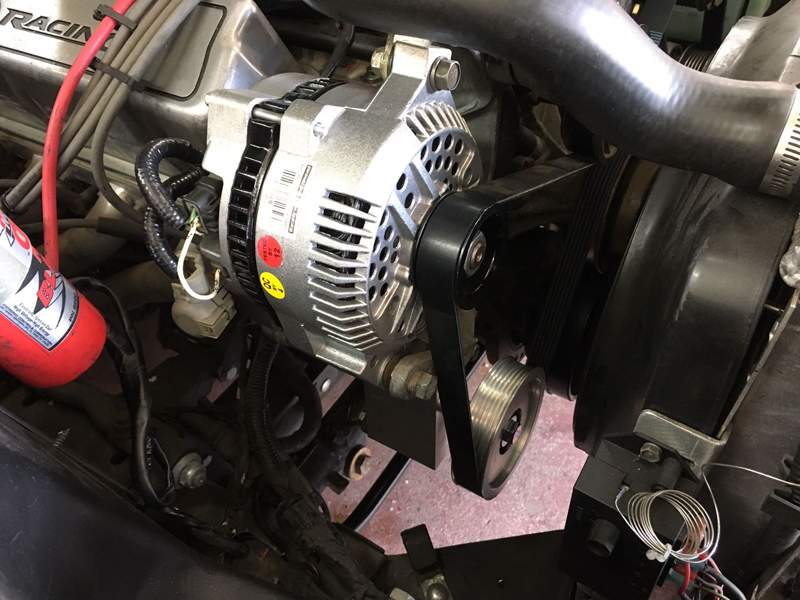
Here is the SMOG pump delete kit, you can't just remove the pump and use a shorter belt as the belt ends up rubbing agains't things that it shouldn't:
We installed the kit:
And then installed a new belt:
And this is the AC side of the engine:
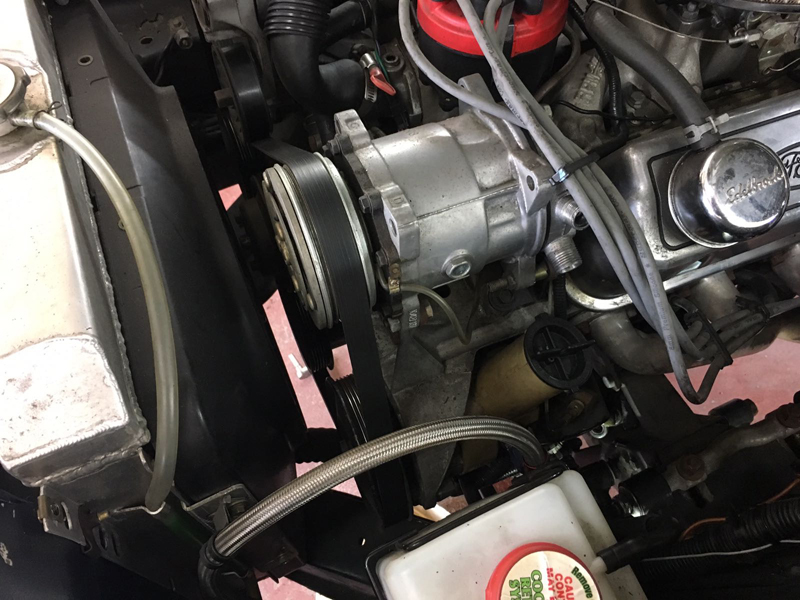
And the AC delete kit:
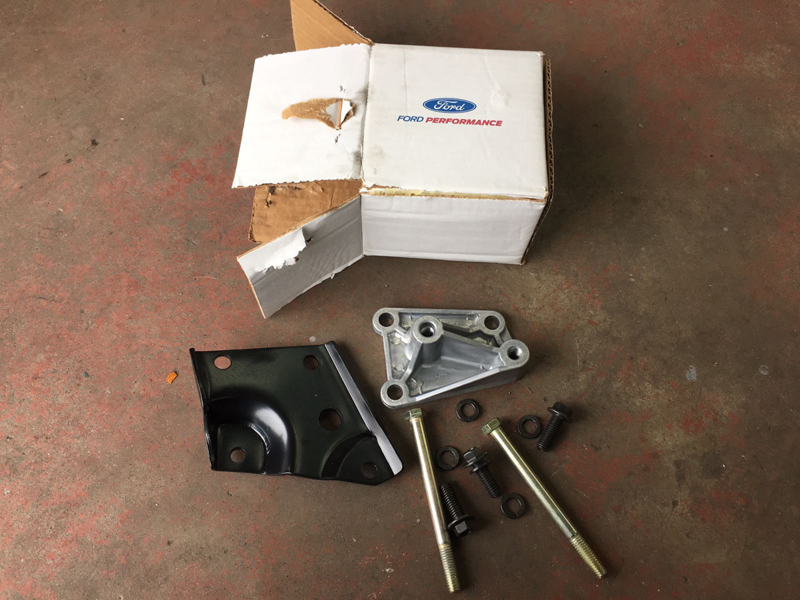
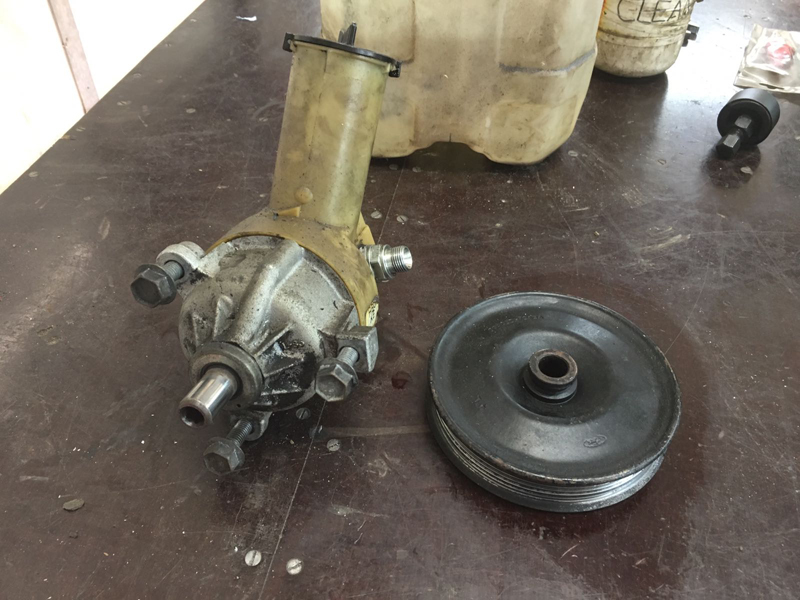
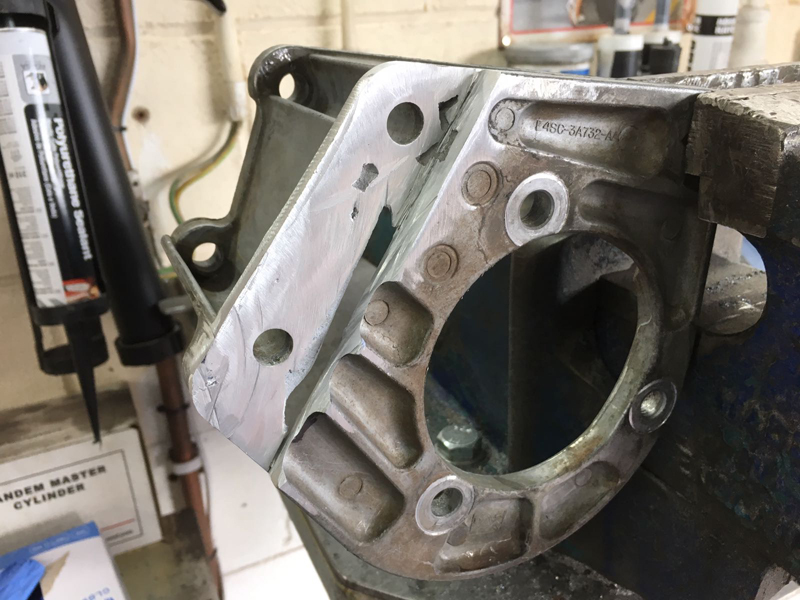
First we removed the AC pump assembly and then the power steering pump. The delete kit raises the power steering pump up higher. We need to replace the aluminium mounting bracket that holds the pump to the engine with a different style one for the kit to work:
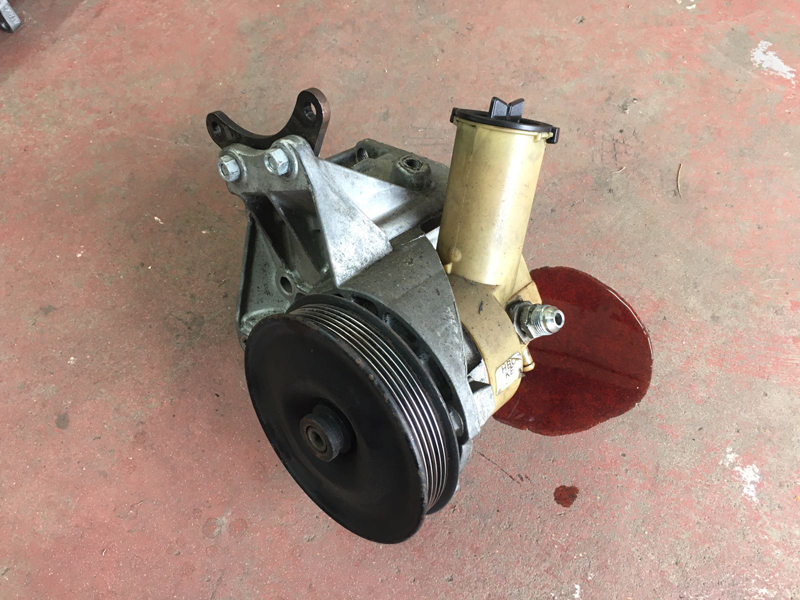
Here is the different mounting bracket that we need to install on the pump before we can install the delete kit:

First we needed to pull the pulley off from the pump using a special puller:
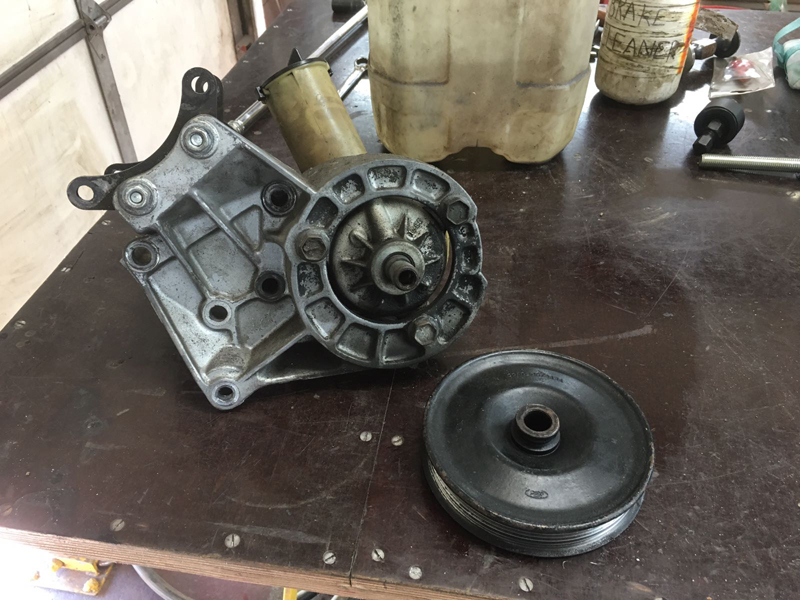
Then we could unbolt the mounting bracket and remove it from the pump:
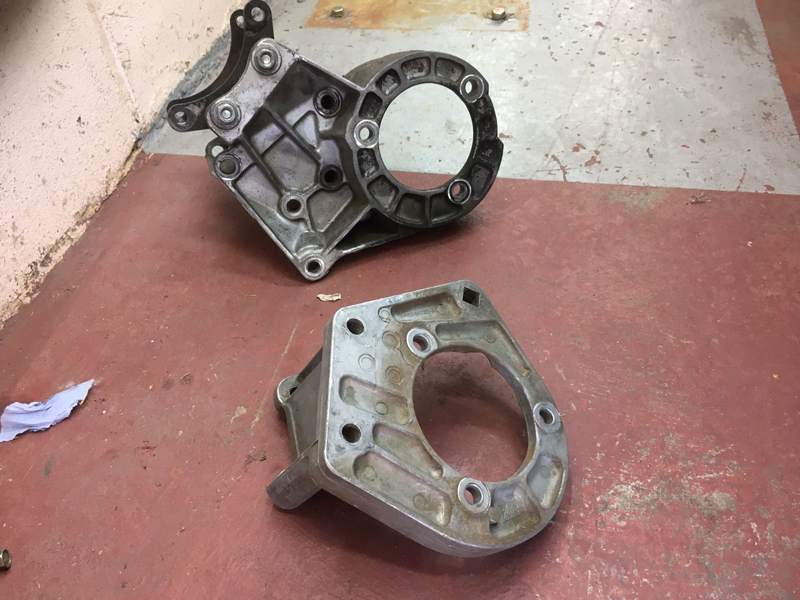
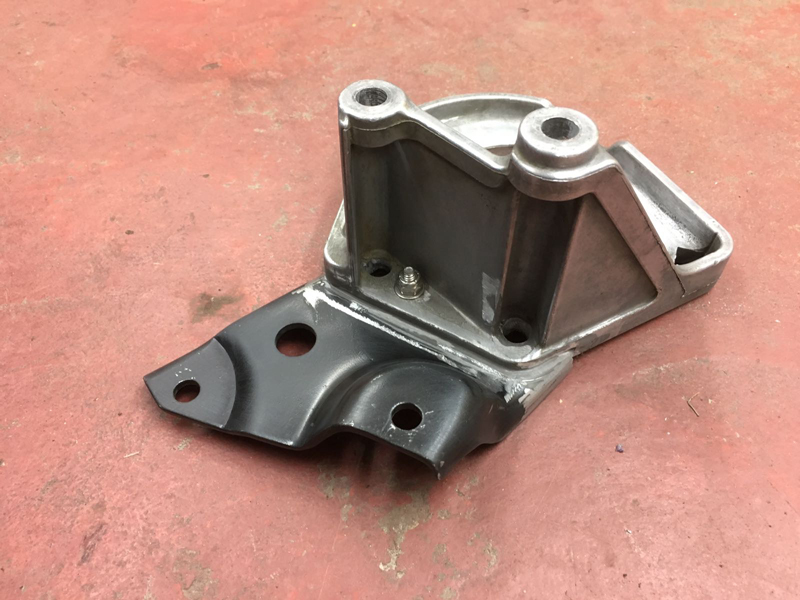
Here you can see the differences between the 2 different mounting bracket styles:
With the new mounting bracket back on the pump and the pulley pressed back on we re-assembled everything and installed the delete kit and ran into a problem. The double studs that act as mounting bolts for the water pump and the power steering pump are not long enough to securly mount the nuts back onto the new pump bracket. Longer mounting studs are not an option as they are a special stud used only for this application:
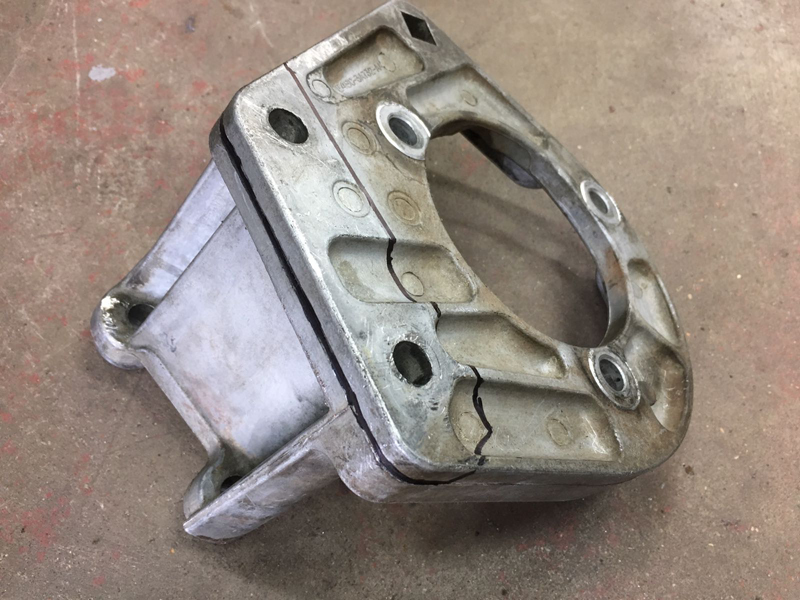
We looked at the diagram for the AC delete kit and noticed the pump mounting bracket they use has a notch in it to allow their delete kit to sit further into the pump bracket. We were un-able to find this style bracket anywere so decided the only option would be to moddify the one that we have:

We removed the bracket again from the pump and marked the area we wanted to remove:
Then carefully cut it away:
We used chemical metal to bond the delete kit back onto the mounting bracket for extra strength since we had to cut metal away from it:
We gave the whole thing a clean up and sanded away any chemical metal from the front that would cause a problem and also give it a smoother look:
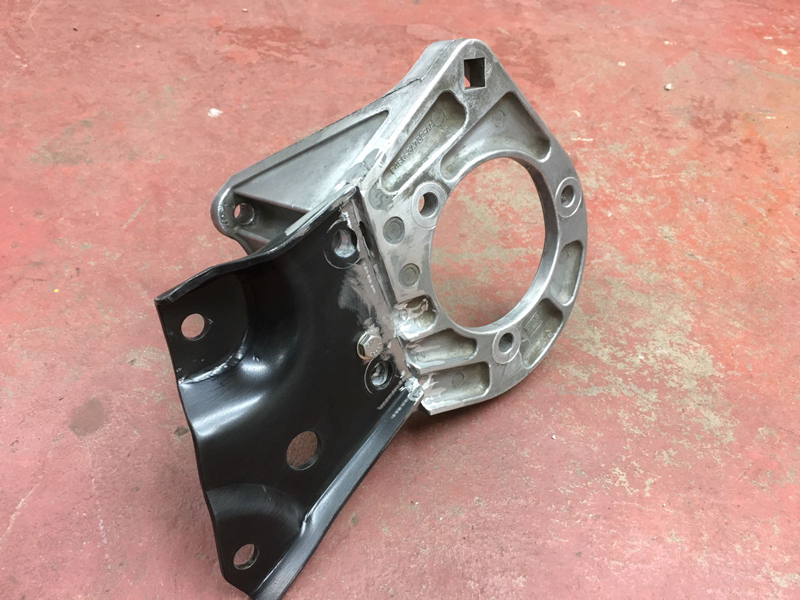
Then gave the whole thing a coat of aluminium coloured paint so that it has a more factory appearance:

The pump now fits on properly and the mounting nuts thread on far enough onto the studs to securely hold the pump in place:
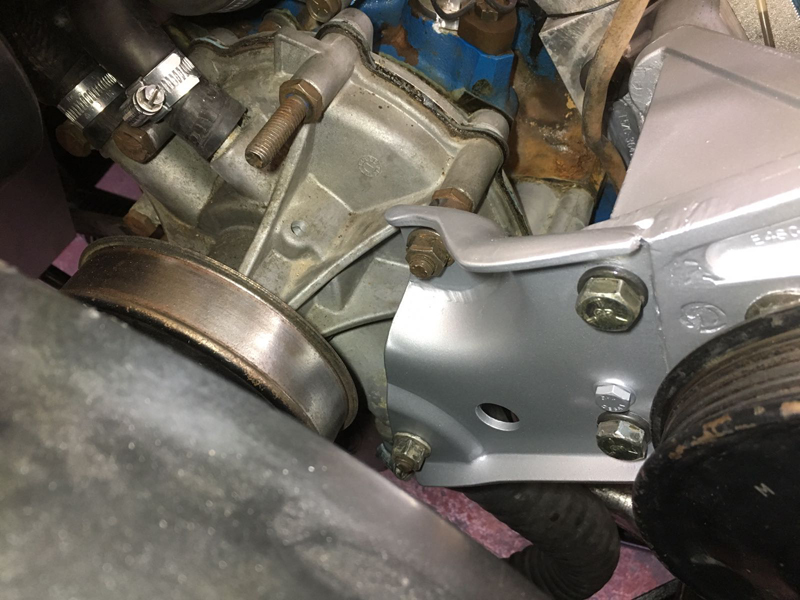
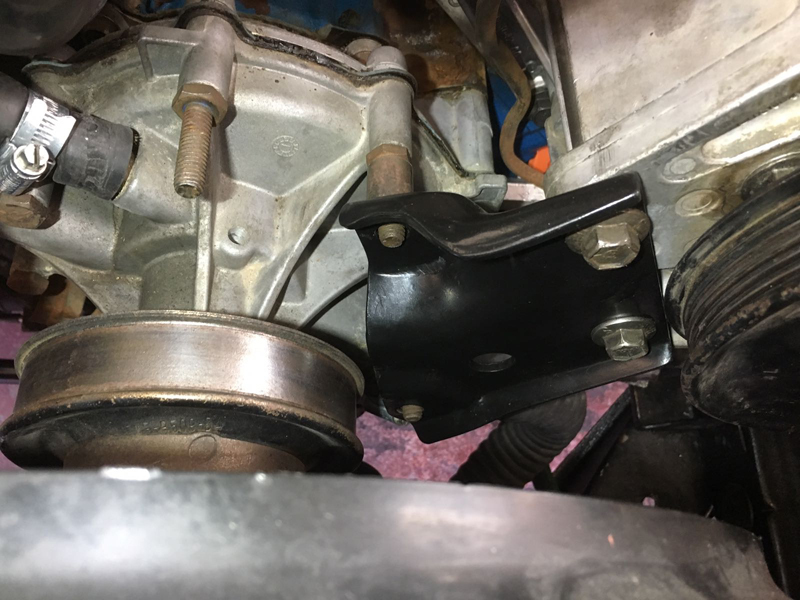
This is the pump mounted in its final place, much higher up and no AC pump. We still need to fit the belt here and connect up the power steering hoses:
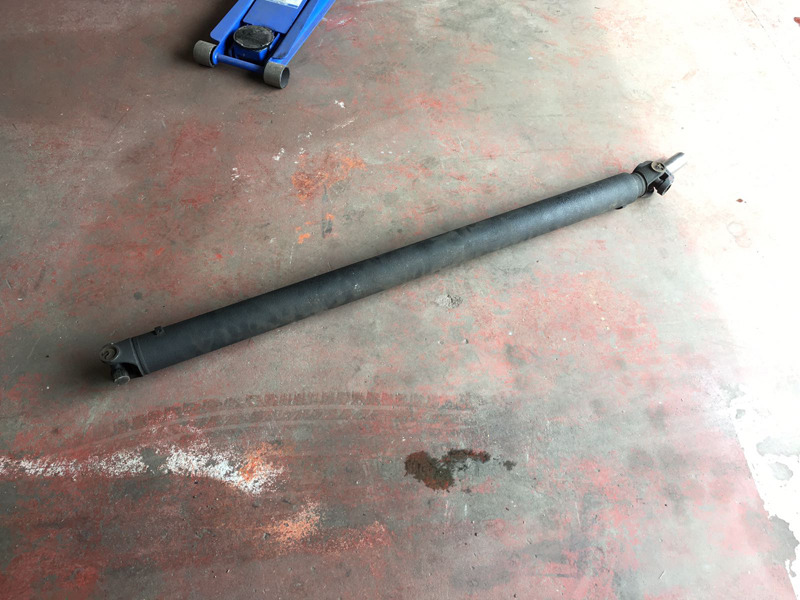
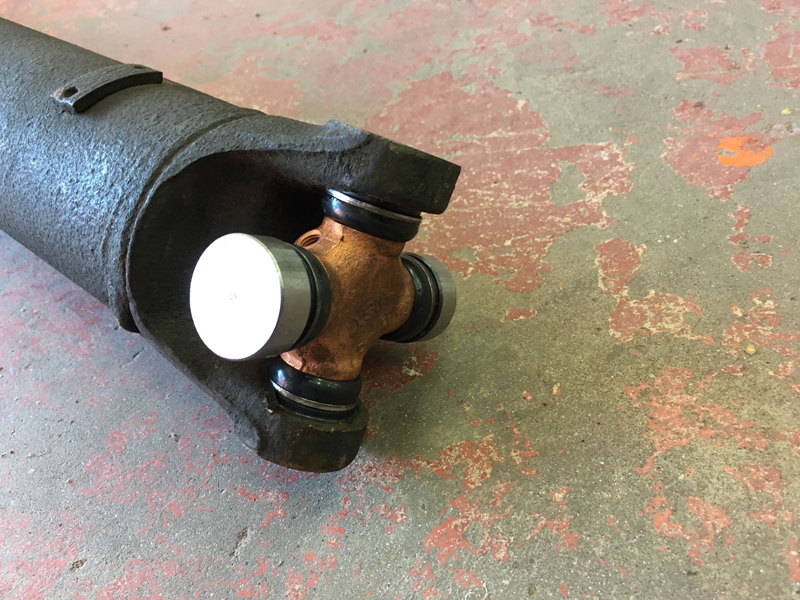
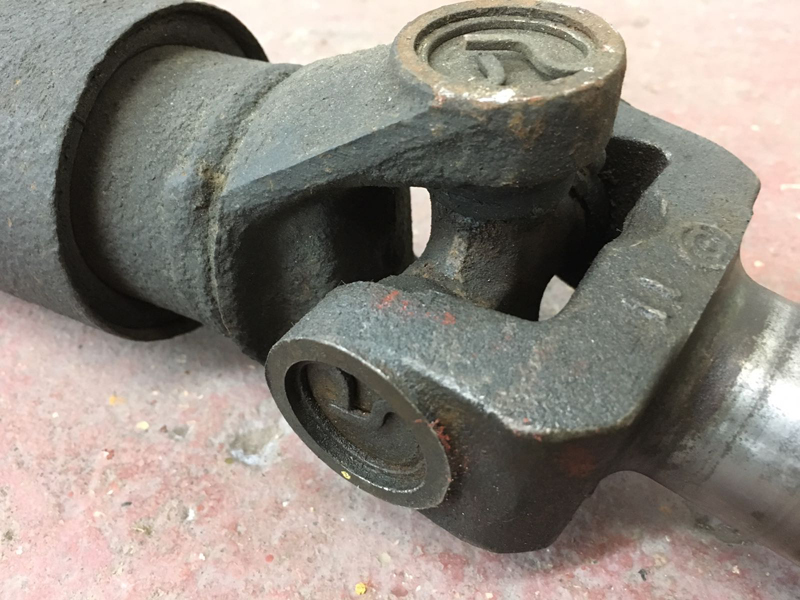
One final job to do before we could road test the car and take it for its MOT was the propshaft UJ's. These had excessive play in them and were causing a terrible vibration throughout the car. First we removed the propshaft:
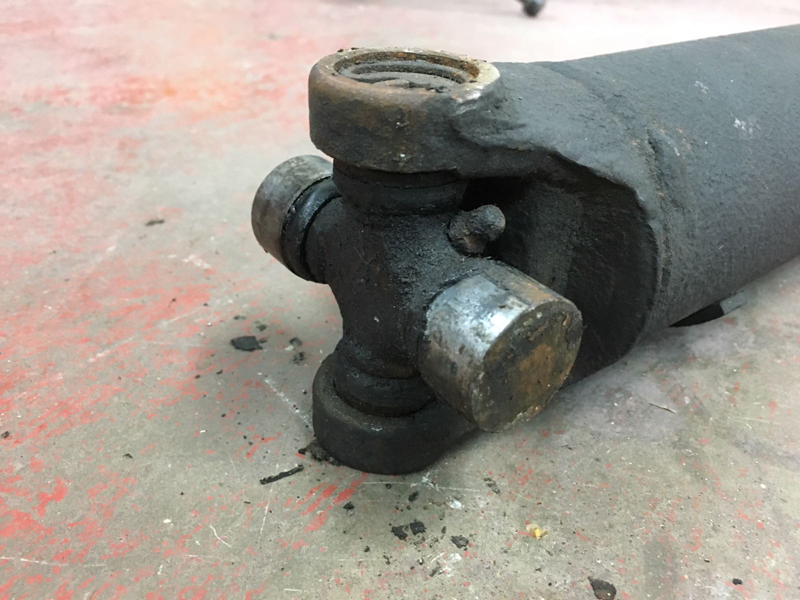
This is the rear UJ, we pressed it out:
Then using new Moog UJ's:
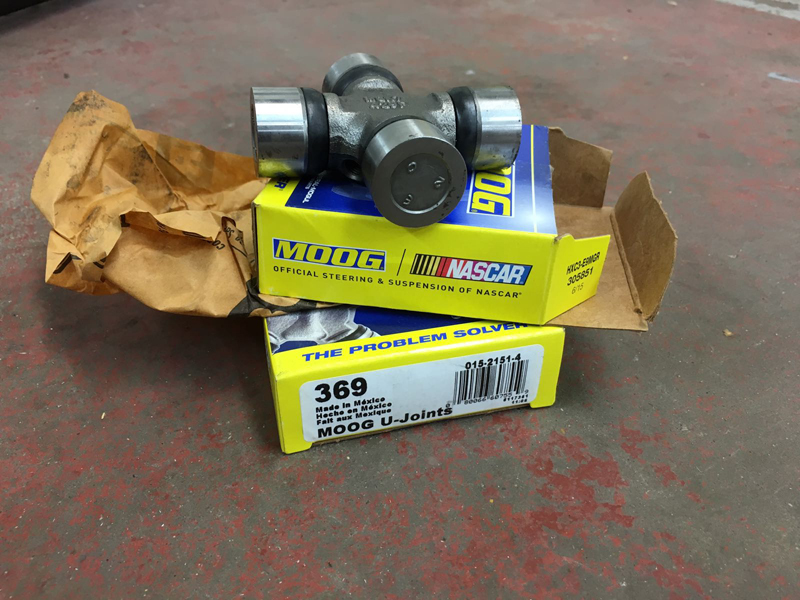
Pressed the new UJ into place:
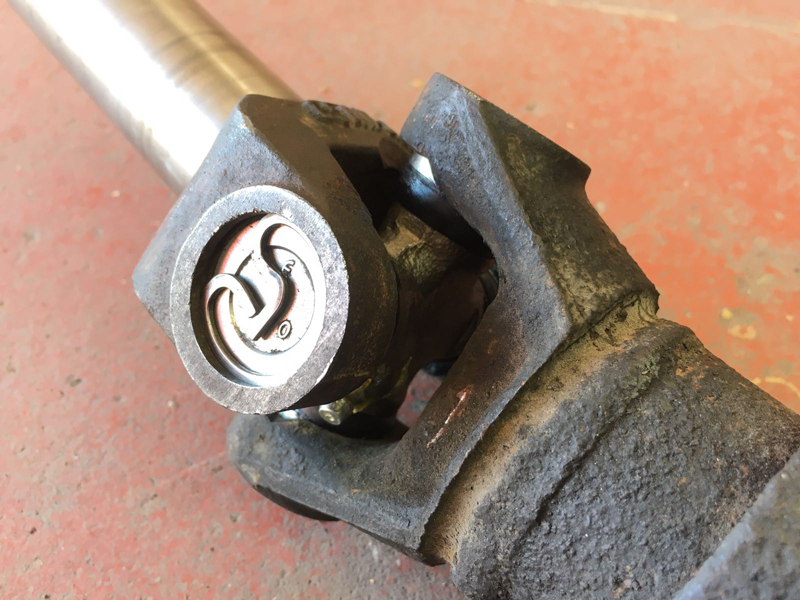
The same went for the front one:
New one installed:
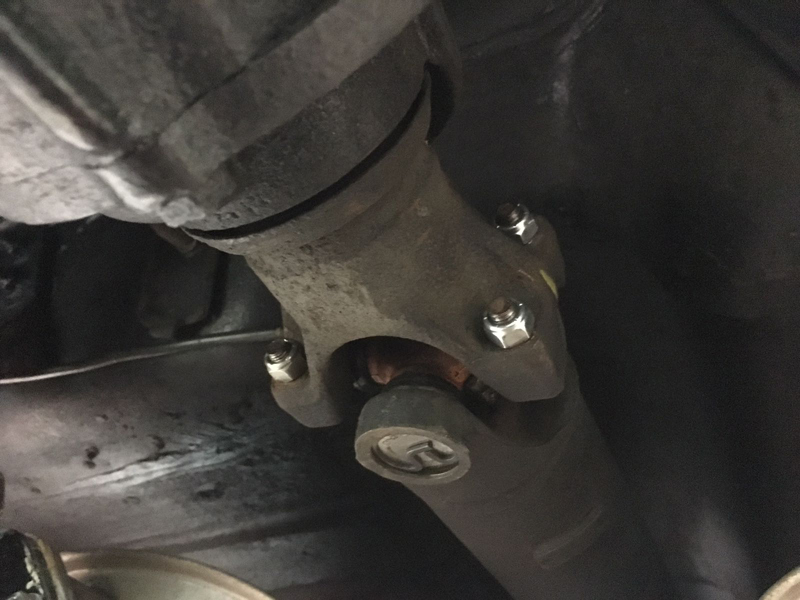
Then re-installed the propshaft back onto the car using new locking nuts as the original nuts were just normal nuts:
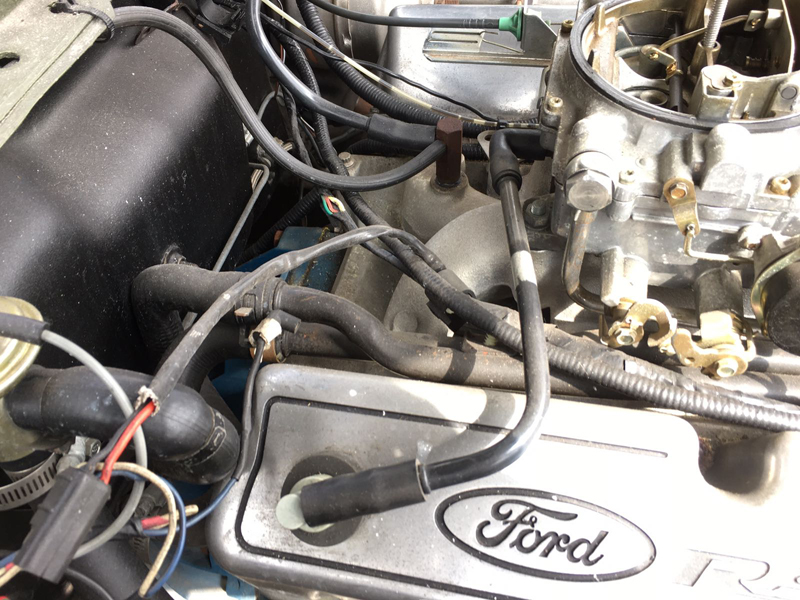
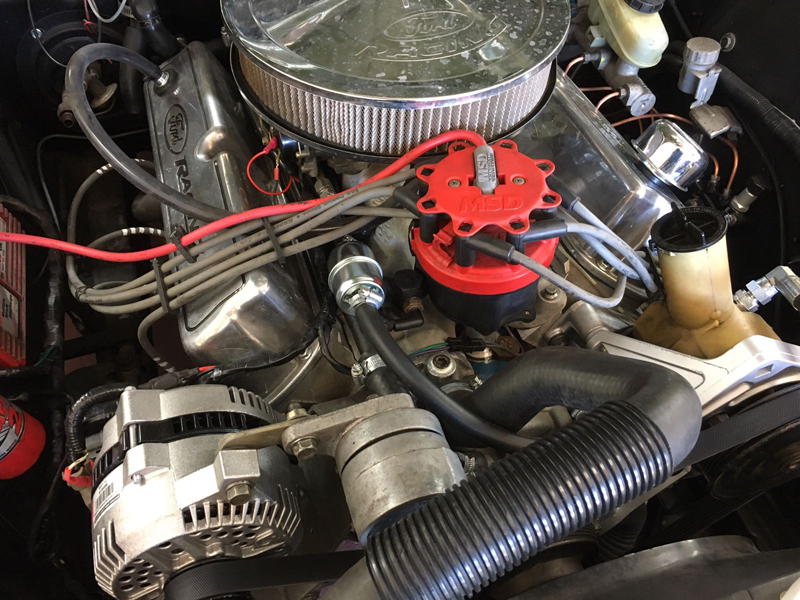
After running the car up to get it ready to take for its MOT, the engine started making a high pitch whistling sound once it had warmed up, so we had to investigate it. After removing the air filter we discovered the breather system was connected up all wrong. Both valve cover breathers were hooked up to the carburetor base, where as only 1 should be and the other should just vent into the atmosphere. This is the passenger side, as you can see the hose is also kinked, this should be hooked up to the front of the carb:
And this is the driver's side, this should just be a different style oil cap that vents to atmosphere. Currently the engine is trying to suck itself inside out by being connected this way:
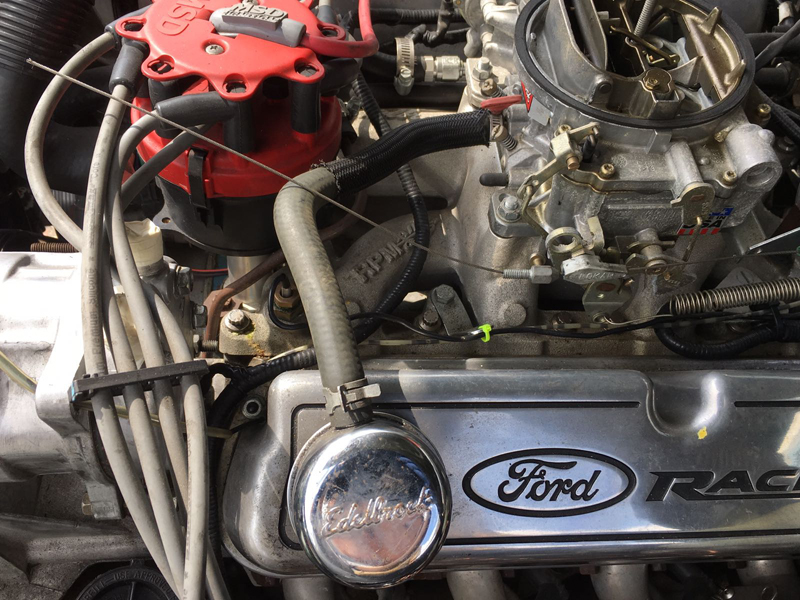
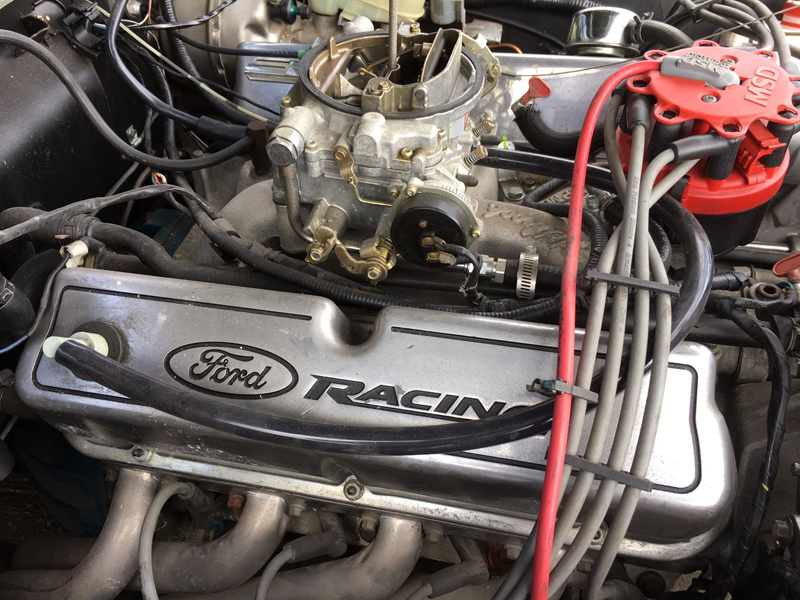
We re-routed the passenger side onto the front of the carburettor and blanked off the rear port:
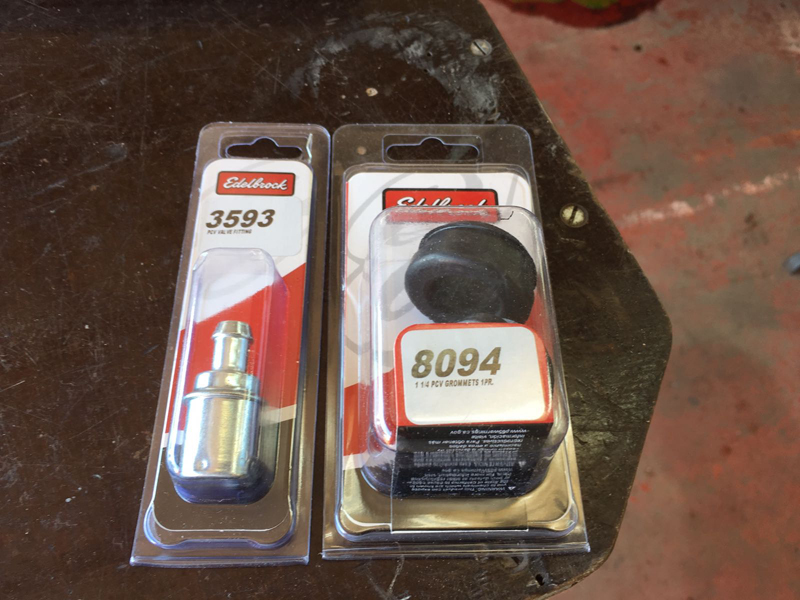
We also checked the operation of the PCV valve in the valve cover, the valve is a one way valve and should let the carburetor suck the fumes from the engine back into the intake manifold to re-burn them, this valve was worn and letting air through either way:
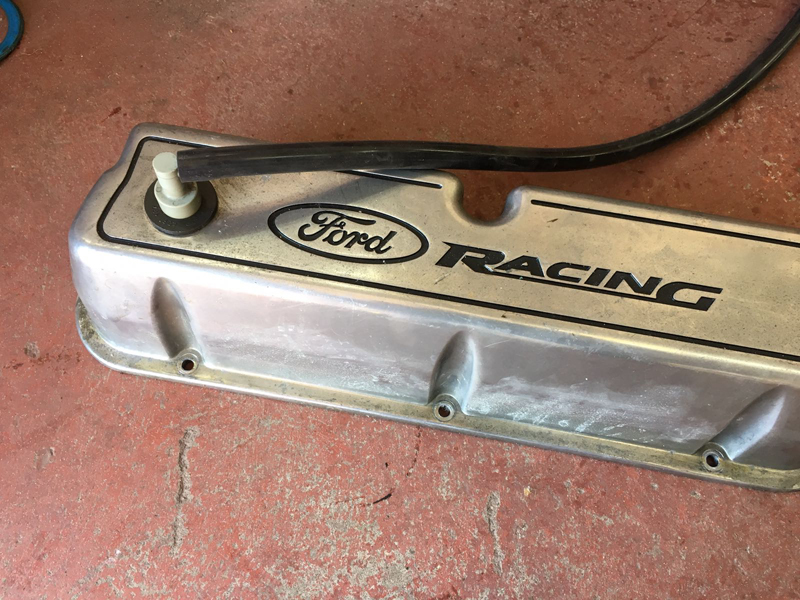
So we supplied a new PCV valve and grommet:
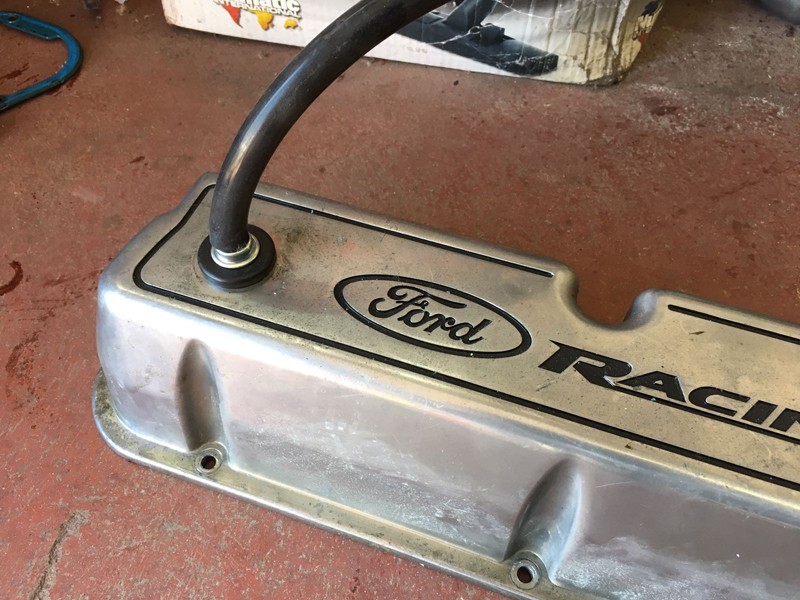
Then installed it in the valve cover:
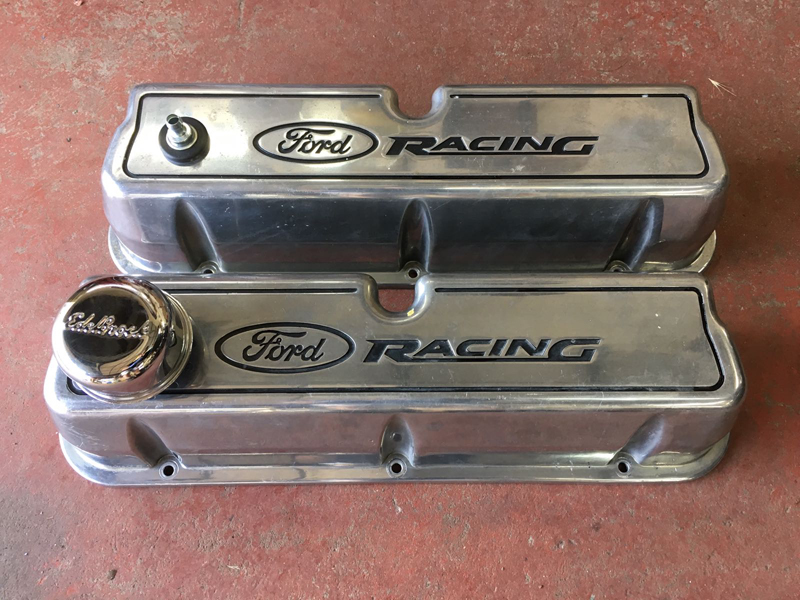
Then we replaced the breather cap in the driver's side valve cover for the open to atmosphere style one:
Now the car was running correct it was time to take it for its MOT test, which is passed:
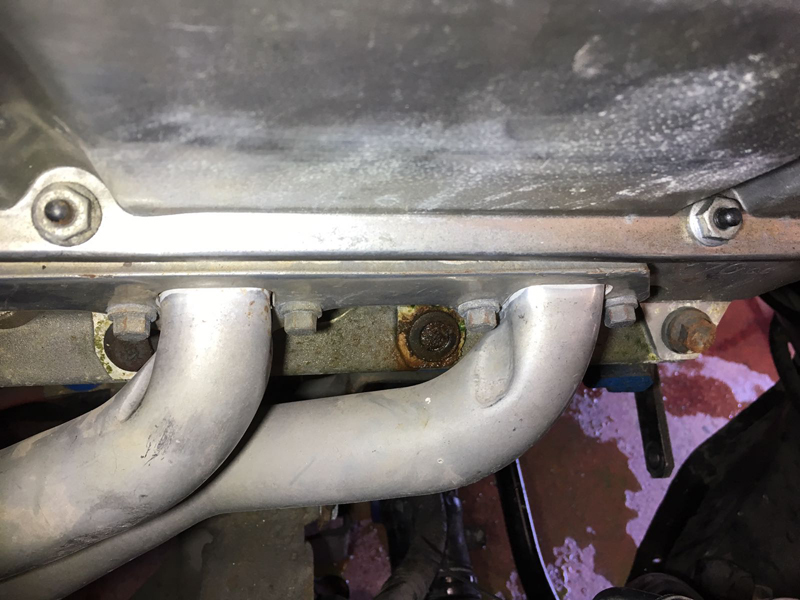
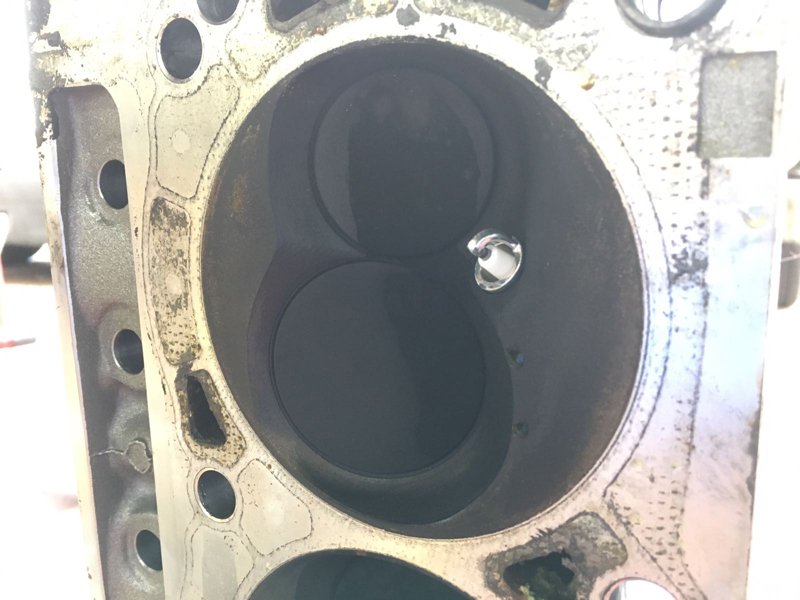
While the car was at the MOT station we noticed a water leak from the engine:

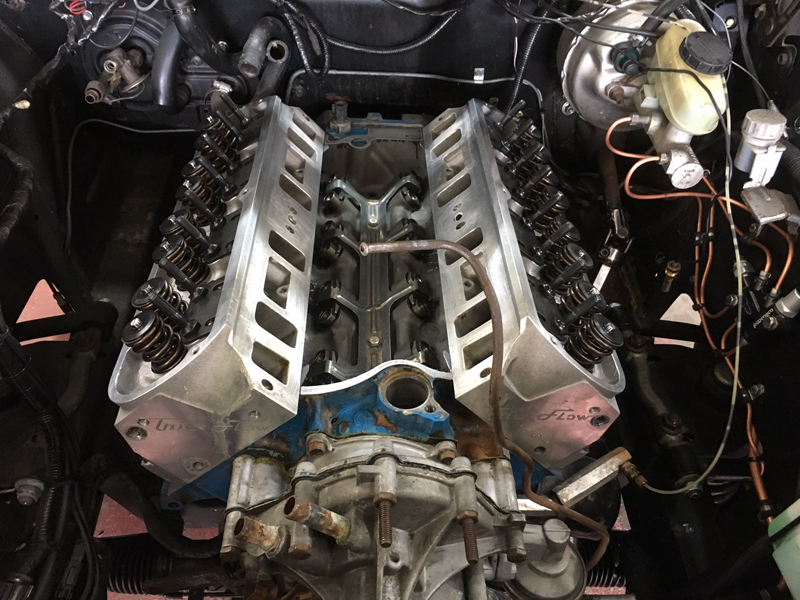
After investigating, we found that leak was being caused by a broken cylinder head bolt:
We had no choice but to remove the cylinder head so that we could access the broken bolt, but even if we could have removed the bolt with the head on, the gasket would still need replacing as water has been leaking past it for such a long time there would be damage to the gasket:
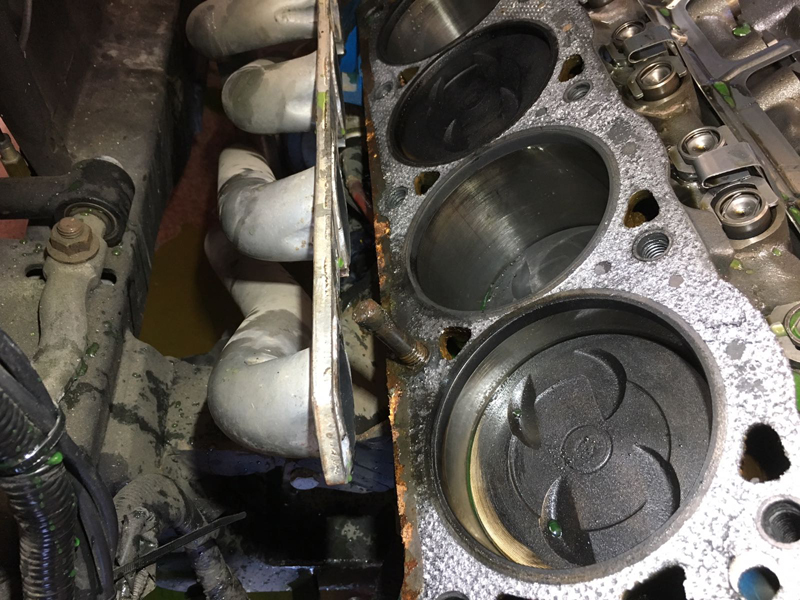
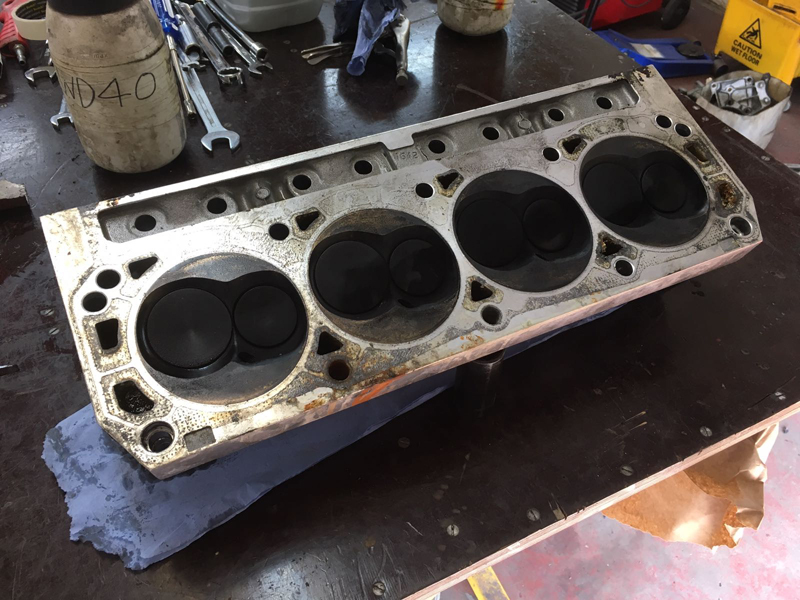
With the head out the way we were able to extract the broken bolt:
Its common practice on a V configuration engine to replace both head gaskets at the same time, even if the opposite bank doesn't have any issues:
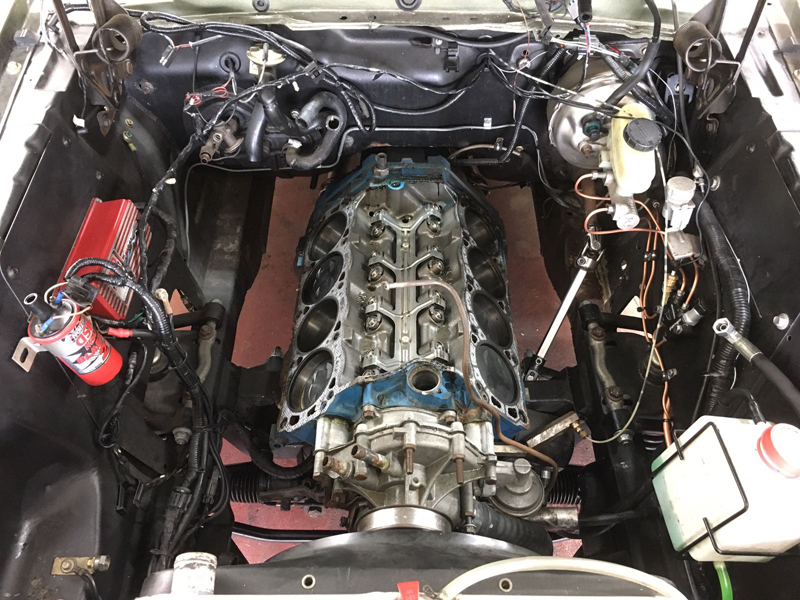
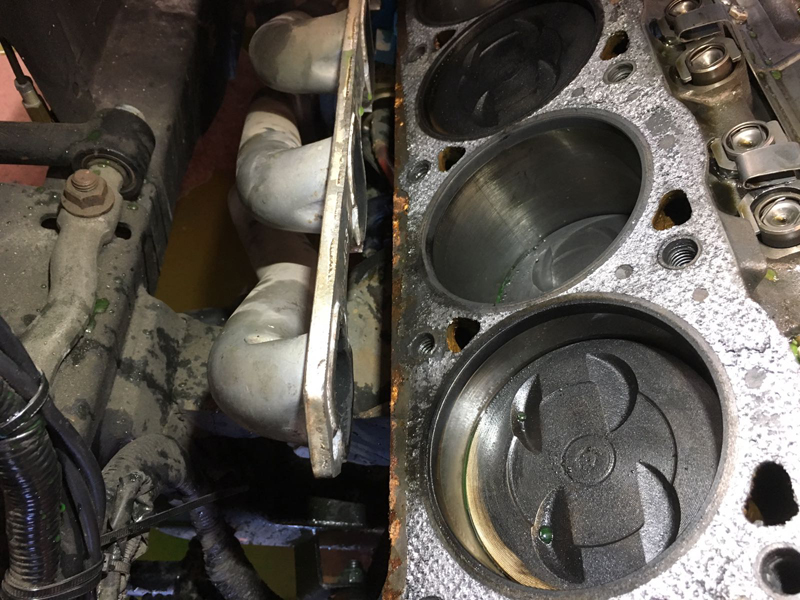
With both heads off and the broken bolt removed next we had to get all the gasket faces cleaned up as the old gaskets leave behind a mess:
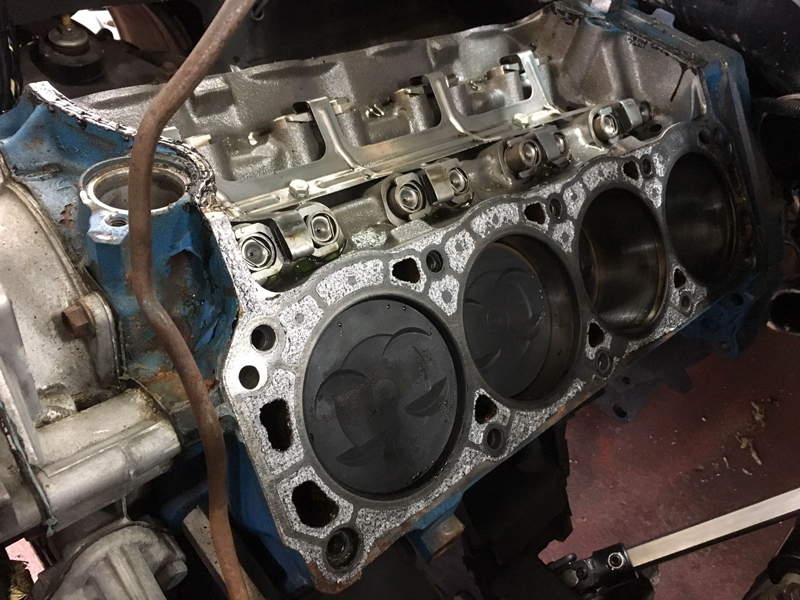
After some clean up the block was ready for re-assembly:
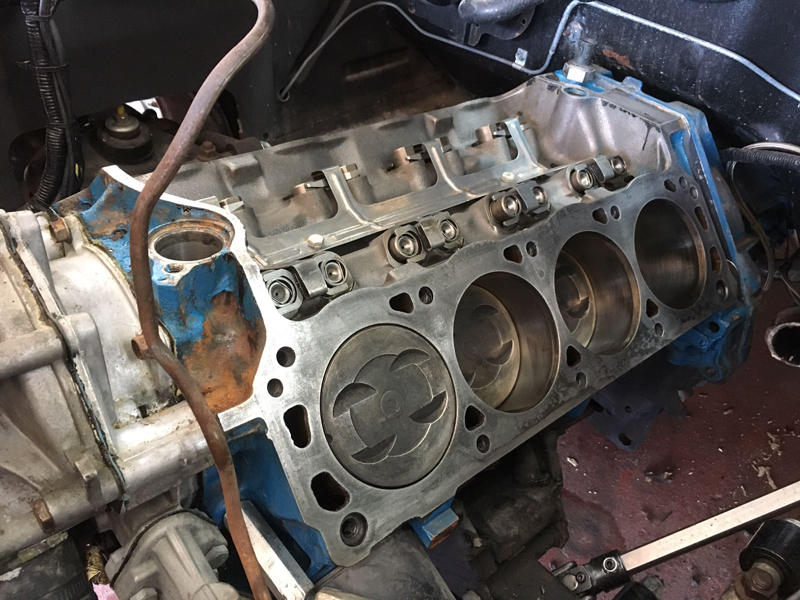
When cleaning up the cylinder heads we noticed another problem, the engine had the wrong spark plugs in it, the tip of the plug wasn't even protruding into the combustion chamber:
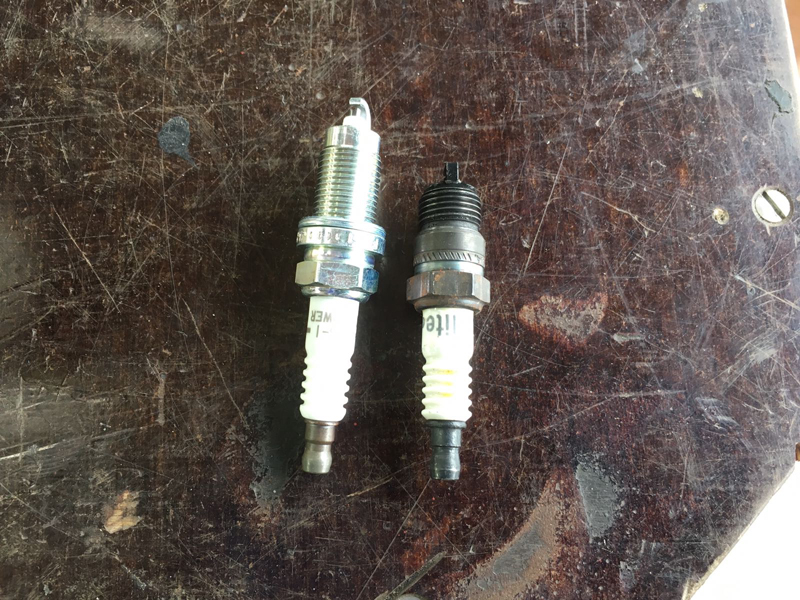
Whilst looking at the technical data specs for the cylinder heads we found the correct part number of the spark plugs that should be used with the heads, the original plug is on the right and the new one on the left, notice the difference in length in the plugs aswell as the fact the original plug uses a taperd seat, where as the correct plug uses a sealing washer:
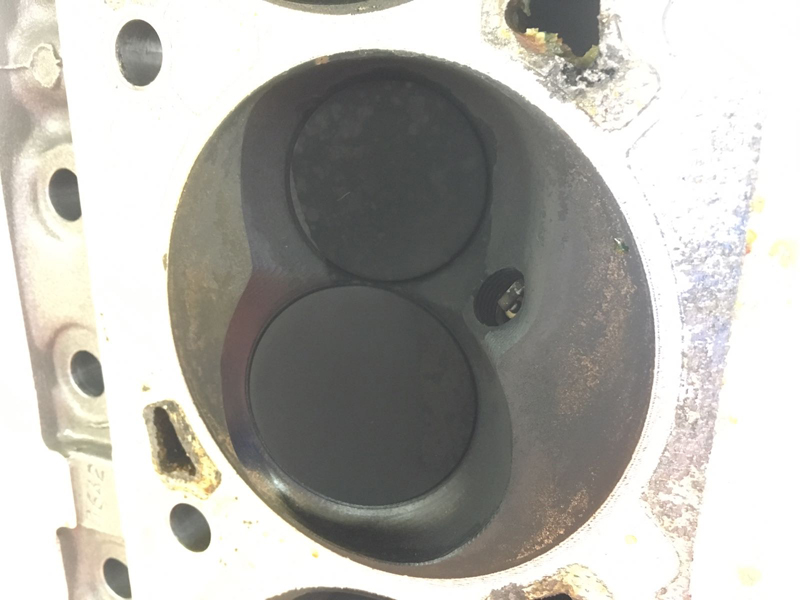
With the correct plug installed in the head you can see how much the tip of the plug is meant to protrude into the combustion chamber:
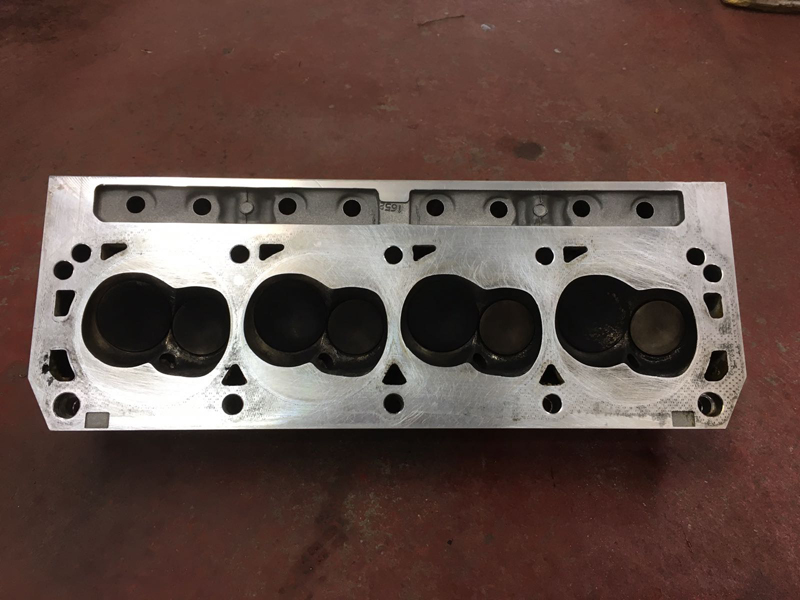
Next we had to clean the old gasket material of the gasket faces on the heads:
The gasket faces must be spotless so that the new gaskets seal correctly:
With the heads cleaned up, we put the new gaskets on the block:
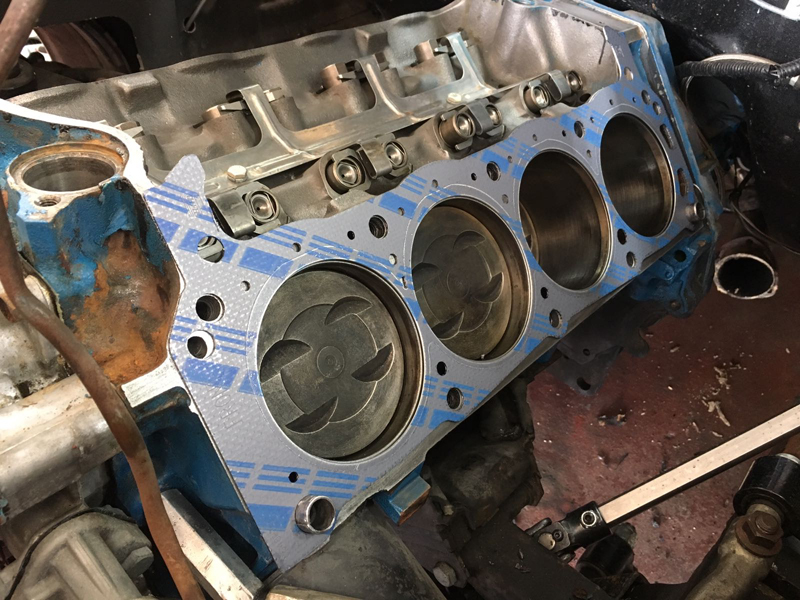
Then bolted the heads back on:
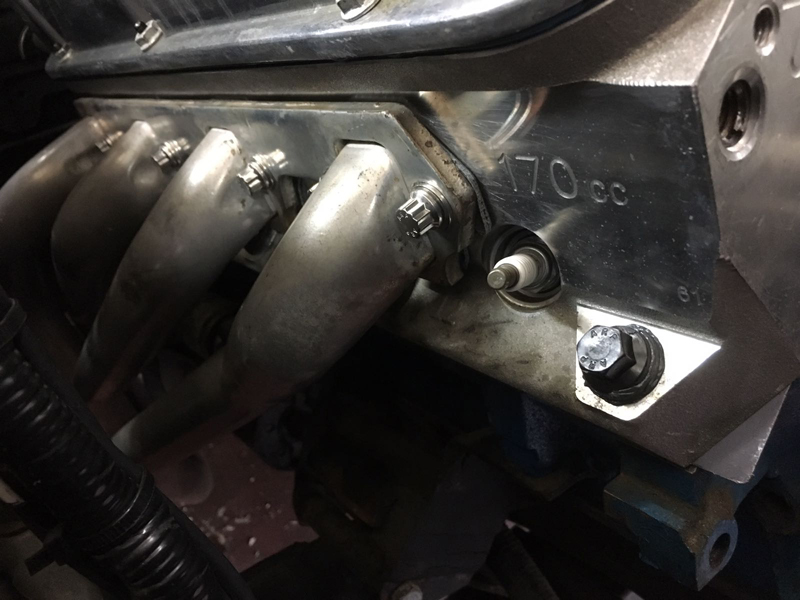
We used ARP head bolts to ensure proper tightening of the bolts and wouldn't have to worry about bolts snapping. We also replaced the exhaust manifold bolts with ARP bolts too as when pulling the engine apart we noticed the bolts that were holding the manifolds on were wrong:
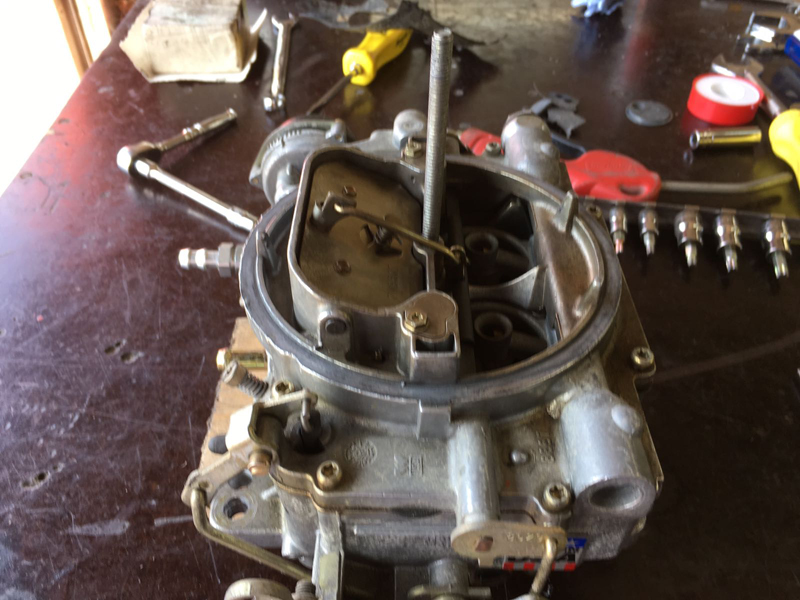
Another problem that needed addressing was the electric choke on the carburetor, someone had worked on the mechanism before and assembled it wrong, jamming the choke open making the car hard to start:
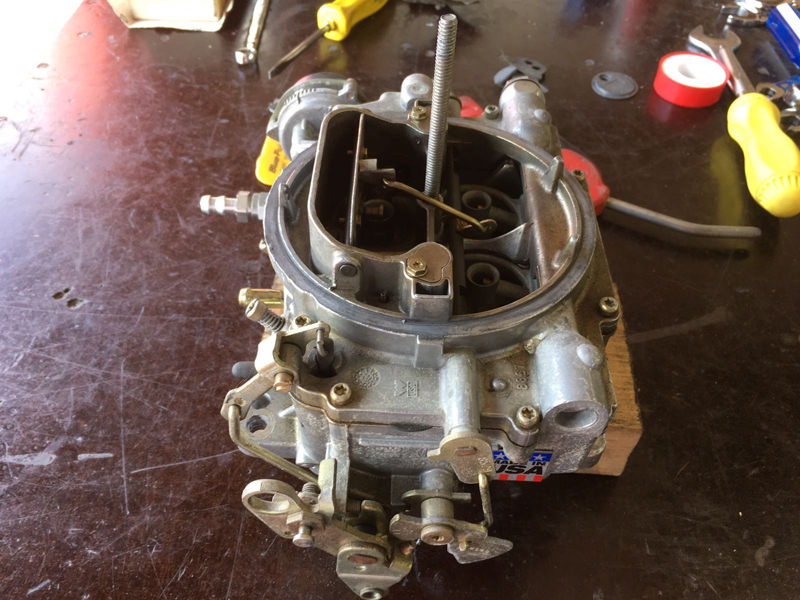
We stripped the mechanism back down and re-assembled it the correct was so that the choke can close:
Another problem was that the fuel line hose to the carburetor was not rated for being used as fuel hose, also there was no fuel filter in the system:
So we replaced the fuel hose and added a filter into the system:
And with that, the engine was all back together with all the problems fixed:
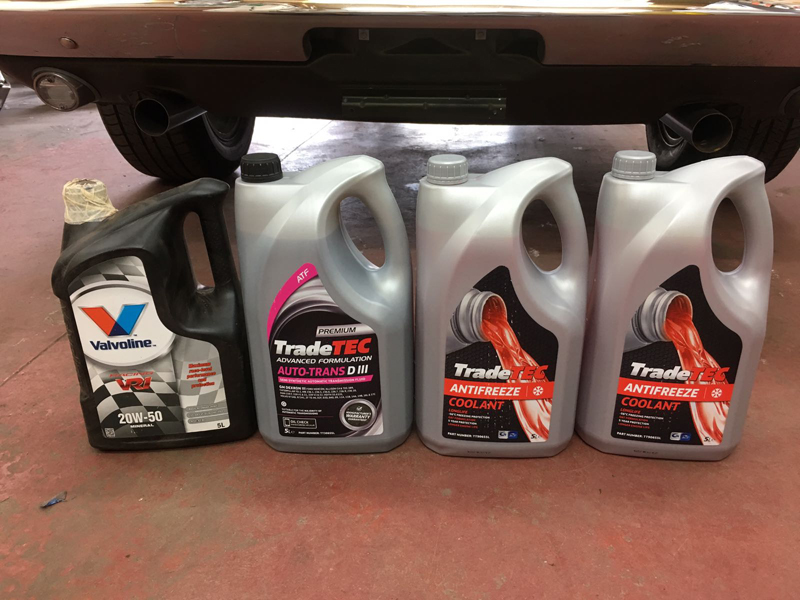
Next we added fresh fluids into the car:
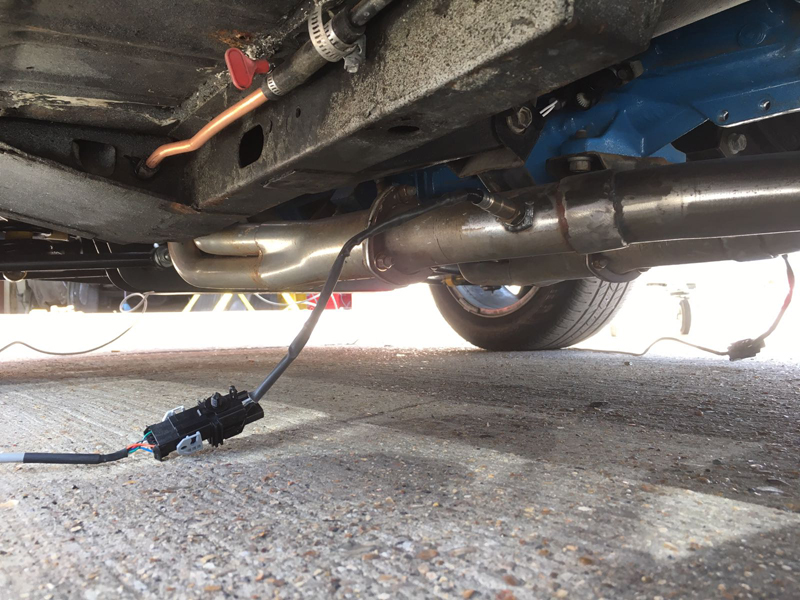
The hooked up our testing equipment into the exhaust of the car so that we can set the fuel mixture properly and monitor it:
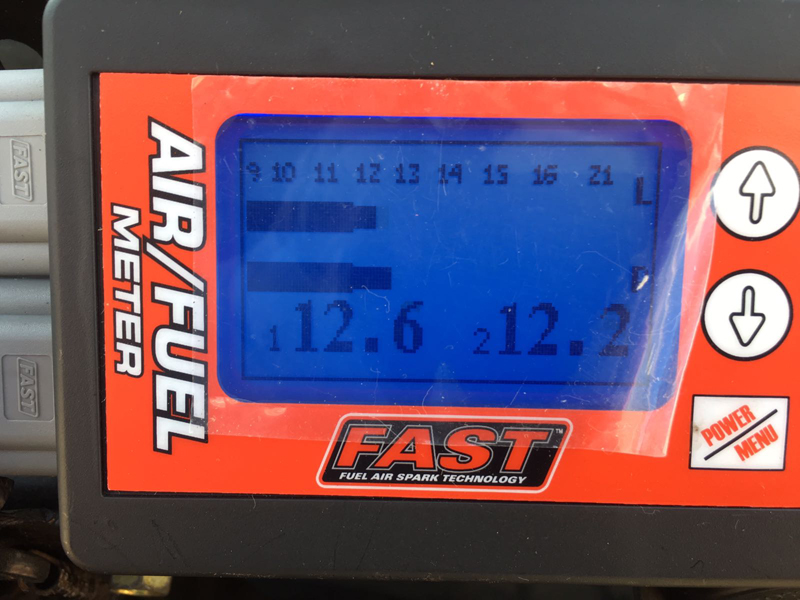
This is the tester we use for checking the fuel mixture, this is what we had to start with, it wasn't far off but a little rich:
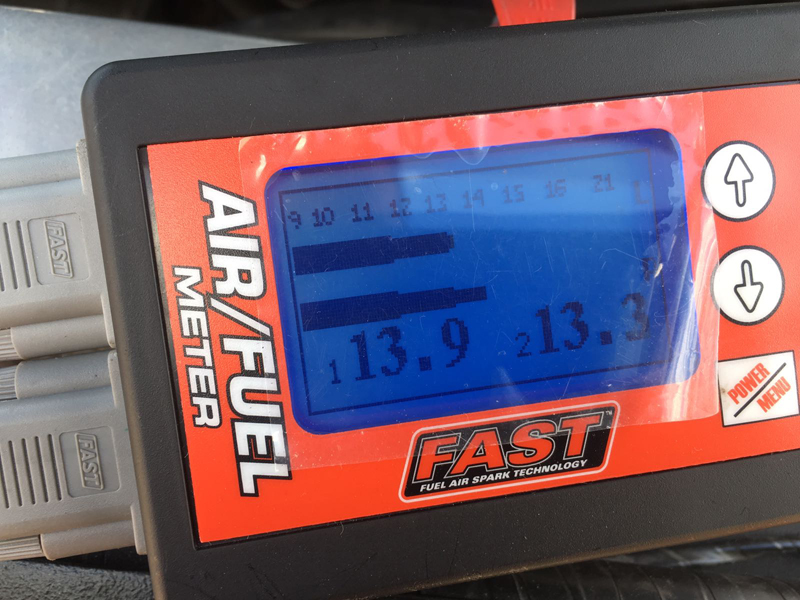
So we made some adjustments to lean it out a little, this made the engine idle smoother and will run more economicly:
After getting the MOT done we applied for the log book for the car before starting work on the engine, whilst carrying out the engine work the log book arrived and we got the number plates for the car, with the car all now road legal and the work completed we road tested the vehicle and washed it ready to give the car back the customer:
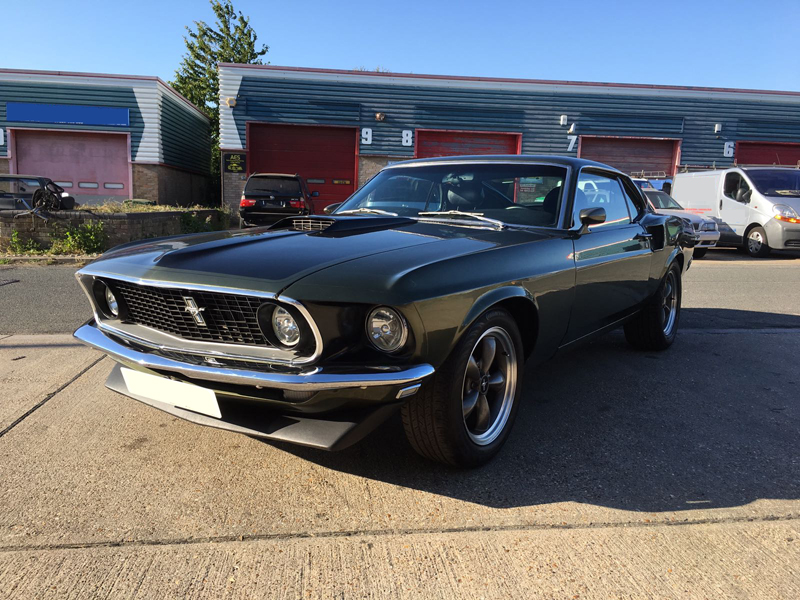
The customer was very happy with the car and we were happy that another classic was saved and back on the road: